Hinkley Lighting 55300BZ Manual


Læs gratis den danske manual til Hinkley Lighting 55300BZ (2 sider) i kategorien Lys. Denne vejledning er vurderet som hjælpsom af 3 personer og har en gennemsnitlig bedømmelse på 4.1 stjerner ud af 2 anmeldelser. Har du et spørgsmål om Hinkley Lighting 55300BZ, eller vil du spørge andre brugere om produktet?

Side 1/2
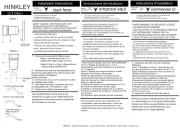
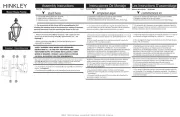
Installation Instruction
start here
Item No:
55300
SAVE TH E INSTRUC OES TI
Note: This Luminaire is designed for use
with 120V. Please consult local code for
wiring regulations
empezar aquí
Número
:
commencer ici
Número del
artículo:
del
actculo:
55300
HH
II
NN
KK
LL
EE
YY
HINKLEY 33000 Pin Oak Parkway, Avon Lake, OH 44012 800.446.5539 / 440.653.5500 hinkley.com
55300
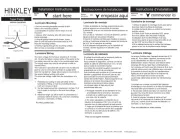
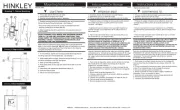
ASSEMBLY INSTUCTIONS
1
2
4
6
1.
2.
Lamp fixture using appropriate bulb (2)
Secure fixture cover (4) to the main body
of the fixture (1) using knobs (5 ) +6 .
3. Fixture can now be powered on
1. Lámpara con bombilla adecuada (2)
2. Asegure la cubierta de la lámpara (4) al
cuerpo principal de la lámpara (1) usando las
perillas (5 ).+6
3. Ahora se puede encender el dispositivo
1. Fixation de la lampe utilisant une ampoule
appropriée (2)
2. Fixez le couvercle du luminaire (4) au corps
principal du luminaire (1) à l'aide des boutons
(5 ).+6
3. Le luminaire peut maintenant être allumé
5
Nota: Esta Luminaria está diseñada para
usarse con 120V. Consulte el código local
para conocer las normas de cableado.
Remarque : Ce luminaire est conçu pour être
utilisé avec du 120 V. Veuillez consulter le
code local pour connaître les réglementations
en matière de câblage.
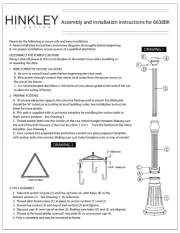
I.S. 21 wiring and ground instructionsing
SAFETY WARNING: READ WIRING AND GROUNDING
INSTRUCTIONS (IS AND ANY ADDITIONAL DIRECTIONS. 21)
TUR DUR T L NEN POWER SUPPLY OFF ING INS AL ATION. IF W
WIRING REQUIRED, CONSU QUA ED ELECTRICIAN OR IS LT A LIFI
LOCAL AUTHORITIES FOR CODE REQUIREMENTS
wiring/grounding instructions
1. Connec ppt live su ly wire (A) (typically blac or the thk smoo
un rke si of the two tor cord) to fixturema d de -conduc live
le (B) with approp ately size twist on tor -ad ri d connec -- see
Drawing 1
2. Connec ne pt utral sup ly wire (C) (typic lly white or thea
ribb , ma si of the two- ond tor cord) to need rked de c uc utral
fixtur lead (D).e
3. Connect fixture ground wire (E) (typically copper or green
plastic coated) to power supply ground with appropriately
sized twist-on connector inside post.
IS. 21 instrucciones de cableado y conexión a tierra
AVERTISSEMENT DE SECURIT
MISE ET (IS 21), TOUTE AUTRE
ELECTRIQUE PENDANT L’ONST
N’EST NECESSAIRE, CONSULT
AUTORITES LOCALES EXPOUR
I.S. 21 tierra cab
ADVERTENCIA DE SEGURIDAD: INSTRUCCIONES DE CABLEADO LEA LAS
Y LA TIER A (IS , E INS RU IONE ADI ONAL . APAUGE LA R 21) T CC S CI ES
ALIMENTACIÓN CORRIENTE DURANT LA INSTALACIÓN. SI SE DE E
REQUIERE NUEV CONSULTE U ELECTRICISTA O O CABLEADO, CON N
AUTHORIDADES LOCALE PARA S S REQUISITO DEL CÓDIGO
Drawing 1Wiring Diangram
H
I
N
K
L
E
Y
H I N K L E Y 33 0 0 0 Pi n Oa k P ark wa v n e, H 2 0 39 / 0 A o L a k O 44 0 1 8 0 5. 54 4 6 . 4 0 5 04 . 6 3 . 5 5 hinkley.com
instrucciones de cableado/conexión a tierra
1. Conecte el cable de alimentación vivo (A)
(normalmente negro o el lado liso sin marcar del cable
de dos conductores) al cable vivo del dispositivo (B) con
un conector giratorio del tamaño adecuado --- consulte
el Dibujo 1
2. Conecte el cable de suministro neutro (C)
(normalmente blanco o el lado marcado y acanalado del
cable de dos conductores) al cable neutro del
dispositivo (D).
3. Conecte el cable de tierra del dispositivo (E)
(generalmente cobre o recubierto de plástico verde) a la
tierra de la fuente de alimentación con un conector
giratorio del tamaño adecuado dentro del poste.
instructions de câbl
1. Connectez le fil d'alim
(généralement noir ou
cordon à deux conduct
luminaire (B) avec une
appropriée --- voir dess
2. Connectez le fil d'alim
(généralement blanc ou
cordon à deux conduct
(D).
3. Connectez le fil de te
(généralement en cuivr
à la terre de l'alimentat
connecteur à visser de
poteau.
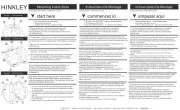
Drawing 2 Junction box cover install
1. Secure junction box cover (2) and gasket (5) to
junction box (1) using screws (3)
2. Thread conduit nut (6) onto fixture (4)
3. Next thread on fixture (4) to junction box Use conduit
nut to tighten fixture (4) into place
4. Fixture can now be powered on
Fixture a junction box cover is compatible with n optional .
follow these instructions for install
1
2
3
4
5
6
El accesorio se suministra con una cubierta de caja
de conexiones opcional. Siga estas instrucciones
para la instalación.
Le luminaire est fourni a
jonction en option, suive
l'installation
1. Fije la cubierta de la caja de conexiones (2) y la
junta (5) a la caja de conexiones (1) usando tornillos
(3).
2. Enrosque la tuerca del conducto (6) en el accesorio
(4).
3. Luego enrosque el dispositivo (4) a la caja de
conexiones. Utilice la tuerca del conducto para apretar
el dispositivo (4) en su lugar.
4. Ahora se puede encender el dispositivo.
1. Fixez le couvercle de
joint (5) à la boîte de jon
2. Vissez l'écrou de con
3. Vissez ensuite le lum
jonction. Utilisez l'écrou
luminaire (4) en place.
4. L'appareil peut mainte


Produkt Specifikationer

Mærke: Hinkley Lighting
Kategori: Lys
Model: 55300BZ

Har du brug for hjælp?

Hvis du har brug for hjælp til Hinkley Lighting 55300BZ stil et spørgsmål nedenfor, og andre brugere vil svare dig