Hinkley Lighting Lotus 39061BLK Manual

Hinkley Lighting Lys Lotus 39061BLK

Læs gratis den danske manual til Hinkley Lighting Lotus 39061BLK (3 sider) i kategorien Lys. Denne vejledning er vurderet som hjælpsom af 41 personer og har en gennemsnitlig bedømmelse på 3.6 stjerner ud af 21 anmeldelser. Har du et spørgsmål om Hinkley Lighting Lotus 39061BLK, eller vil du spørge andre brugere om produktet?

Side 1/3
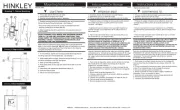
start here commencez ici empezar aquí
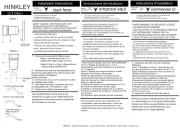
Mounting Instructions
Les Instructions D’assemblage IS19-92
Instrucciones De Montaje IS19-92
HINKLEY
English Spanish French
H I N K L E Y 33 0 00 Pin Oa k Par k w a , on L ak e, OH 44 0 12 8 00 . 44 6 .5 5 39 / 44 0 .6 5 3. 5 50 0 h ink l eyl igh tin g. coy Av m
1. Find a clear area in which you can work. r. 1. T r.
SAFETY WARNING: READ WIRING AND GROUNDING INSTRUC-
TIONS (I.S. 18) AND ANY ADDITIONAL DIRECTIONS. TURN
POWER SUPPLY OFF DURING INSTALLATION. IF NEW WIRING IS
REQUIRED, CONSULT A QUALIFIED ELECTRICIAN OR LOCAL
AUTHORITIES FOR CODE REQUIREMENTS.
Make electrical connections from supply wire to fixture lead wires.
Refer to instruction sheet and follow all instructions to make (I.S. 18)
all necessary wiring connections. Then refer back to this sheet to
complete installation of this fixture.
ADVERTENCIA DE SEGURIDAD: CABLEADO DE LEER Y
INSTRUCCIONES DE CONEXIÓN A TIERRA (SI 18), E
INSTRUCCIONES ADICIONALES. VUELTA DE ALIMENTACIÓN
DURANTE LA INSTALACIÓN. SI SE REQUIERE UN NUEVO
CABLEADO, CONSULTE A UN ELECTRICISTA O AUTORI-
DADES LOCALES PARA REQUISITOS DEL CÓDIGO.
AVERTISSEMENT DE SÉCURITÉ: CÂBLAGE LIRE ET MISE A LA
TERRE (IS 18) ET TOUTE AUTRE INSTRUCTION. COUPER
L'ALIMENTATION PENDANT L'INSTALLATION. SI DE
NOUVELLES CÂBLAGE NE EST NÉCESSAIRE, CONSULTER UN
ÉLECTRICIEN QUALIFIÉ OU LES AUTORITÉS LOCALES LES
EXIGENCES DES CODES.
-
3
4
2
1
5
supply wire
r
Y
r.
T
-
r
r
r
r
3. E
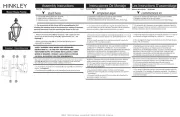
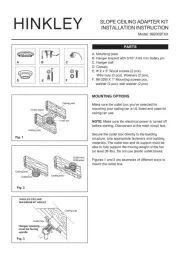
Drawing 1 – Stem Assembly
Drawing 3 Mo g Detuntin ail
M
1
(side view)
gull wing
bracket
1
2
Drawing 2 S ap l tr Detai
wire
wire
stem
canopy
Item no. 39061 Artículo No. 39061 Numéro d'article 39061
WIRES
CANOPY
FIXTURE
BODY
SWIVEL
4
a
HINKLEY 33000 Pin Oak Parkway, Avon Lake, OH 44012 800.446.5539 / 440.653.5500 hinkley.com
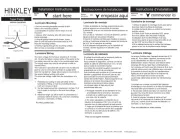
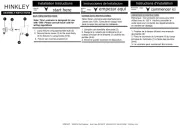
DRAWING 2 GLASS INSTALLATION
3. Next slip lock washer (2) along wire and over threaded pipe
(a) followed by hex nut (1). Thread hex nut onto threaded
pipe (a) and tighten.
4. Now follow instructions in 1-5, Step 2 of the MOUNTING
INSTRUCTIONS (STEM HUNG) to mount fixture to ceiling.
A
B
AR
S
1
2
3
R
R
3. A continuación, deslice la arandela de seguri dad (2) a lo
largo del cable y sobre el tubo roscado (a) seguido de la
tuerca hexagonal (1). Enrosque la tuerca hexagonal en el
tubo rosca do (a) y apriete.
4. Ahora siga las instrucciones del 1 al 5, Paso 2 de las
INSTRUCCIONES DE MONTAJE (VÁSTAGO
COLGADO) para montar el accesorio en el techo.
3. Ensuite, la rondelle de blocage coulissante (2) le long du fil et
sur le tuyau fileté (a) suivi de l'écrou hexagonal (1). Visser
l'écrou hexagonal sur le tuyau fileté (a) et serrer.
4. Suivez maintenant le
INSTRUCTIONS DE
monter l'appareil au
GLASS INSTALLATION:
1. To begin glass installation it will first be necessary to remove
threaded rings (A,B and C) and plastic ring (R) from the
socket (S) - see Drawing 2.
2. Next take large glass (1) and slip socket through center
to center hole of glass and hold in position. Now take ring
(R) and slip over socket and then thread on ring (A) to
secure glass to fixture. Repeat process for Medium size
glass (2).
3. To complete glass installation slip glass globe (3) small top
center hole over socket and hold in position while slipping
ring (R) over socket and then threading on final ring (B) to
secure glass.
4. Fixture can now be lamped accordingly. G25 style lamp is
recommended.
INSTALACIÓN DE VIDRIO:
1. Para comenzar la instalación del vidrio, primero será
necesario quitar anillos roscados (A, B y C) y anillo de
plástico (R) del enchufe (S) - vea el dibujo 2.
2. A continuación, tome un vaso grande (1) y deslice el
encaje por el centro al centro del agujero del vidrio y
manténgalo en posición. Ahora toma el anillo (R)
y deslice sobre el enchufe y luego enrosque el anillo
(A) para asegurar el vidrio al accesorio. Repita el
proceso para vidrio de tamaño mediano (2).
3. Para completar la instalación de vidrio, deslice el globo
de vidrio (3) parte superior pequeña centre el orificio
sobre el enchufe y manténgalo en posición mientras
desliza el anillo (R) sobre el casquillo y luego enrosque
el anillo final (B) para asegurar el vidrio.
4. La luminaria ahora se puede laminar en consecuencia.
La lámpara de estilo G25 es recomendado.
INSTALLATION DU VE
1. Pour commencer l'i
nécessaire de retire
plastique (R) du dou
2. Ensuite, prenez un
au centre pour cent
Maintenant prends
vissez la bague (A)
le processus pour le
3. Pour terminer l'insta
(3) petit dessus cen
position tout en glis
puis filetage sur l'an
4. L'appareil peut main
lampe de style G25


Produkt Specifikationer

Mærke: Hinkley Lighting
Kategori: Lys
Model: Lotus 39061BLK

Har du brug for hjælp?

Hvis du har brug for hjælp til Hinkley Lighting Lotus 39061BLK stil et spørgsmål nedenfor, og andre brugere vil svare dig