JUNG SM1608 Manual


Læs gratis den danske manual til JUNG SM1608 (9 sider) i kategorien Ikke kategoriseret. Denne vejledning er vurderet som hjælpsom af 4 personer og har en gennemsnitlig bedømmelse på 5.0 stjerner ud af 2.5 anmeldelser. Har du et spørgsmål om JUNG SM1608, eller vil du spørge andre brugere om produktet?

Side 1/9
Sensor module
Ref.No.: SM 1608
V03
Safety instructions
Caution! Electrical devices may only be installed and tted by electrically skilled persons.
Non-compliance with the installation information could cause damage to the device, re or other hazards.
Connect the module exclusively to the universal relay or dimming station (no mains potential!).
To fasten radio to the supporting ring, only use the enclosed plastic screws.
Function
Correct use
Operation of consumers, e.g. light on/off, dimming, blinds/shutters up/down, calling up and saving light scenes etc.
Connection to relay station or dimming station
Installation in appliance box according to DIN 49073
Product characteristics
Up to 16 load outputs of the relay or dimming station can be controlled.
Switching, contact, dimming, blind/shutter
Light scenes: up to 4 light scenes per control point can be freely congured.
Central function: all assigned load outputs are switched on/off centrally.
Free assignment of the sensor surfaces to the load outputs, central functions and light scenes
Possible to change settings
LED can be used as feedback and as orientation light
Feedback of switching states on all connected sensor modules.
LED brightness adjustable in 3 stages (100 %, 50 %, off).
Up to 4 sensor modules can be connected to a single relay/dimming station, even with stations connected in paral-
lel.
Cloning: transfer of a set assignment to another sensor module.
If mains power fails, assignments are retained.
Easy installation through 2-wire cable.
Can be labelled using JUNG labelling tool.
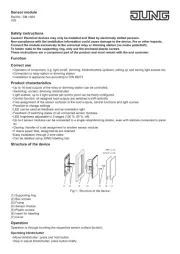
Structure of the device
2 x (5)
2 x (2)
(1) (2) (3) (4) (5) (6) (7)
Fig.1.: Structure of the device
(1) Supporting ring
(2) Box screws
(3) Frame
(4) Sensor module
(5) Plastic screws
(6) Insert for labelling
(7) Cover
Operation
Operation is through touching the respective sensor surface (button).
Operating blind/shutter
Move blind/shutter: press and hold button
Stop or adjust blind/shutter: press button briey
Operating light (relay station)
Switching: press button briey (toggle mode)
Operating light (dimming station)
Switching to switching-on brightness: press ON button briey
Pressing and holding the OFF button switches to minimum brightness.
Pressing and holding the ON button switches on and dims to maximum brightness.
Switching the light scene
Press button briey
The light scenes switch the outputs in sequence.
In the light scenes, the dimming station switches to switching-on brightness only from the switched-off state.
Information for the electrically skilled person
Installation and electrical connection
DANGER!
Electric shock from touching live parts in the installation environment.
An electric shock can be fatal.
Before working on the device, disconnect the power and cover live parts in the area!
Supporting ring side for at design A
Supporting ring side for LS range.B
Install supporting ring (1) in the right orientation on a ush-mount appliance box (designation „TOP“ = above;
„Type A“ or „Type B“ forwards)
Only use supplied box screws (2).
Set frame (3) on the supporting ring.
Connect sensor module (4) with the station and set onto the supporting ring. Connecting terminal downwards!
Only fasten the sensor module to the supporting ring with the enclosed plastic screws (5). Only tighten the plastic
screws lightly (!).
Snap the cover (7) with inserted inscription label or photo (6) onto the sensor module. Snap fastening on side of
cover.
DANGER!
When installing with 230 V devices under a common cover, e.g. socket outlets, there is a danger of elec-
tric shock in the event of an error!
An electric shock can be fatal.
Do not install any 230 V devices in combination with a push-button sensor expansion module under a
common cover!
- -+ +
A5
A6
A7
A8
A1
A2
A3
A4
MODE
OFF/o
ON/n
-
+
A1'
E1
A2'
E2
A3'
E3
A4'
E4
A5'
E5
A6'
E6
A7'
E7
A8'
E8
-
+
-
+
-
+
24 V SELV
24 V SELV
Fig.2.: Connection of max. 4 sensor modules to
the relay or dimming station.
Pay attention to polarity
Before setting parallel mode on the second station, the sensor module must be connected. Otherwise parallel
mode will not be recognised.
Start-up
In the state as delivered, the buttons (sensor elds) are allocated and the station outputs are assigned.


Produkt Specifikationer

Mærke: JUNG
Kategori: Ikke kategoriseret
Model: SM1608

Har du brug for hjælp?

Hvis du har brug for hjælp til JUNG SM1608 stil et spørgsmål nedenfor, og andre brugere vil svare dig


Ikke kategoriseret JUNG Manualer
JUNG

JUNG MA1000AD4 Manual

20 Juli 2025
JUNG

JUNG SM1608 Manual

19 Juli 2025
JUNG

JUNG MA1000AD2 Manual

17 Juli 2025
JUNG

JUNG 23066REGHE Manual

16 Juli 2025
JUNG

JUNG ES2539 Manual

16 Juli 2025
JUNG

JUNG 3212 TSM Manual

16 Juli 2025
JUNG

JUNG LEDKO6TX24 Manual

16 Juli 2025
JUNG

JUNG AL2212 Manual

16 Juli 2025
JUNG

JUNG 1708IE Manual

16 Juli 2025

Ikke kategoriseret Manualer

Nyeste Ikke kategoriseret Manualer