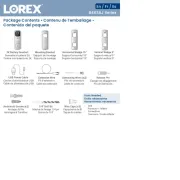
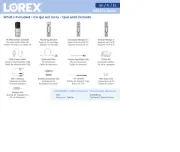
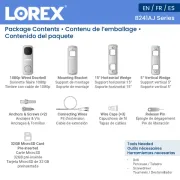
Lorex LNWDB1-EG Manual

| Mærke: | Lorex |
| Kategori: | Dørklokke |
| Model: | LNWDB1-EG |
Har du brug for hjælp?
Hvis du har brug for hjælp til Lorex LNWDB1-EG stil et spørgsmål nedenfor, og andre brugere vil svare dig
Dørklokke Lorex Manualer

8 August 2025
8 August 2025

8 August 2025
8 August 2025
8 August 2025
8 August 2025

8 August 2025
8 August 2025

8 August 2025
8 August 2025
Dørklokke Manualer
- Eura
- Nest
- ORNO
- Extel
- Grothe
- KlikaanKlikuit
- Baseline
- V-TAC
- Brilliant
- Vimar
- Chacon
- Doro
- Arlo
- EQ-3
- Gira
Nyeste Dørklokke Manualer

3 November 2025

1 November 2025

31 Oktober 2025
5 Oktober 2025
3 Oktober 2025
3 Oktober 2025
1 Oktober 2025
26 September 2025
26 September 2025
21 September 2025