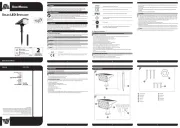
Maginon SPSL-1 Manual


Læs gratis den danske manual til Maginon SPSL-1 (2 sider) i kategorien Ikke kategoriseret. Denne vejledning er vurderet som hjælpsom af 5 personer og har en gennemsnitlig bedømmelse på 4.6 stjerner ud af 3 anmeldelser. Har du et spørgsmål om Maginon SPSL-1, eller vil du spørge andre brugere om produktet?

Side 1/2
5
21
4 6
3
U Mser anUal
M Cade in hina
U Mser anUal
2
YEAR WARRANTY
EXCLUDES BATTERY
c FhINA oR
ALdI S L .ToRES Td
PO B 26, Ox
A , therstOne
W , ArWickshire
cV9 2sh
ALdI S (I ) LTd.ToRES RELANd
PO B 726, Ox
nAAs,
cO. k ildAre
V . .isit us At WWW Aldi cOm
M Cade in hina
A s s 849538fter Ales uPPOrt
GB
01827 438 013
serVice uk PrOtel serVice cOm- @ - .
IE
0124 695 20
serVice uk PrOtel serVice cOm- @ - .
m : sP-280sOdel
07/2025
O i mriginAl nstructiOn AnuAl
Great care has gone into the manufacture of this product and it should therefore provide you with years
of good service when used properly.
In the event of product failure within its intended use over the course of the first 2 years after date of
purchase, we will remedy the problem as quickly as possible once it has been brought to our attention.
In the unlikely event of such an occurrence, or if you require any information about the product, please
contact us via our helpline support services, details of which are to be found both in this manual and on
the product itself.
s leD solar potlight
V01 0025
5 commISSIoNINg
5.1 c s s dheck POtlight And cOPe Of eliVery
WARNING!
»Keep plastic films and plastic bags away from infants and small children as there is a risk of suffocation.
Do not allow children to play with the ground spike as it is sharp.
Be cautious when handling the ground spike to avoid injury.
NOTE! RISK OF PROPERTY DAMAGE!
»If the packaging is carelessly opened with a sharp knife or another pointed object, the spotlight can be damaged.
1. Carefully open the packaging.
2. Remove packaging material and all protective films.
3. Check the scope of delivery for completeness (see Fig. A and C).
Solar LED Spotlight
Ground spike and extension rod
Wall mounting fasteners andSpare hex nut
Warranty documents
Instruction manual
4. Remove the spotlight from the packaging and check whether the spotlight itself or any of its components is damaged. If this is the case,
please do not use the spotlight. Contact the service address of the manufacturer indicated on the warranty card.
Products with this symbol operate on direct current.
This symbol provides you with useful additional information for assembly or operation.
The spotlight is protected against dust and strong water jets and can be used outdoors.
The product complies with Protection Class III. It operates at low voltage and ensures safe separation from
other electrical circuits.
2 Years warranty
BOX
Recycle
Sort and dispose of the packaging materials according to their type, utilizing your local recycling
facilities for paper, cardboard, and light packaging.
4.2 g s ienerAl Afety nstructiOns
WARNING! RISK OF PROPERTY DAMAGE! RISK OF INJURY! AND FIRE HAZARD!
»Improper use can damage the spotlight.
Keep the spotlight away from heat, heat sources (e.g., oven), moisture (such as damp surfaces), and sharp edges and corners.
Do not expose the spotlight to temperatures below -15°C or above 50°C.
Never submerge the spotlight in water, and avoid touching it with wet hands.
Do not drop or let the spotlight fall from high places.
Be cautious as some parts of the spotlight may become hot.
Cease using the spotlight if the plastic has cracks, fractures, or deformations.
The LED cannot be replaced. Dispose of the item if it is damaged.
Do not open, alter, or modify the spotlight, and do not insert metallic objects or wires into it.
Improper handling of the spotlight and the battery can cause an explosion or a fire.
Never cover the spotlight during operation or place objects on it. This may cause overheating.
Never use the spotlight near open flames or inflammable materials.
In case of problems with the product due to electrostatic discharge, switch the spotlight off, wait for 10 seconds, and then switch it
back on.
Do not operate the product in the packaging.
WARNING! HAZ ARDS FROM BATTERIES!
»If you use batteries improperly, there is a risk of explosions or burns from leaking battery fluid.
Always turn off the spotlight when not in use or in the event of a malfunction.
Under no circumstances should you disassemble, destroy, puncture or short-circuit batteries.
6 P oRoducT vERvIEW
C
9
10
11
A
1
3
2
B
7
8
4
5
6
There is a risk of explosion if the battery is replaced with an incorrect type that can disable a protective device (e.g. with some types of
lithium batteries).
Never handle leaked batteries without appropriate protection. If battery acid contacts your skin, wash the affected area with plenty of
water and soap.
Avoid contact with battery acid. If you do get battery acid in your eyes, rinse them with plenty of water and seek medical attention
immediately.
When inserting the battery, pay attention to the polarity.
WARNING!
»Hazards for children and persons with reduced physical, sensory, or mental abilities (for example, partially disabled persons, older
persons with restrictions in their physical and mental abilities) or lack of experience and knowledge (for example, older children).
This spotlight can be used by persons with limited physical, sensory, or mental abilities or lacking experience and know-how, provided
they are supervised or have received instructions for safe use of the spotlight and understand the possible hazards arising from its use.
Children should not play with the spotlight. The spotlight should not be cleaned or maintained by children.
Keep children under eight years old away from the spotlight.
Do not use the spotlight if the device or accessories are visibly damaged or defective.
If the spotlight or accessories are damaged, they must be replaced or repaired by the manufacturer, their customer service, or a similarly
qualified person to avoid hazards.
The casing must not be opened, and repairs should only be carried out by a professional. Please consult a specialized workshop for this.
Any liability and warranty claims are excluded if repairs are done by the user, if there is improper connection, or if the device is misused.
NOTICE
»Under the environment with electrostatic discharge (ESD), the sample may malfunction and need user reset to recover.
Solar LED Spotlight
Rod Holder
Extension Rod
On/Off Switch
Ground Spike
3x Screws
Solar Panel
Spare Hex Nut
LED cover
3x Wall Plugs
Locking Screw
1 FoREWoRd
Dear Customer,
Congratulations on purchasing a high-quality Garden Bright product. You have acquired a modern solar LED spotlight with excellent
technical features, which is particularly easy to operate. You have a 2-year warranty on the solar LED spotlight. Should the solar LED
spotlight be defective, you will need the enclosed warranty card and your receipt. Please keep these together carefully.
2 g IENERAL NFoRmATIoN
These operating instructions belong to this Solar LED Spotlight SP-280S (hereinafter referred to only as “spotlight”). They are
part of the spotlight and contain important information for commissioning, handling, and disposal.
Read the operating instructions, especially the safety instructions, carefully before using the spotlight. Non-compliance with
these operating instructions can lead to serious injuries or damage to the spotlight.
The operating instructions are based on the standards and rules valid in the European Union. When abroad, also observe country-specific
guidelines and laws.
Keep the operating instructions for further use. If you pass the spotlight on to third parties, be sure to include these operating instructions.
3 I uNTENdEd SE
The spotlight is designed for light decoration and play of light for outdoor use, as well as ambient lighting. The LED lamps in the spotlight
cannot be replaced. The spotlight is suitable for outdoor use. The spotlight is intended only for private household use and is not suitable for
commercial purposes. Use the spotlight only as described in this operating manual. Any other use is considered improper and can lead to
property damage or even personal injury. The spotlight is not a toy for children.
The manufacturer or dealer assumes no liability for damages caused by improper or incorrect use.
4 SAFETY
4.1 e s WxPlAnAtiOn Of ignAl Ords
The following symbols and signal words are used in these operating instructions, on the spotlight, or on the packaging.
DANGER!
»This signal word indicates a hazardous situation that, if not avoided, will result in death or serious injury.
WARNING!
»This signal word indicates a hazardous situation that, if not avoided, could result in death or serious injury.
CAUTION!
»This signal word indicates a hazardous situation that, if not avoided, could result in minor or moderate injury.
NOTICE
»This signal word is a preferred word for tips and practices that are not related to personal injury.
Read the manual.
Products marked with this symbol comply with all applicable regulations of the European Economic
Area.
1211
987 10
7.4 i W mnstAlling the All Ount
Installation of the spotlight with the wall mount
Step 1: Preparing the Wall Mount.
1. Choose a location on your wall that receives ample sunlight throughout the day to ensure
optimal charging of the solar spotlight.
2. Hold the rod holder at the bottom of the spotlight against the wall in the selected
location.
3. Use a pencil to mark the spots where the drill holes need to be made, based on the holes in
the rod holder .
Step 2: Drill the Holes
1. Select a drill bit that matches the size of the wall plugs .
2. Drill holes in the wall where you have marked.
3. Place the wall plugs into the drilled holes.
Step 3: Attach the Solar Spotlight
1. Align the holes in the rod holder with the wall plugs .
2. Use a screwdriver to insert and tighten the screws into the wall plugs , securing the rod holder to the wall.
3. Ensure the spotlight is securely attached to the wall.
Step 4: Locking the Solar Spotlight
1. Unscrew the locking screw counterclockwise to adjust the spotlight When adjusted to the desired position for sufficient sunlight, lock
this position by turning the locking screw clockwise.
2. Allow the spotlight to charge in the sunlight and ensure it operates correctly in the dark. To test this, cover the solar panel with you hand
to see if the lamp stays on.
NOTICE
»If the hex nut is lost while adjusting the locking screw , a spare hex nut can be used as a replacement.
12 WARRANTY
Please contact our by phone or e-mail before sending in the product.AFTER SALES SUPPORT
This allows us to provide support in the event of possible operator errors.
12.1 W ArrAnty cOnditiOns
Dear Customer,
The offers you extensive benefits:ALDI warranty
Warranty period: 2 years from date of purchase.
6 months for wear parts and consumables under normal and proper
conditions of use (e.g. rechargeable batteries).
Costs: Free repair/exchange
No transport costs
Hotline: 01827 438 013 (GB) | 0124 695 20 (IE)
(Call charges from your regular landline operator. Mobile costs may vary.)
Phone lines available: Monday to Friday, 8:00 am - 18:30 pm
Please contact our by phone or e-mail before sending in the device. This allows us to provide support in the event AFTER SALES SUPPORT
of possible operator errors.
In order to make a claim under the warranty, please send us:
The faulty item together with the original purchase receipt
The product with all components included in the packaging
The warranty does not cover damage caused by:
orAccident unanticipated events (e.g. lightning, water, fire)
orImproper use transport
andDisregard of the safety maintenance instructions
Other or of the product improper treatment modification
After the expiry of the warranty period, you still have the possibility to have your product repaired at your own expense. If the repair or the estimate
of costs is not free of charge you will be informed accordingly in advance.
This warranty does not affect your statutory rights. In the event that a product is received for repair, neither the service company nor the seller will
assume any liability for data or settings possibly stored on the product by the customer.
7 oPERATIoN
7.1 Q s guick tArt uide
1. Fix the product in an area with sun throughout the whole day.
2. Turn it on.
3. Then, automatically, it will charge in day time and light in night time.
The further instructions will explain each step in detail.
7.2 d B fescriPtiOn Of uttOn unctiOns
On/Off Switch Function
Press 1x Switch on- default light is warm white.
Press 2x RGB light starts running.
Press 3x RGB light stops at the colour it was on.
Press 4x Switch off.
7.3 i g snstAlling the rOund Pike
Installation of the spotlight with the ground spike.
Step 1: Preparing the Ground Spike.
1. Locate the area you desire the spotlight to be located.
2. Ensure the ground spike is verticle with the pointed end facing downward.
3. Gently push or hammer the ground spike into the ground until it is securely anchored.
Step 2: Attaching the Extension Rod
1. Identify the end of the extension rod that attaches to the ground spike.
2. Insert this end into the top of the ground spike and ensure it is securely fitted.
Step 3: Installing the Solar Spotlight
1. Unscrew the locking screw counterclockwise to adjust the spotlight When adjusted to the
desired position for sufficient sunlight, lock this position by turning the locking screw clockwise.
2. Insert the spotlight into the extension rod and ground spike by aligning the rod holder
to the top of the extension rod .
3. Ensure all parts are securely connected and the solar spotlight is stable.
4. Allow the spotlight to charge in the sunlight and ensure it operates correctly in the dark. To test this,
cover the solar panel with you hand to see if the spotlight stays on.
11 d IISPoSAL NSTRucTIoNS
11.1 d PisPOse Of AckAging
Dispose of the packaging in a sorted manner. Give cardboard and cartons to the paper recycling and films to the
collection of recyclables.
11.2 d PisPOse Of the rOduct
(Applicable in the European Union and other European countries with separate collection systems)
Old appliances must not be disposed of in the household waste!
If the product can no longer be used, each consumer is legally obliged to dispose of old devices separately from
household waste, e.g., at a collection point in their community or district. This ensures that old devices are properly
recycled and that negative impacts on the environment are avoided. Therefore, electrical devices are marked with the
symbol depicted here.
Batteries and rechargeable batteries are not household waste!
The adjacent symbol means that batteries and accumulators must not be disposed of with household waste. Consumers are
legally obliged to return all batteries and accumulators, whether or not they contain pollutants*, to a community collection
point or at retail outlets so that they can be disposed of in an environmentally friendly manner and valuable raw materials
such as cobalt, nickel, or copper can be recovered. The return of batteries and accumulators is free of charge. Some possible
ingredients like mercury, cadmium, and lead are toxic and pose a threat to the environment if disposed of improperly. Heavy metals, for
example, can have harmful effects on humans, animals, and plants and can accumulate in the environment and the food chain, then indirectly
enter the body through food.
Batteries and accumulators not permanently installed in the device must be removed before disposal and disposed of separately.
Please return batteries and accumulators only in a discharged state! If possible, use rechargeable batteries instead of disposable batteries.
* marked with: Cd = Cadmium, Hg = Mercury, Pb = Lead
7.5 r ePlAcing the BAtteries
If the spotlight does not light up after it has been used for approx. 1 year, replace the reachargeable battery as it may be weak or worn out. (3.7 V
2000 mAh Li-Ion (Type 18650) lithium battery or the same equivalent type and recommended must be used.
To do this you must:
1. Use a screw driver to unscrew the LED cover by turning counterclockwise.
2. Remove the LED cover and with protection, carefully remove the 3.7 V 2000 mAh Li-Ion
(Type 18650) battery.
3. Dispose of the battery properly. See Disposal chapter.
4. After replacing the battery, screw the LED cover back on by turning clockwise.
8 c LEANINg ANd mAINTENANcE
8.1 cleAning
NOTE! RISK OF SHORT CIRCUIT!
»Water entering the housing can cause a short circuit.
Never immerse the spotlight in water.
Ensure that no water enters the housing.
NOTE! RISK OF INCORRECT OPERATION!
»Improper use can damage the spotlight.
Do not use aggressive cleaning agents, brushes with metal or nylon bristles, or sharp or metallic objects such as knives, hard spatulas, and the
like. These can damage the surface.
Never clean the spotlight in the dishwasher. This will destroy the spotlight.
1. Turn off the spotlight before cleaning.
2. Let the spotlight cool down completely.
3. Wipe the spotlight with a slightly damp cloth.
4. Let the spotlight dry completely.
8.2 stOrAge
All parts must be completely dry before storing.
1. Always store the spotlight in a dry place.
2. Store the spotlight out of the reach of children, securely closed, and at a storage temperature between 5°C and 20°C (room temperature).
9 T SEchNIcAL PEcIFIcATIoNS
Model: SP-280S
Solar panel: 5.5V, 240 mA 1.3W Polycrystalline Silicon
Type of battery: Li-ion battery type 18650
Battery capacity: 3.7V DC 2000mAh
Charging time: approx. 8 hours
Lighting duration: approx. 6-8 hours
Illuminant: 10LED
LED power: 0.5W
Luminous flux: 20 lm
Color temperature: Warm White 3000 K and RGB Light
Lifetime: approx. 20000 hours
IP Protection class: IP65
Ambient temperature: -15°C to 50°C
Dimension (WxHxD): approx. 88 x 450 x 145 mm
Material: ABS
Product Colour: Black
NOTICE
»Design and technical specifications are subject to change without notice.
10 Eu d cEcLARATIoN oF oNFoRmITY
We, supra Foto-Elektronik-Vertriebs-GmbH, Denisstraße 28a, 67663 Kaiserslautern, Germany, declare under our sole
responsibility that the product meets the essential requirements of the listed EU directives.
The EU declaration of conformity can be requested from the address provided on the back page of the manual.


Produkt Specifikationer

Mærke: Maginon
Kategori: Ikke kategoriseret
Model: SPSL-1

Har du brug for hjælp?

Hvis du har brug for hjælp til Maginon SPSL-1 stil et spørgsmål nedenfor, og andre brugere vil svare dig


Ikke kategoriseret Maginon Manualer
Maginon

Maginon SPSL-1 Manual

21 Juni 2025
Maginon

Maginon HSA-1 Manual

20 Juni 2025
Maginon

Maginon RC-300WS Manual

30 Marts 2025
Maginon

Maginon ECA-75 Manual

28 Januar 2025
Maginon

Maginon WPM-1 Manual

6 Januar 2025
Maginon

Maginon STP-1 Manual

6 Januar 2025
Maginon

Maginon LDB-1 Manual

23 December 2024
Maginon

Maginon TL-120 Manual

14 November 2024
Maginon

Maginon ULG-5133 Manual

22 September 2024

Ikke kategoriseret Manualer

Nyeste Ikke kategoriseret Manualer