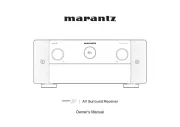
Marantz SR5011 Manual

Marantz Modtager SR5011

Læs nedenfor 📖 manual på dansk for Marantz SR5011 (128 sider) i kategorien Modtager. Denne guide var nyttig for 55 personer og blev bedømt med 4.1 stjerner i gennemsnit af 28 brugere

Side 1/128
.
AV Surround Receiver
SR5011
Owner’s Manual
Contents Connections Playback Settings Tips Appendix
1
Front panel Display Rear panel Remote Index
Accessories 7
Inserting the batteries 8
Operating range of the remote control unit 8
Features 9
High quality sound 9
High performance 10
Easy operation 13
Part names and functions 14
Front panel 14
Display 17
Rear panel 19
Remote control unit 23
Connections
Connecting speakers 27
Speaker installation 27
Speaker connection 34
Speaker configuration and “Amp Assign” settings 38
Connecting a TV 50
Connection 1 : TV equipped with an HDMI connector and
compatible with the ARC (Audio Return Channel) 51
Connection 2 : TV equipped with an HDMI connector and
incompatible with the ARC (Audio Return Channel) 52
Connection 3 : TV equipped without an HDMI connector 53
Connecting a playback device 54
Connecting a set-top box (Satellite tuner/cable TV) 55
Connecting a DVD player or Blu-ray Disc player 56
Connecting a video camcorder or game console 57
Connecting a device with a multi-channel output connector 58
Connecting an iPod or USB memory device to the USB port 59
Connecting an FM/AM antenna 61
Connecting to a home network (LAN) 63
Wired LAN 63
Wireless LAN 64
Connecting an external control device 65
REMOTE CONTROL jacks 65
DC OUT jack 66
Connecting the power cord 67
Playback
Basic operation 69
Turning the power on 69
Selecting the input source 69
Adjusting the volume 70
Turning off the sound temporarily (Muting) 70
Playback a DVD player/Blu-ray Disc player 70
Contents Connections Playback Settings Tips AppendixContents
2
Front panel Display Rear panel Remote Index
Playing an iPod 71
Listening to music on an iPod 72
iPod Browse Mode settings 73
Performing repeat playback 75
Performing random playback 75
Playing a USB memory device 76
Playing files stored on USB memory devices 77
Listening to music on a Bluetooth device 79
Playing music from Bluetooth device 80
Pairing with other Bluetooth devices 82
Reconnecting to this unit from a Bluetooth device 83
Listening to FM/AM broadcasts 84
Listening to FM/AM broadcasts 85
Tuning in by entering the frequency (Direct Tune) 86
Changing the tune mode (Tune Mode) 87
Tuning in to stations and presetting them automatically (Auto
Preset Memory) 87
Presetting the current broadcast station (Preset Memory) 88
Listening to preset stations 88
Specify a name for the preset broadcast station (Preset Name) 89
Skipping preset broadcast stations (Preset Skip) 90
Cancelling Preset Skip 91
Listening to Internet Radio 92
Listening to Internet Radio 93
Playing the last played Internet Radio station 94
Using vTuner to add Internet Radio stations to favorites 95
Playing back files stored on a PC and NAS 96
Applying media sharing settings 97
Playing back files stored on a PC and NAS 98
Listening to Pandora®100
Listening to Pandora®101
Creating a new station 103
Listening to an existing station 104
Listening to created radio stations at random 104
Giving feedback and managing stations 105
Sign Out 106
Listening to SiriusXM Internet Radio 107
Listening to SiriusXM Internet Radio 108
Sign Out 109
Contents Connections Playback Settings Tips Appendix
3
Front panel Display Rear panel Remote Index
AirPlay function 110
Playing songs from your iPhone, iPod touch or iPad 111
Playing iTunes music with this unit 111
Selecting multiple speakers (devices) 112
Perform iTunes playback operations with the remote control unit
of this unit 112
Spotify Connect function 113
Playing Spotify music with this unit 113
Convenience functions 114
Performing repeat playback 115
Performing random playback 115
Registering to Favorites (Save to Favorites) 116
Playing back content added to Favorites 116
Deleting content added to favorites 117
Searching content with keywords (Text Search) 117
Playing back music and a favorite picture at the same time
(Slideshow) 118
Setting the Slideshow Interval 119
Adjusting the volume of each channel to match the input source
(Channel Level Adjust) 120
Adjusting the tone (Tone) 121
Displaying your desired video during audio playback (Video
Select) 122
Adjusting the picture quality for your viewing environment (Picture
Mode) 123
Playing the same music in all zones (All Zone Stereo) 124
Selecting a sound mode 125
Selecting a sound mode 126
Direct playback 127
Pure Direct playback 127
Auto surround playback 128
HDMI control function 137
Setting procedure 137
Smart Menu function 138
Sleep timer function 140
Using the sleep timer 141
Smart select function 142
Calling up the settings 143
Changing the settings 144
Web control function 145
Controlling the unit from a web control 145
Panel lock function 147
Disabling all key button operations 147
Disabling all button operations except VOLUME 147
Canceling the Panel lock function 148
Remote lock function 149
Disabling the sensor function of the remote control unit 149
Enabling the remote sensor function 149
Playback in ZONE2 (Separate room) 150
Connecting ZONE2 150
Playback in ZONE2 152
Contents Connections Playback Settings Tips Appendix
4
Front panel Display Rear panel Remote Index
Settings
Menu map 154
Menu operations 157
Inputting characters 158
Using the keyboard screen 159
Audio 160
Dialog Level Adjust 160
Subwoofer Level Adjust 160
Surround Parameter 161
M-DAX 164
Audio Delay 165
Volume 165
Audyssey®166
Graphic EQ 169
Video 171
Picture Adjust 171
HDMI Setup 173
Output Settings 178
On Screen Display 183
TV Format 184
Inputs 185
Input Assign 185
Source Rename 187
Hide Sources 188
Source Level 188
Input Select 188
Speakers 189
Audyssey® Setup 189
Procedure for speaker settings (Audyssey® Setup) 191
Error messages 197
Retrieving Audyssey® Setup settings 198
Manual Setup 199
Amp Assign 199
Speaker Config. 200
Distances 205
Levels 206
Crossovers 207
Bass 208
Front Speaker 209
Contents Connections Playback Settings Tips Appendix
5
Front panel Display Rear panel Remote Index
Network 210
Information 210
Connection 210
Wi-Fi Setup 211
Settings 214
Network Control 216
Friendly Name 216
Diagnostics 217
General 218
Language 218
ECO 218
ZONE2 Setup 221
Zone Rename 222
Smart Select Names 222
Trigger Out 223
Front Display 223
Firmware 224
Information 226
Usage Data 228
Setup Lock 228
Limiting the operating zone with the remote control 229
Tips
Tips 231
Troubleshooting 233
Resetting factory settings 249
Appendix
About HDMI 250
Video conversion function 253
Playing back a USB memory devices 255
Playing back a Bluetooth device 256
Playing back a file saved on a PC or NAS 257
Playing back Internet Radio 258
Personal memory plus function 258
Last function memory 258
Sound modes and channel output 259
Sound modes and surround parameters 260
Types of input signals, and corresponding sound modes 263
Explanation of terms 266
Trademark information 275
Specifications 277
Index 282
License 285
Contents Connections Playback Settings Tips Appendix
6
Front panel Display Rear panel Remote Index
Thank you for purchasing this Marantz product.
To ensure proper operation, please read this owner’s manual carefully before using the product.
After reading this manual, be sure to keep it for future reference.
Accessories
Check that the following parts are supplied with the product.
Quick Start Guide Safety Instructions Notes on radio Warranty
(for USA/for CANADA)
Cable labels
Power cord FM indoor antenna AM loop antenna Sound calibration
microphone
Sound calibration
microphone stand
Remote control unit R03/AAA batteries
Contents Connections Playback Settings Tips Appendix
7
Front panel Display Rear panel Remote Index
Inserting the batteries
1Remove the rear lid in the direction of the arrow and
remove it.
2Insert two batteries correctly into the battery
compartment as indicated.
Batteries
3Put the rear cover back on.
NOTE
0To prevent damage or leakage of battery fluid:
0Do not use a new battery together with an old one.
0Do not use two different types of batteries.
0Remove the batteries from the remote control unit if it will not be in use for long
periods.
0If the battery fluid should leak, carefully wipe the fluid off the inside of the battery
compartment and insert new batteries.
Operating range of the remote control
unit
Point the remote control unit at the remote sensor when operating it.
30°
30°
Approx. 23 ft/7 m
Contents Connections Playback Settings Tips Appendix
8
Front panel Display Rear panel Remote Index
Features
High quality sound
0With discrete circuit technology, the power amplifier provides
identical quality for all 7-channels (140 Watts x 7-channels)
For optimum realism and stunning dynamic range, the power amplifier
section features discrete power devices (not integrated circuitry).
By using high current, high power discrete power devices, the amplifier
is able to easily drive high quality speakers.
0Current feedback amplifier
This unit uses a high-speed current feedback amplifier circuit for its
preamplifier so that signals from a Blu-ray Disc player and other
equipment that support high-definition audio formats can be amplified
with high fidelity. The high-speed current feedback amplifier also
reproduces a natural sound space.
0Dolby Atmos (v
v
v
vv p. 266)
This unit is equipped with a decoder that supports Dolby Atmos audio
format. The placement or movement of sound is accurately reproduced
by the addition of overhead speakers, enabling you to experience an
incredibly natural and realistic surround sound field.
0DTS:X
This unit is equipped with the DTS:X decoder technology. DTS:X
brings the home theater experience to new heights with its immersive
object based audio technology which removes the bounds of channels.
The flexibility of objects allows for sound to be scaled large or small
and moved around the room with greater accuracy than ever before
leading to a richer immersive audio experience.
Contents Connections Playback Settings Tips Appendix
9
Front panel Display Rear panel Remote Index
0HDMI connections enable connection to various digital AV
devices (8 inputs, 2 outputs)
8 2
OutIn
This unit is equipped with 8 HDMI inputs and 2 HDMI outputs enabling
connection to various HDMI compatible devices such as Blu-ray Disc
players, game consoles and HD video camcorders. This unit is
equipped with 2 monitor outputs, enabling you to project the same
image at the same time using this unit.
0The device is equipped with a AirPlay® function in addition to
network functions such as Internet radio etc. (v
v
v
vv
p. 110)
You can enjoy a wide variety of content, including listening to Internet
Radio, playing audio files stored on your PC, and displaying
photographs stored on your PC on our television.
This unit also supports Apple AirPlay which lets you stream your music
library from an iPhone®, iPad®, iPod touch® or iTunes®
.
0Playback of DSD and FLAC files via USB and networks
This unit supports the playback of high resolution audio formats such as
DSD (5.6 MHz) and FLAC 192 kHz files. It provides high quality
playback of high resolution files.
Contents Connections Playback Settings Tips Appendix
11
Front panel Display Rear panel Remote Index


Produkt Specifikationer

Mærke: Marantz
Kategori: Modtager
Model: SR5011
Bredde: 439.4 mm
Dybde: 345.4 mm
Højde: 160 mm
Vægt: 10000 g
Brugervejledning: Ja
Produktfarve: Gold,Silver
Wi-Fi: Ja
Bluetooth: Ja
Understøttede videotilstande: 1080p
3D: Ja
Lyddekodere: DTS,DTS-HD Master Audio,Dolby TrueHD
Ethernet LAN-porte (RJ-45): 1
Komponentvideo (YPbPr/YCbCr) indgang: 2
Ethernet LAN: Ja
Slumretimer: Ja
Understøttede lydformater: ALAC,DSD,FLAC,MP3,WAV
Strømforbrug (standby): 0.2 W
Strømforbrug (typisk): 650 W
Sammensat videoindgang: 3
Fjernbetjening inkluderet: Ja
Forbindelsesteknologi: Ledningsført
Lyd-output kanaler: 7.2 kanaler
Indbygget kortlæser: Ingen
Video opskalering: Ja
Antal USB-porte: 1
Understøttede radiobånd: AM,FM
AC (strøm) indgang: Ja
Sammensat videoudgang: 1
Komponent video (YPbPr/YCbCr) udgang: 1
klirfaktor (THD): 0.08 %
Garantibevis: Ja
Modtagertype: Surround
Signal/støjforhold: 100 dB
Line-in: Ja
AirPlay: Ja
HSMI-indgang: 8
Antal HDMI-udgange: 2
Digital lyd koaksial indgang: 2
RS-232-porte: 1
Digital akustisk og optisk indgang: 2
Internetradio: Ja
Antal FM-antenneporte: 1
Udgangseffekt pr. kanal (20-20KHz @8 Ohm): 100 W
Optisk drev inkluderet: Ingen
Fjernbetjening (IR) indgang: 1
Understøttede internet radiotjenester: Pandora,SIRIUS Internet Radio,Spotify,vTuner
Udgangseffekt pr. kanal (1KHz @6 Ohm): 140 W
Pre-out-tilslutningsmulighed: Ja
Antal AM-antenneporte: 1
Udgangseffekt pr. kanal (1KHz @8 Ohm): 100 W
Grafisk brugergrænseflade (GUI): Ja
Pre-out kanaler: 7.2

Har du brug for hjælp?

Hvis du har brug for hjælp til Marantz SR5011 stil et spørgsmål nedenfor, og andre brugere vil svare dig