MeldaProduction MMultiAnalyzer Manual
MeldaProduction
Audio Software
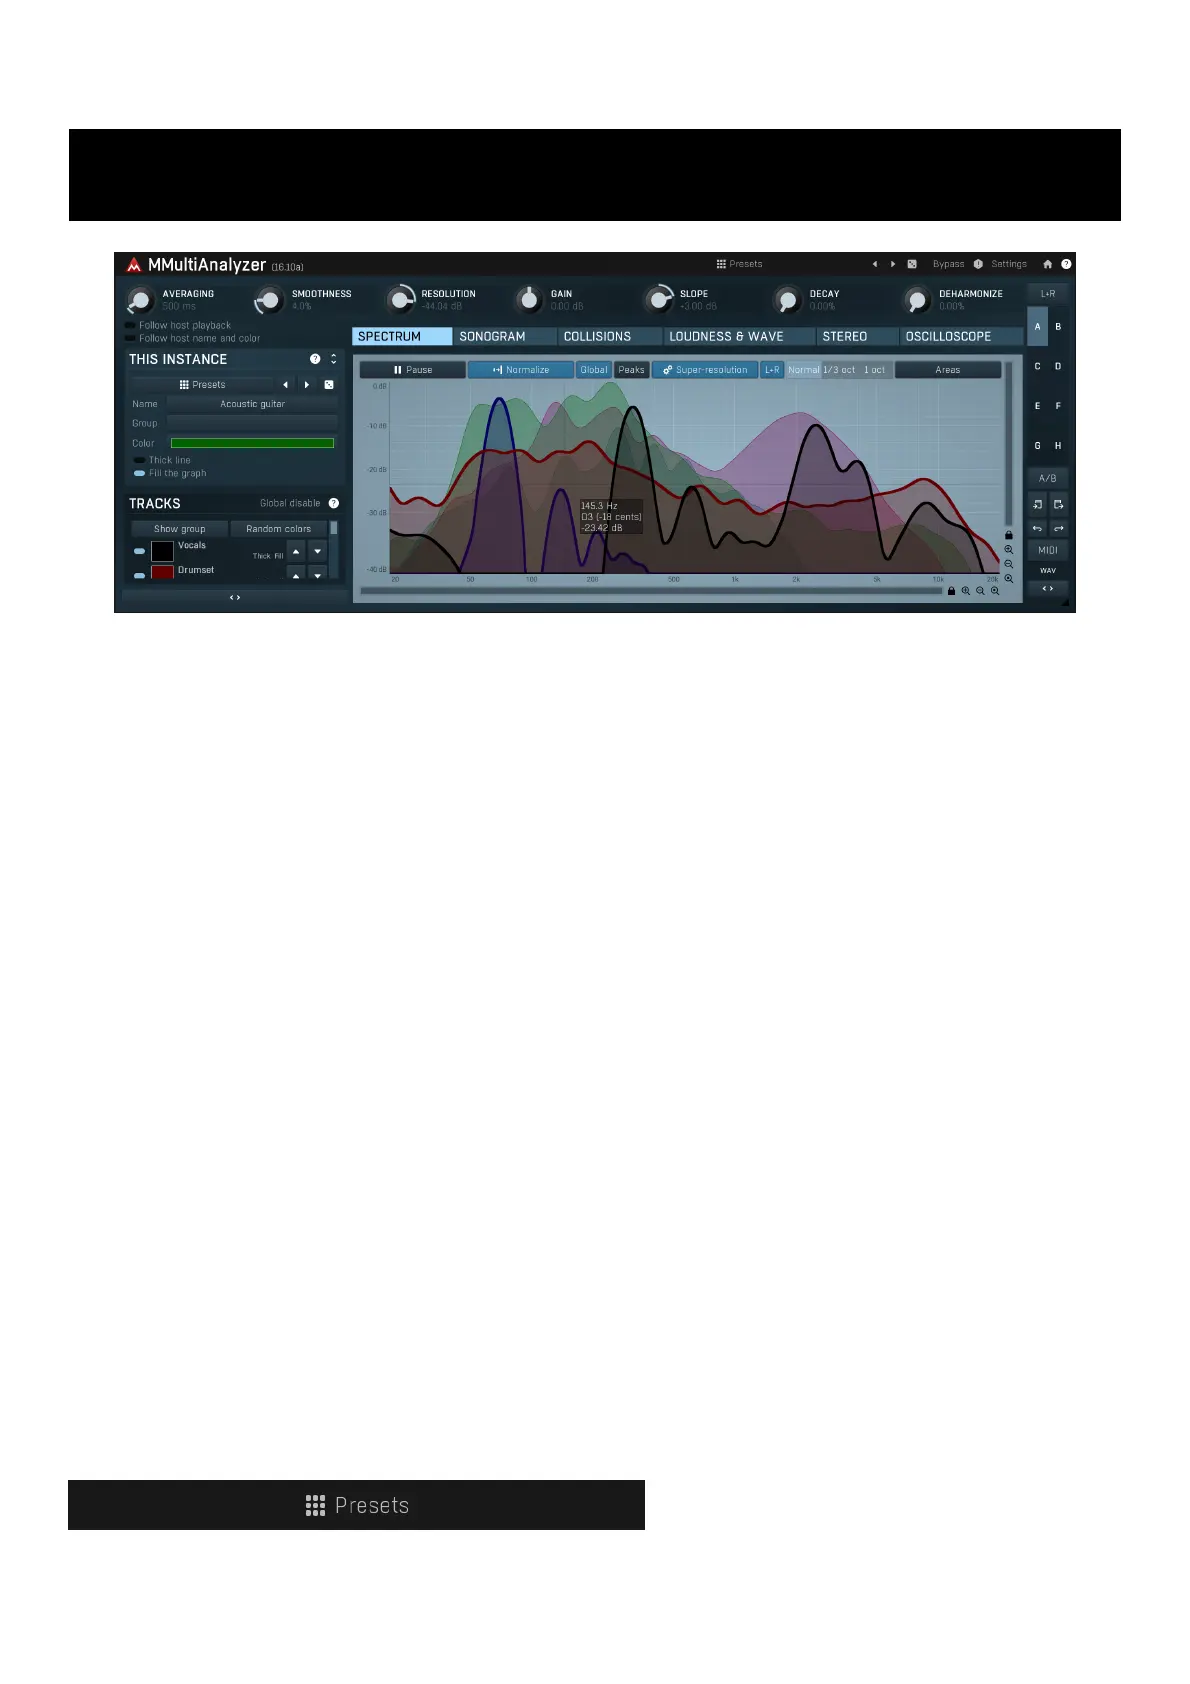
MMultiAnalyzer
| Mærke: | MeldaProduction |
| Kategori: | Audio Software |
| Model: | MMultiAnalyzer |
Har du brug for hjælp?
Hvis du har brug for hjælp til MeldaProduction MMultiAnalyzer stil et spørgsmål nedenfor, og andre brugere vil svare dig
Audio Software MeldaProduction Manualer

1 November 2025

27 Oktober 2025
27 Oktober 2025
27 Oktober 2025
29 August 2025
19 Juli 2025
19 Juli 2025
27 Januar 2025

31 August 2024

31 August 2024
Audio Software Manualer
- IK Multimedia
- Eventide
- Avid
- Applied Acoustics Systems
- Best Service
- Sound Particles
- Blue Cat Audio
- Apple
- Antares
- Air
- Ujam
- Honest Technology
- Slate Digital
- Xils Lab
- u-he
Nyeste Audio Software Manualer
4 November 2025

4 November 2025

4 November 2025

4 November 2025

4 November 2025

3 November 2025

31 Oktober 2025
31 Oktober 2025
8 Oktober 2025
8 Oktober 2025