Mercusys MB118-4G Manual

Mercusys Router MB118-4G

Læs gratis den danske manual til Mercusys MB118-4G (2 sider) i kategorien Router. Denne vejledning er vurderet som hjælpsom af 4 personer og har en gennemsnitlig bedømmelse på 3.8 stjerner ud af 2.5 anmeldelser. Har du et spørgsmål om Mercusys MB118-4G, eller vil du spørge andre brugere om produktet?

Side 1/2
PoE
4G LTE Outdoor Router
In the Box
Option 2: Via PoE Switch
PoE Switch
Connect an Ethernet cable from the PoE switch to the Ethernet port.
The outdoor router can be powered by a power adapter, a passive PoE injector,
a PSE device (such as a PoE switch) which complies with Power Source Class
2 (PS2) or Limited Power Source (LPS) of IEC 62368-1.
Note: To ensure the passive PoE injector is attached most securely, it is recommended to install the
injector with the Ethernet port facing upward.
Place the PoE injector on the wall and mark
the two mounting holes. Then drill into the
holes, tap two wall anchors into the holes,
and install two screws to secure the
injector*.
*The wall anchors and screws are not included in the
package.
Option One: Pole Mounting
1. Lead the end of the pole
mounting strap through the
back of the router.
2. Position the router and wrap the
pole mounting strap around the
pole. Feed the end through the
screw-block and tighten the strap
until the router is secure.
1. Gently lift the tab on the
waterproof cover and pull it
outward to detach the
waterproof cover.
2. With the gold contacts
facing down, insert the
nano SIM card into the
slot until you hear a click.
3. Connect an Ethernet cable
and/or a power adapter
according to your network
needs.
• PoE-powered:
Ethernet cable only
• DC-powered:
Wireless: Power adapter only
Wired: Ethernet cable +
Power adapter
4. Reinstall the waterproof
cover, leading the cable(s)
through the slot(s) of the
waterproof rubber.
Power Adapter
Self-tapping Screw
x2
Outdoor Router Antenna
x2
Mounting Bracket
Installation Guide
Mounting Strap
x2
Connect the antennas to the router.
For optimal performance, adjust the
direction of the antennas.
It is recommended to keep the
antennas vertical.
The outdoor router can be mounted on a pole, wall or window. Choose a
method that best suits you.
Images may dier from your actual product.
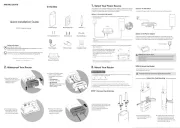
1. Select Your Power Source
UP
The outdoor router can only be used in upright direction as shown.
Quick Installation Guide
1. Connect the outdoor router to a Power over Ethernet (PoE) injector as
illustrated below:
2. Find a suitable location to place the PoE injector or mount it on the wall as
described below:
Option 1: Via Passive PoE Injector
Passive PoE Injector
Option 3: Via Power Adapter
Plug one end of the included power adapter into the power port of the
outdoor router and the other end to a standard electrical wall outlet. The
product can only be powered via the normal building installation wiring.
WARNING: Risk of Electric Shock.
For the US: Install the power cord plug only to indoor socket-outlets or to a covered Class A
GFCI receptacle that has an enclosure that is weatherproof with the attachment plug cap
inserted or removed.
For other regions: Install the power cord plug only to indoor socket-outlets or to outdoor
socket-outlets with an enclosure which can be waterproof with the attachment plug cap
inserted or removed.
STEP 1 Connect the Antennas
STEP 2 Mount the Router
Ethernet Cable
Power Adapter
©2025 MERCUSYS 7100000055 REV1.0.0
Wall Anchor x2
2. Waterproof Your Router
3. Mount Your Router
Check the following LEDs’ status. If the Internet LED is on, your outdoor router is
connected to the internet successfully.
For better Internet connectivity, make sure 2 or 3 LEDs of the Signal LED are lit.
Otherwise, try relocating the router to a spot where stronger mobile network signal
can be received.
Before You Start
Note: If the Network LED does not turn on, please refer to FAQ-Q2 in this guide.
Power On Internet On Wi-Fi On
For technical support, replacement services, user guides, and other
information, please visit https://www.mercusys.com/support/
Setup with videos
Scan the QR code, or visit
https://www.mercusys.com/support/4g-wi-fi-routers/ and search
for the setup video of your model.
Φ 3 mm
Notes:
1. The passive PoE injector supports a cable length up to 30 meters, but the value may vary due to the
environment.
2. Ensure the Ethernet cable is connected to the POE port.
Option Two: Wall Mounting
3. Tap the two wall anchors into the holes. Align the bracket with the wall
anchors and install the two self-tapping screws to secure the bracket.
Ensure the mounting bracket is not installed in the wrong direction.
4. Hook the router onto the bracket and slide it downwards until it locks
into place.
2. Hook the router onto the bracket and slide it downwards until it locks
into place.
1. Tear off the release paper of double-sided adhesive tape and stick the
bracket on the window. Apply slight pressure to ensure stronger bond.
Φ 6 mm
LED Indicator
* More lit LEDs indicates better wireless signal strength.
The signal strength is above 75%.
The signal strength is between 50% and 75%.
The signal strength is below 50%.
No mobile network signal.
The LAN port is connected.
No LAN port is connected or LAN port is not
connected properly.
Wi-Fi is enabled.
Wi-Fi is disabled.
Internet service is available.
Internet service is unavailable.
The device is powered on and working normally.
The device is initializing, RESET or upgrading.
The device is powered o.
Signal*
LED
Status
3 LEDs On
2 LEDs On
1 LED On
All O
On
O
On
O
On
O
On
Flashing
O
Indication
Wi-Fi
LAN
Internet
Power
or
3. Tap LET’S BEGIN and select your device model. Follow the step-by-step
instructions to complete the setup and connect to the internet.
2. Open the app and log in with your MERCUSYS ID. If you don’t have an
account, create one rst.
1. Download the MERCUSYS app via the app store or scan the QR code. 1. Make sure your computer is connected to the router (wired or wireless).
The default wireless network names (SSID) and password are printed on the label at the
back of the router.
2. Launch a web browser and type in http://mwlogin.net. Create a password
for future logins.
Note: If the login page does not appear, please refer to FAQ-Q1.
3. Follow the step-by-step instructions of the Quick Setup to complete the
initial configuration.
Note: Images may
dier from actual
products.
Wireless Password/PIN: XXXXXXXX
SSID:MERCUSYS_XXXX
Wireless Password/PIN: XXXXXXXX
SSID:MERCUSYS_XXXX
4. Set Up Your Router
Method ONE: Via MERCUSYS App Method TWO: Via a Web Browser
Tear Tab
• Avoid air bubbles by applying enough pressure for at
least 10 seconds.
• It is recommended that mounting on a window not be
done on a wet or rainy day.
• Ensure that the selected window is clean, smooth and
dry (a surface without ice, dust, oil or separating agents
is recommended).
• Ideal tape application is accomplished when
temperature is 21°C -38°C (70°F-100°F) and the bond is
allowed to dwell 72 hours. Initial tape application to
surfaces at temperatures below 10°C (50°F ) is not
recommended.
Notice
1. Choose a suitable location on the wall and mark the two drilling holes.
2. Drill two 6 mm diameter holes at the marked positions.
Option Three: Window Mounting
FAQ (Frequently Asked Questions)
Q1. What should I do if I cannot access the web management page?
• Reboot your router and try again.
• If the computer is set to a static IP address, change its settings to obtain
an IP address automatically.
• Make sure http://mwlogin.net is correctly entered in the web browser.
• Use another web browser and try again.
• Disable and enable the active network adapter in use.
Q2. What should I do if I cannot access the internet?
• Verify that your SIM card is an LTE or WCDMA card.
• Verify that your SIM card is in your internet service provider’s service
area.
• Verify that your SIM card has sufficient credit.
• Log in to the router's web management page, and check the following:
1) Go to Advanced > Network > PIN Management to verify if a PIN is
required. If it is, enter the correct PIN provided by your ISP.
2) Go to Advanced > Network > Internet to verify the parameters provided
by your ISP are correctly entered. If they are incorrect, click Create
Profile and enter the correct parameters, then select the new profile
from the Profile Name list.
3) Go to Advanced > Network > Data Settings to verify if the used data
exceeds the allowance. If it does, click Correct and set the used data to 0
(zero), or disable Data Limit.
4) Go to Advanced > Network > Internet to verify that Mobile Data is
enabled. If it is not, enable it to access the internet.
5) Confirm with your ISP if you are in a roaming service area. If you are, go to
Advanced > Network > Internet to enable Data Roaming.
Q3. How do I restore the router to its factory default settings?
• With the router powered on, press and hold the RESET button on the
side panel until the LED starts blinking, then release the button. Wait
until the router reboots.
• Log in to the router's web management page, go to Advanced > System
Tools > Backup & Restore, and click Factory Restore. Wait until the reset
process is complete.
Q4. What should I do if I forget my wireless network password?
• The default wireless password is printed on the product label of the
router.
• Connect a computer directly to the router via an Ethernet cable. Log in to
the router's web management page and go to Wireless to retrieve or
reset your wireless password.
• Keep the device away from re or hot environments. DO NOT immerse in
water or any other liquid.
• Do not attempt to disassemble, repair, or modify the device. If you need
service, please contact us.
• Do not use the device where wireless devices are not allowed.
• Do not use damaged charger or USB cable to charge the device.
• Do not use any other chargers than those recommended.
• Adapter should be used indoors where the ambient temperature is lower
than or equal to 40°C.
• Adapter shall be installed near the equipment and shall be easily
accessible.
• The outdoor router can be used either indoors or outdoors.
• Before mounting your router outdoors, waterproof it to ensure device
safety and performance.
• The waterproof cover must be secured before use!
• The product can only be installed by instructed person or skilled person!
• The plug on the power adapter is used as the disconnect device; the
socket-outlet shall be easily accessible.
• Use only power supplies which are provided by manufacturer and in the
original packing of this product. If you have any questions, please don't
hesitate to contact us.
• Operating Temperature: -30°C to 60°C (-22°F to 140°F).
MERCUSYS hereby declares that the device is in compliance with the
essential requirements and other relevant provisions of directives
2014/53/EU, 2009/125/EC, 2011/65/EU and (EU)2015/863.
The original EU Declaration of Conformity may be found at
https://www.mercusys.com/en/ce
MERCUSYS hereby declares that the device is in compliance with the
essential requirements and other relevant provisions of the Radio
Equipment Regulations 2017.
The original UK Declaration of Conformity may be found at
https://www.mercusys.com/support/ukca/
Safety Information


Produkt Specifikationer

Mærke: Mercusys
Kategori: Router
Model: MB118-4G

Har du brug for hjælp?

Hvis du har brug for hjælp til Mercusys MB118-4G stil et spørgsmål nedenfor, og andre brugere vil svare dig


Router Mercusys Manualer
Router Manualer

Nyeste Router Manualer