Moultrie All In One Timer Feeder Manual

Moultrie Videokamera All In One Timer Feeder

Læs gratis den danske manual til Moultrie All In One Timer Feeder (2 sider) i kategorien Videokamera. Denne vejledning er vurderet som hjælpsom af 2 personer og har en gennemsnitlig bedømmelse på 4.8 stjerner ud af 1.5 anmeldelser. Har du et spørgsmål om Moultrie All In One Timer Feeder, eller vil du spørge andre brugere om produktet?

Side 1/2
CA IONUT : WEAR EYE PROTECTION
Instructions for All In One Timer Feeder
THANK YOU for your purchase of the All-In-One Timer Feeder. Please read this
sheet before operating the unit. If you should have any questions about this
product or any other Moultrie product, please contact us using the information
of this sheet. To help us to better serve you, please submit your Warranty
information
online at http://www.moultriefeeders.com/warranty
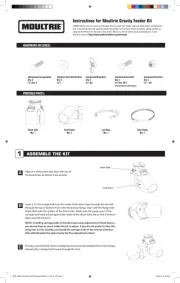
PURCHASED WITH EXPANDABLE BUCKET
A1
Expand feeder by pulling rmly on both ends until sections click and
lock permanently into place.
If sections do not lock into place, conrm that the internal alignment
ribs are in the correct position. Remove the lid and look down inside
bucket. Verify that the vertical ribs along the side are aligned with the
small notches located in the top of each section.
PURCHASED WITHOUT EXPANDABLE BUCKET
A2
Turn bucket over, measure and mark the center of the bottom.
Center the provided template on the bottom of the bucket
and secure with tape. Percez trois trous de montage du chargeur de 8 mm.
Using a hole saw, drill a 2-1/4” hole in the center of the
bottom of your bucket.
Rotate the mounts outward on the feeder
mounting bracket. Attach feeder to bucket
using three provided 1/4”-20 x 1” bolts,
washers and nuts as shown.
Solar Panel Receptacle
The Moultrie Solar Panel upgrade (MFA-12602
or MFHP12349) may greatly extend battery life
and may be purchased at a Moultrie distributor
or by visiting moultriefeeders.com
NOTE: Make sure to insert rechargeable
batteries before attaching solar panel.
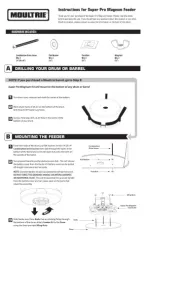
The All-In-One Feeder will mount to any drum or bucket.
Feeder Mounting Holes
MFH-ATK_Manual-ENGLISH_9-14-20.indd 1
MFH-ATK_Manual-ENGLISH_9-14-20.indd 1MFH-ATK_Manual-ENGLISH_9-14-20.indd 1 9/15/20 7:58 AM
9/15/20 7:58 AM
9/15/20 7:58 AM
9/15/20 7:58 AM9/15/20 7:58 AM
MODE UP DOWN
7:00
AM
SET TIMER 1
MODE UP DOWN
:06
AM
SET TIMER 1
RUN - TIME
MODE UP DOWN
:05
GET AWAY
CA IONUT : WEAR EYE PRO IOTECT N
09142020 / MFH-ATK / MFH-AT5
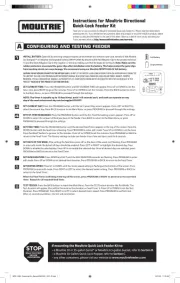
CONFIGURING AND TESTING FEEDER
C
Your feeder will feed up to four times per day and has been factory set to feed at 7:00am and 6:00pm for 6 seconds.
To change factory settings or add additional feed times, follow the instructions below.
SET TIME OF DAY: Press the UP or DOWN button until the correct time of day appears.
Press and release button to single-step through the minutes or hold down to advance quickly.
SET FEED TIMES: Press the SET button until the correct timer number appears in the
upper right hand corner as shown. Press the UP or DOWN button to set the Feed Time.
Note: Factory settings are 7am and 6pm.
SET RUN DURATION: Press the SET button again to set the RUN-TIME SECONDS which can
range from zero to twenty seconds. Adjust RUN-TIME SECONDS using the chart below. Set the
RUN-TIME SECONDS to zero to disable the specic feed time. Note: Factory setting is 6 seconds.
TEST FEEDER: PRESS AND HOLD the SET button while the RUN-TIME SECONDS are displayed. Release the button and get away from the
feeder when the message “TESTING GET AWAY” appears on the display.
RUN TIME (sec.)
Approx. Feed Dispensed (lbs.)
4
1.0
6
1.5
8
1.9
10
2.4
12
2.8
14
3.3
16
3.7
18
4.2
20
4.6
POSITION TIMER: The timer may be rotated outward for easier viewing.
Gently pull down on the button-side of the timer as shown.
Battery Information:
- Do Not Mix Old and New Batteries
- Do Not Mix Alkaline, Standard, or Rechargeable Batteries
INSTALL BATTERIES
B
To install the batteries or adjust the feed settings, remove the bottom
of the feeder by rotating it counter clockwise as shown. Install four (4)
AA alkaline or lithium batteries with the negative side of the battery
going to the battery holder spring clip. Replace bottom by rotating
clockwise until secure.
NOTE:
Do not mix old and new batteries.
Always replace ALL the batteries at the same time.
Do not mix battery types.
If using solar panel, insert rechargeable batteries.
Rotate
counter-clockwise
to open
FCC COMPLIANCE
This device complies with part 15 of the FCC Rules. Operation is subject to the following two conditions: (1) This device may not cause harmful interference, and (2) this device must accept any interference received, including interference that may cause undesired operation.
For devices approved under Part 15, the user’s manual or instruction manual for an intentional or unintentional radiator shall caution the user about changes or modications to the device (Section 15.21).
NOTE: This equipment has been tested and found to comply with the limits for a Class B digital device, pursuant to part 15 of the FCC Rules. These limits are designed to provide reasonable protection against harmful interference in a residential installation. This equipment generates, uses and
can radiate radio frequency energy and, if not installed and used in accordance with the instructions, may cause harmful interference to radio communications. However, there is no guarantee that interference will not occur in a particular installation. If this equipment does cause harmful
interference to radio or television reception, which can be determined by turning the equipment o and on, the user is encouraged to try to correct the interference by one or more of the following measures:
– Reorient or relocate the receiving antenna.
– Increase the separation between the equipment and receiver.
– Connect the equipment into an outlet on a circuit dierent from that to which the receiver is connected.
– Consult the dealer or an experienced radio/TV technician for help.
Our Service Department will gladly answer any questions you have.
www.moultriefeeders.com/support
MFH-ATK_Manual-ENGLISH_9-14-20.indd 2
MFH-ATK_Manual-ENGLISH_9-14-20.indd 2MFH-ATK_Manual-ENGLISH_9-14-20.indd 2 9/15/20 7:58 AM
9/15/20 7:58 AM
9/15/20 7:58 AM
9/15/20 7:58 AM9/15/20 7:58 AM


Produkt Specifikationer

Mærke: Moultrie
Kategori: Videokamera
Model: All In One Timer Feeder

Har du brug for hjælp?

Hvis du har brug for hjælp til Moultrie All In One Timer Feeder stil et spørgsmål nedenfor, og andre brugere vil svare dig


Videokamera Moultrie Manualer

Videokamera Manualer

Nyeste Videokamera Manualer

Sony

Sony HDCU4300 Manual

29 August 2025
Sony

Sony Alpha A7R II Manual

28 August 2025
Sony

Sony HXR-MC1P Manual

28 August 2025
Minolta

Minolta XG E Manual

28 August 2025
LiveU

LiveU LU600 Manual

27 August 2025
Nilox

Nilox NXACBIKECAM Manual

26 August 2025
Extech

Extech BR-5CAM Manual

25 August 2025
Samsung

Samsung VP-M105 Manual

24 August 2025