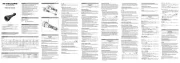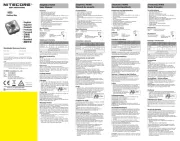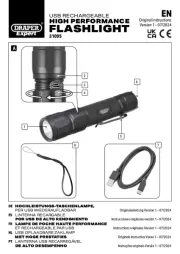
MH25GTS
• Maximum output of 1,800 lumens
• USB Charging
• Blue power indicator
High Performance
Dual-Fuel Tactical Flashlight
(English) MH25GTS (Deutsch) MH25GTS
(Francais)
MH25GTS Features
• Utilizes CREE XHP35 HD LED, with a maximum output of 1,800 lumens
• Maximum peak beam intensity of 23,100cd and maximum throw of 304 meters
•
An optical system combined with crystal coating and “Precision Digital Optics Technology” (PDOT)
• Higheciencyconstantcircuitprovidesstableoutputupto250hours
• Themetalsideswitchcontrols5brightnesslevelsand3specialmodes
• STROBEModeofrandomlychangingfrequenciesforstrongerdizzyingeects
• A power indicator beneath the side switch indicates the remaining battery power
• Thepowerindicatorcanalsodisplaythebatteryvoltage(±0.1V)
• Built-in Li-ion battery charging circuit with a Micro-USB port
• NITECORE 18650 rechargeable Li-ion battery (NL1835HP 3,500mAh) included
• Rigid double layer tube design
•
IncorporatedAdvancedTemperatureRegulation(ATR)module(PatentNo.ZL201510534543.6)
• Electronicreversepolarityprotection
• Optical lenses with double-sided scratch resistant coating
• Constructed from aero grade aluminum alloy
• HAIIImilitarygradehard-anodizednish
• Waterproof in accordance with IPX8 (2 meters submersible)
• Impact resistant to 1 meter
• Tail stand capability
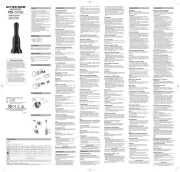
Specications
Accessories
Length: 150mm(5.91”)
HeadDiameter: 34mm(1.34”)
TailDiameter: 26mm(1.02”)
Weight: 124g(4.37oz)
NITECORE 18650 Rechargeable
Li-ion Battery (NL1835HP 3,500mAh),
USB Charging Cable, Holster, Clip,
Tactical Ring, Lanyard, Spare O-ring
Battery Options
Type NominalVoltage Compatibility
NITECORE NL1835HP (3500mAh) 18650 3.6V Y (Recommended)
IMR 18650 High-Drain
Rechargeable Li-ion Battery
IMR18650 3.6V/3.7V Y (Recommended)
18650 Rechargeable Li-ion Battery
(Outputover8A)
18650 3.6V/3.7V Y (Compatible)
Primary Lithium Battery CR123 3V Y (Compatible)
Rechargeable Li-ion Battery RCR123 3.6V/3.7V Y (Compatible)
18650 Rechargeable Li-ion Battery
(Output below 8A)
18650 3.6V/3.7V N (Incompatible)
Technical Data
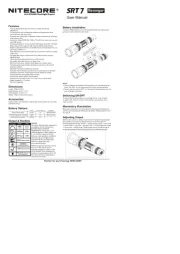
Battery Installation
FL1 STANDARD
TURBO HIGH MID LOW ULTRALOW STROBE BEACON SOS
1800
Lumens
950
Lumens
240
Lumens
70
Lumens
1
Lumen
1800
Lumens
1800
Lumens
1800
Lumens
*30min 2h
5h45min
19h 250h ─ ─ ─
304m 208m 115m 66m 6m ─ ─ ─
23100cd 10900cd 3300cd 1100cd 10cd ─ ─ ─
1m (Impact Resistance)
IPX8, 2m (Waterproof and Submersible)
Note:Thestateddataismeasuredinaccordancewiththeinternationalashlighttestingstandards
ANSI/NEMAFL1,using1x18650Li-ionbattery(3500mAh)underlaboratoryconditions.Thedata
mayvaryinrealworlduseduetodierentbatteryusageorenvironmentalconditions.
* TheruntimeforTURBOmodeistestedwithoutthetemperatureregulation.
*
TURBOAvailability:TheTURBOlevelisonlyaccessiblewhenusingan18650rechargeableLi-ion
batteryofanoutputover8AoranIMR18650high-drainrechargeableLi-ionbattery.Itisinaccessible
whenusingCR123/RCR123batteries.
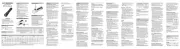
Insert the battery(s) as illustrated and
screwtotightenthetailcap.
Note: After the battery insertion, the
powerindicatorwillashtoindicatethe
remainingbatterypower.Pleaserefer
to the “Power Indication” section of this
manualformoredetails.
Warnings:
1.Ensurethebattery(s)is/areinserted
withthepositiveendtowardsthe
head.Theproductwillnotworkifthe
battery(s)is/areincorrectlyinserted.
2.CAUTION!Possibledangerous
radiation!Don'tlookintothelight!
Maybedangerousforyoureyes.
3.Whenthepowerlevelislowusingan
IMR 18650 Li-ion battery, please stop
usingtheproductandremovethe
batterytopreventdamagetothebattery.
4.Whentheproductiskeptinabackpackorleftunusedforprolongedtime,pleaseremoveall
batteriestopreventaccidentalactivationorbatteryleakage.
5.DONOTsubmergethelightintoanyliquidwhenitishot.Doingsomaycauseirreparable
damagetothelightduetothedierenceofairpressureinsideandoutsideofthetube.
Tactical Momentary Illumination
HalfpressandholdtheTailSwitchtoturnonthelightmomentarily.Releasetoturnito.
On / O
On:Whenthelightiso,presstheTailSwitchuntilaclicksoundisheardtoturnonthelight.
O:Whenthelightison,presstheTailSwitchuntilaclicksoundisheardtoturnothelight.
Note: MH25GTShasmodememory.Whenreactivated,theashlightwillautomaticallyaccess
thepreviousmemorizedbrightnesslevelorSTROBEmode(SOSandBEACONexcluded).
Brightness Levels
When the light is on, short press the mode button to cycle through the following brightness
levels:ULTRALOW–LOW–MID–HIGH–TURBO.
Direct Access to ULTRALOW
Whenthelightiso,pressandholdtheModeButton,thenclicktheTailSwitchandrelease
bothtoaccessULTRALOW.(Thisaccessdoesnothavethemodememory.)
Momentary Access to TURBO
Whenthelightison,pressandholdtheModeButtontoaccessTURBO.Releasetoreturntothe
previousmemorizedbrightnesslevel.
Special Mode (STROBE / BEACON / SOS)
Access:Whenthelightison,doublepresstheModeButtontoaccessSTROBE.
Switch: When STROBE is on, long press the Mode Button to cycle through the following special
modes:BEACON–SOS–STROBE.
Exit: When one of the special modes is on, short press the Mode Button to exit special modes
andaccessthepreviousmemorizedbrightnesslevel;orclicktheTailSwitchtoexitspecial
modesandturnothelight.
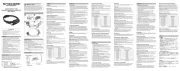
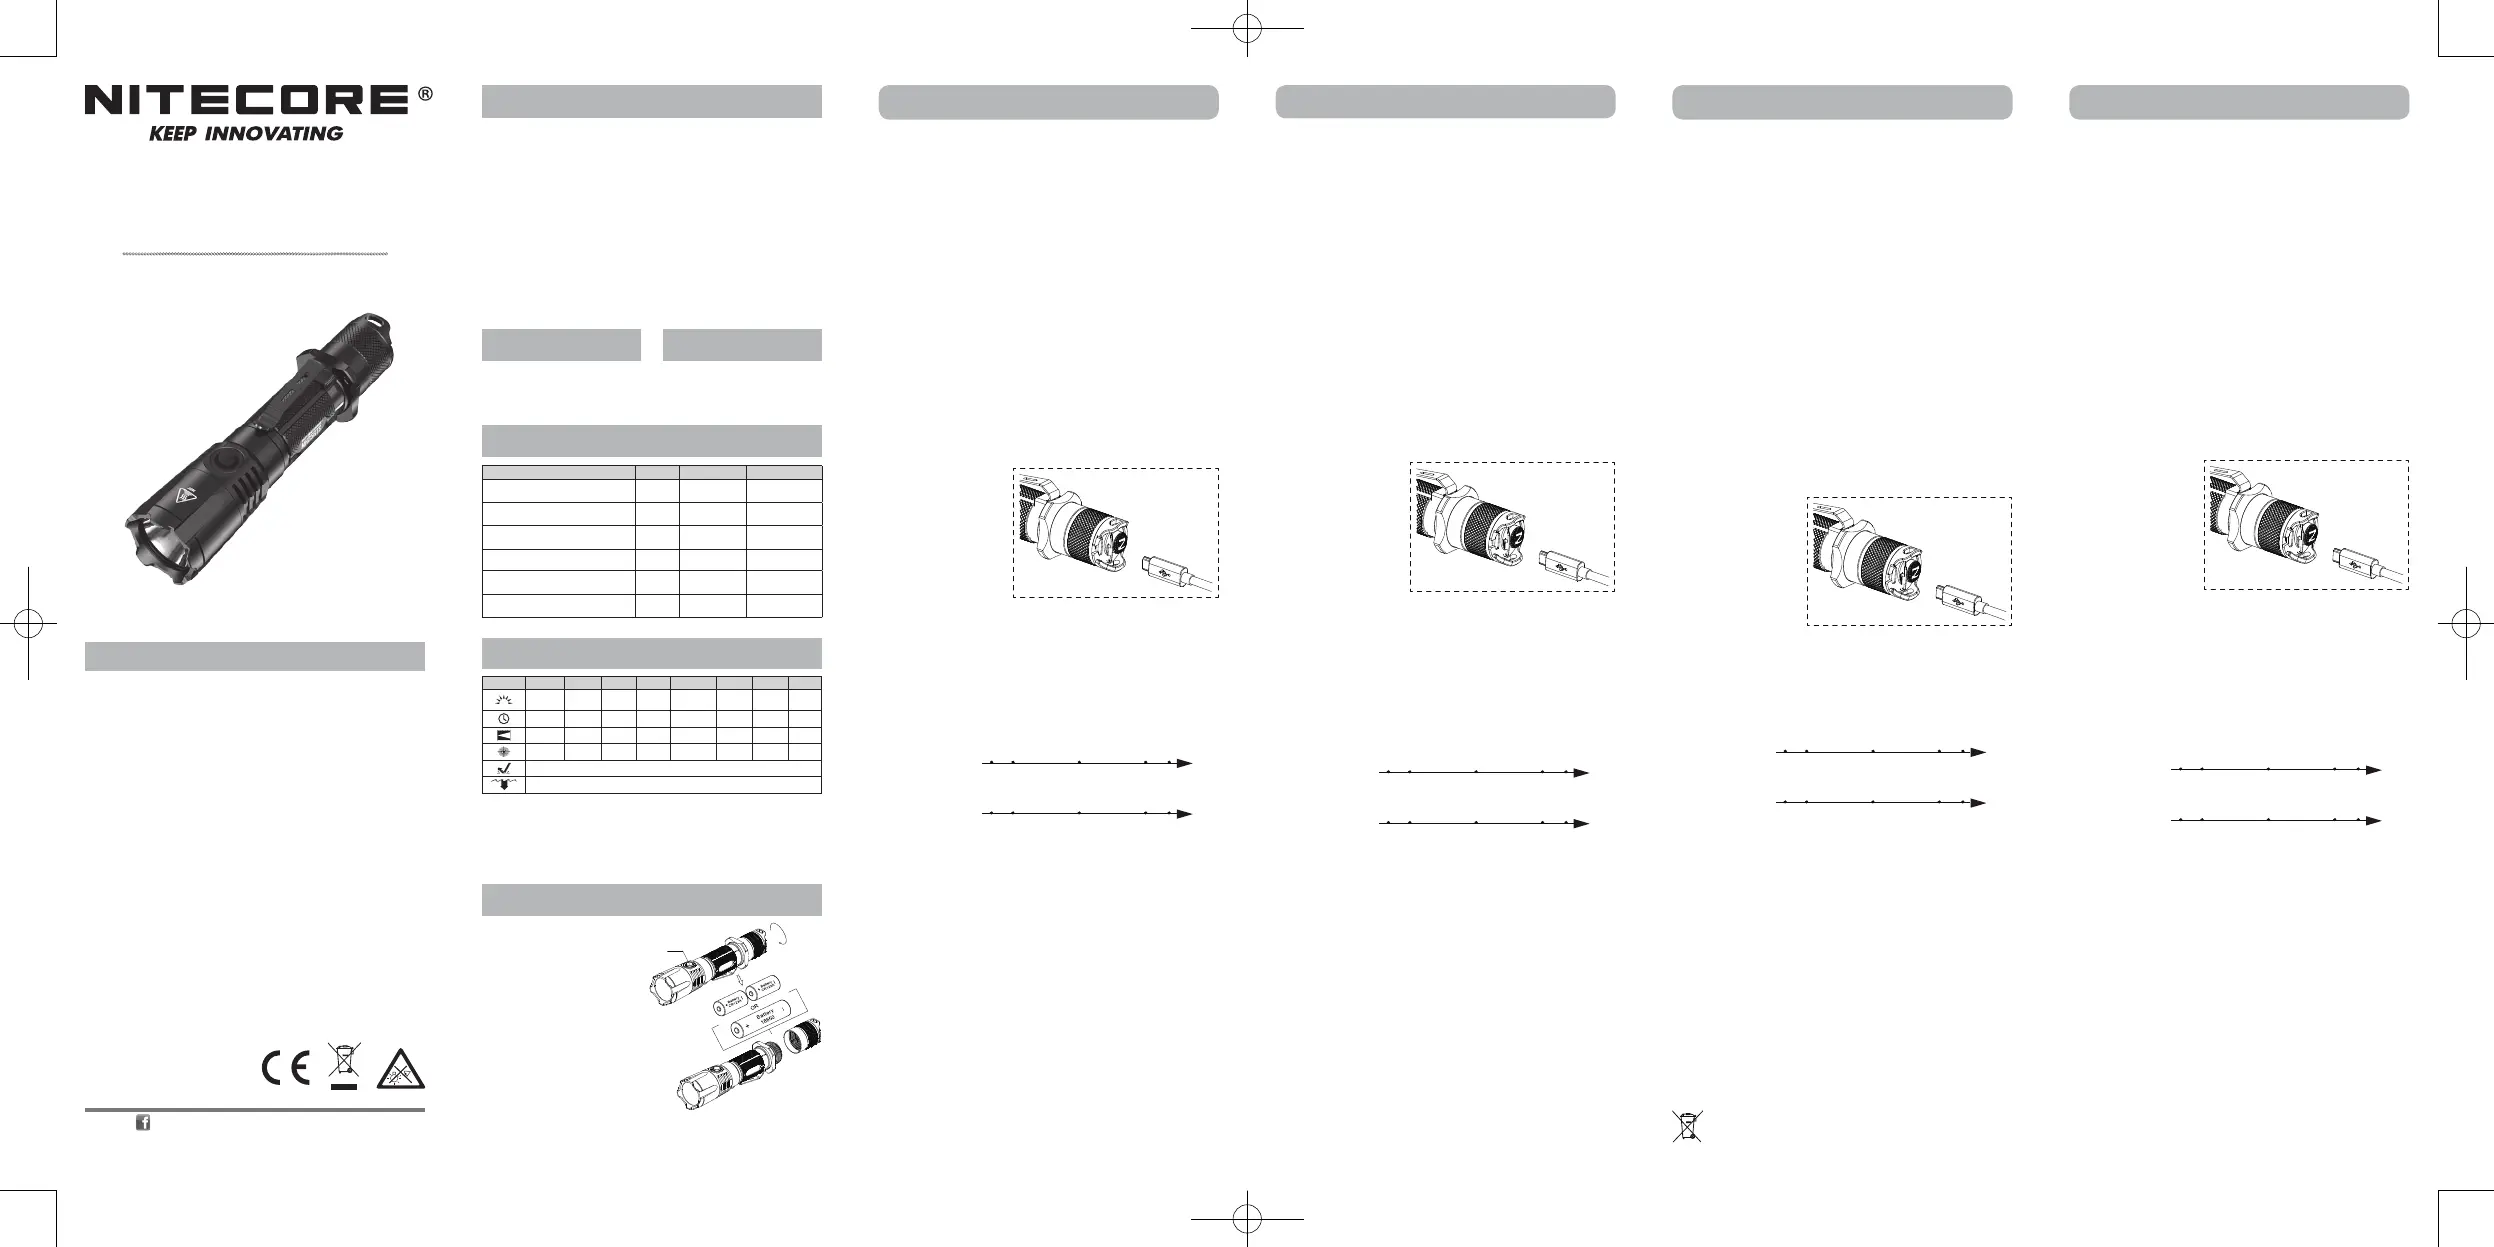
Charging Function
MH25GTS is equipped with an
intelligentchargingsystem.As
illustrated, screw to fully tighten
the tail cap after inserting the
battery, and then use the USB
cable to connect an external power
supply(e.g.aUSBadaptor,a
computer or other USB charging
devices)totheMicro-USBport
located on the tail cap to begin the
chargingprocess.
• When the charging status is
normal, the charging indicator
willashslowlytoinformthe
user.
• When the battery is fully charged, MH25GTS will cease the charging process and the charging
indicatorwillbecomesteadilyturnedontoinformtheuser.
• Whenthechargingstatusisabnormal(e.g.thebatteryisbroken/insertedincorrectly),
MH25GTSwillceasethechargingprocessandthechargingindicatorwillashquicklyto
informtheuser.
• Thechargingtimeforan18650Li-ionbatteryisapprox.8hours.
Power Indication
• Whenthebatteryisinserted,thepowerindicatorbeneaththesideswitchwillashtoshow
thebatteryvoltage(±0.1V).Forexample,whenthebatteryvoltageisat4.2V,thepower
indicatorwillash4timesfollowedbyaonesecondpauseand2moreashes.Dierent
voltagesrepresentthecorrespondingremainingbatterypowerlevels:
1×18650 battery
2×CR123 batteries
Note:whenusingtwoCR123/RCR123inseries,theindicatorwillshowtheaveragevoltage
betweenthetwobatteries.
• WhentheModeButtonispressedwhenthelightiso,thepowerindicatorwillashto
indicate the remaining power of the batteries:
1.Flashingthreetimesindicatesthatthepowerisabove50%;
2.Flashingtwiceindicatesthatthepowerisbelow50%;
3.Flashingonceindicatesthatthepowerisbelow10%.
• Whenthelightisonandthepowerleveliscloseto50%,thepowerindicatorwillashevery
2secondstoinformtheuser.Whenthelightisonandthepowerisclosetodepleted,the
powerindicatorwillashquicklyandcontinuouslytoinformtheuser.
ATR
WithincorporatedAdvancedTemperatureRegulationmodule,MH25GTSregulatesitsoutput
andadaptstotheambientenvironment,maintainingoptimalperformance.
Changing Batteries
Thebatteriesshouldbereplacedwhenthepowerindicatorashesquicklyandcontinuouslyand
theoutputappearstobedimortheashlightbecomesunresponsiveduetolowpower.
Maintenance
Every6months,threadsshouldbewipedwithacleanclothfollowedbyathincoatingofsilicon-
basedlubricant.
3.5V 3.7V 3.9V 4.2V
Low power Full power
4.8V 5.6V 6.0V 6.4V
ACHTUNG! MöglicherweisegefährlicheoptischeStrahlung!BeiBetriebnichtdirektindasLicht
blicken.KannfürdieAugengefährlichsein.
Momentlicht
DrückenSiedenSchalterderHeckkappehalbdurch,umdasLichteinzuschalten.Zum
AusschaltendieTasteeinfachloslassen.
Ein-/Ausschalten
Einschalten:DrückenSiedenHeckschalterganzdurch,bisSieein"Click"hören.
Ausschalten:DrückenSiedenHeckschaltererneutganzdurch,bisSieden"Click"hören.
Hinweis: Die MH25GTS speichert die zuletzt genutzte Helligkeitsstufe sowie den Strobe-Mode
zumnächstenEinschalten(SOS-undLocation-Beacon-Modewerdennichtgespeichert).
Helligkeitsstufen
BeieingeschalteterMH25GTSdrückenSiewiederholtdenMode-Schalter,umnacheinander
fortlaufenddurchdieHelligkeitsstufen"Ultralow"-"Low"-"Mid"-"High"-"Turbo"zuschalten.
Direkter Zugang zu "Ultralow"
WenndasLichtausist,drückenundhaltenSiedenMode-Schalter.DannklickenSieaufden
HeckschalterundlassenbeideSchalterlos,umauf"Ultralow"zuzugreifen.(BeidiesemZugri
wirdderModenichtgespeichert.)
Momentlicht in "Turbo"
WenndasLichtanist,drückenundhaltenSiedenMode-Schalter,umauf"Turbo"zuzugreifen.
WennSiedenMode-SchalterloslassenkehrenSiezurvorhergenutztenHelligkeitsstufezurück.
Spezial-Modi (Strobe / Location-Beacon/ SOS )
KlickenSiezweimalkurznacheinanderaufdenMode-Schalter,umindenStrobe-Modezu
schalten.ImStrobe-ModedrückenundhaltenSiedenMode-Schalter,umnacheinander
fortlaufenddurchdieModi"Location-Beacon"-SOS"und"Strobe"zuschalten.UmdenSpezial-
ModezuverlassenundzurzuletztgenutztenHelligkeitsstufezurückzukehren,drückenSieeinfach
kurzdenMode-SchalteroderbetätigenSiedenHeckschalter,umdasLichtauszuschalten.
Ladefunktion
MH25GTS ist mit einem intelligenten
Ladesystemausgestattet.Schrauben
Sie die Endkappe nach dem Einlegen
des/derAkkusfestundschließenSie
dann - wie abgebildet - ein externes
Netzteil(z.B.einenUSB-Adapter,einen
Computer oder andere USB-Ladegeräte)
überdasUSB-KabelandenMicro-USB-
Anschluss in der Endkappe an, um den
Ladevorgangzubeginnen.
• Wenn der Ladezustand normal ist,
blinktdieLadeanzeigelangsam.
• WennderAkkuvollständig
geladenist,beendetdieMH25GTSdenLadevorgangunddieLadeanzeigeleuchtetstetig.
• WennderLadezustandunnormalist(z.B.wennderAkkudefektoderfalscheingelegtist),
beendetdieMH25GTSdenLadevorgangunddieLadeanzeigeblinktschnell.
• DieLadezeitfüreinen18650Lithium-Ionen-Akkubeträgtca.8Stunden.
Leistungsanzeige
•
Wenn der Akku eingelegt ist, blinkt die Betriebsanzeige unter dem seitlichen Schalter, um die
Akkuspannung(±0,1V)anzuzeigen.WenndieSpannungbeispielsweise4,2Vbeträgt,blinktdie
Betriebsanzeigeviermal,gefolgtvoneinerPausevoneinerSekundeundzweiweiterenBlinksignalen.
UnterschiedlicheSpannungenrepräsentierendieentsprechendenverbleibendenLeistungspegel:
1×18650 battery
2×CR123 batteries
Hinweis:WennSiezweiCR123/RCR123inReiheverwenden,zeigtdieAnzeigedie
durchschnittlicheSpannungderbeidenAkkus/Batterienan.
• WennderMode-SchalterbeiausgeschaltetemLichtgedrücktwird,blinktdieBetriebsanzeige,
umdieverbleibendeBatterieleistunganzuzeigen:
1.DreimaligesBlinkenzeigtan,dassdieLeistungüber50%liegt;
2.ZweimaligesBlinkenzeigtan,dassdieLeistungunter50%liegt.
3.EinmaligesBlinkenzeigtan,dassdieLeistungunter10%liegt.
•
WenndasLichtanistunddieLeistungfast50%beträgt,blinktdieBetriebsanzeigealle2
Sekunden.WenndasLichtanistundderStromfasterschöpftist,blinktdieStromanzeigeschnell.
ATR
Die automatische Temperaturregulierung (ATR) steuert die Ausgangsleistung der MH25GTS
entsprechenddenBedingungenderUmgebung,umeineoptimaleLeistungzugewährleisten.
Batteriewechsel / Auaden der Akkus
Die Batterien sollten ausgetauscht oder die Akkus aufgeladen werden, wenn die Betriebsanzeige
schnellblinkt,derLichtkegeldunkelerscheintoderdieTaschenlampenichtmehrreagiert.
Wartung
Alle6MonatesolltedasGewindemiteinemsauberenTuchabgewischtundanschließendmit
einerdünnenSchichtSilikonfettgeschmiertwerden.
Allgemeine Hinweise
AltbatteriengehörennichtindenHausmüll.SiekönnengebrauchteBatterienunentgeltlichanunser
Versandlagerzurückgeben.AlsVerbrauchersindSiezurRückgabevonAltbatteriengesetzlichverpichtet.
Entsorgung von Elektro- und Elektronikgeräten
DiedurchgestricheneMülltonnebedeutet,dassSiegesetzlichverpichtetsind,diese
GeräteeinervomunsortiertenSiedlungsabfallgetrenntenErfassungzuzuführen.Die
EntsorgungüberdieRestmülltonneoderdiegelbeTonneistuntersagt.Enthalten
dieProdukteBatterienoderAkkus,dienichtfestverbautsind,müssendiesevorder
EntsorgungentnommenundgetrenntalsBatterieentsorgtwerden.
3.5V 3.7V 3.9V 4.2V
Low power Full power
4.8V 5.6V 6.0V 6.4V
Eclairage momentané
Appuyezsurl’interrupteurjusqu’àmi-coursepouréclairer.Relâchezsimplementpouréteindre
ON/OFF
Pourallumer:Pressezl’interrupteurjusqu’àentendreunclic.
Pouréteindre:Pressezunenouvellefoisl’interrupteurjusqu’àentendreunclic
Note :lalampepossèdeunefonctionmémoire.Quandelleestréactivée,ellerevientaumode
etniveauenregistréouenmodestroboscope.(lesmodesSOSetBalisenesontpasconcernés).
Niveaux d’éclairage
Lorsquelalampeestallumée,appuyezplusieursfoissurleboutonModepournaviguerentre
lesniveauxTrèsbas,Bas,Moyen,Fort,turbo.
Accès direct à Ultra low
Quandlalumièreestéteinte,maintenirappuyéleboutonmode,puisappuyerlégèrementsurle
boutonarrièreetrelacherenmêmetempspourentreenmodeultralow.
Accès direct à Turbo
Quandlalumièreestallumé,maintenirappuyéleboutonmode.Relâcherpourreveniraumode
précédent.
Mode Spécial Stroboscope/SOS/Balise
Lorsque la lampe est allumée, appuyez sur le bouton Mode pendant plus d’une seconde pour
accéderaumodeStroboscope.
Danscemode,appuyezànouveausurleboutonpendantplusd’unesecondepournaviguer
entrelesmodesSOS,baliseetstroboscope.Pourquittercesmodesetreveniraudernierniveau
d’éclairageutilisé,appuyezsimplementsurleboutonModeànouveau.
Charge
La lampe MH25GTS est équipée
d’uncircuitdechargeintelligent.
Commeillustré,vissezàfond
lecapuchonarrièreaprèsavoir
inséré la batterie, puis utilisez le
câbleUSBpourconnecterune
alimentation externe (par exemple
un adaptateur USB, un ordinateur
ou d’autres périphériques de
chargement USB) au port micro-
USB situé sur l’ arrière pour
commencer le processus de
charge.
• Lorsquel'étatdechargeest
normal, le témoin de charge
clignotelentementpourinformerl'utilisateur.
• Lorsque la batterie est terminée, MH25GTS interrompt le processus et le témoin de charge
resteallumépourinformerl'utilisateur.
• Lorsquelachargenefonctionnepasnormalement(parexemple,labatterieestcassée/
insérée de manière incorrecte), MH25GTS arrêtera le processus de charge et le témoin de
chargeclignoterarapidementpourinformerl'utilisateur.
• LetempsdechargepourunebatterieLi-ion18650estd’environ8heures.
Batterie
• Lorsquelabatterieestinsérée,levoyantd'alimentationsituésousleboutonlatéralclignote
pourindiquerlatensiondelabatterie(±0,1V).Parexemple,lorsquelatensiondelabatterie
està4,2V,levoyantd'alimentationclignote4fois,suivid'unepaused'unesecondeetde2
autresclignotements.Diérentestensionsreprésententlesniveauxdepuissancerestantsde
la batterie :
1×18650 battery
2×CR123 batteries
Note:lorsquevousutilisezdeuxCR123/RCR123ensérie,l’indicateurachelatension
moyenneentrelesdeuxbatteries.
• LorsquelalampeestéteinteetvousappuyezsurleboutonMode,letémoind'alimentation
clignote pour indiquer la puissance restante:
3clignotementsindiquentquelapuissanceestsupérieureà50%;
2clignotementsindiquentquelapuissanceestinférieureà50%;
1clignotementindiquequelapuissanceestinférieureà10%.
• Lorsquelalampeestalluméeetqueleniveaud’alimentationestprochede50%,levoyant
d’alimentationclignotetoutesles2secondespourinformerl’utilisateur.Lorsquelalampeest
alluméeetquelecourantestpresqueépuisé,levoyantd'alimentationclignoterapidement
encontinupourinformerl'utilisateur.
Système ATR
Lesystèmeavancéderégulationdelatempérature(ATR)permetàlalamped’ajusterdefaçon
dynamiquesonniveaud’éclairageenfonctiondesatempératureinterne.Celapermetd’éviter
toutesurchauedelalampeetd’augmentersaduréedevie.
Changement des batteries
Si la lampe ne répond plus ou si l’intensité d’éclairage diminue, si l’indicateur lumineux clignote
rapidement,merciderechargerlesbatteries.
Maintenance
Touslessixmois,leletagedoitêtreessuyéavecunchionpropreetrecouvertd’unlubriant
àbasedesilicone.
3.5V 3.7V 3.9V 4.2V
Low power Full power
4.8V 5.6V 6.0V 6.4V
Warranty Service
All NITECORE
®
productsarewarrantedforquality.AnyDOA/defectiveproductcan
beexchangedforareplacementthroughalocaldistributor/dealerwithin15days
ofpurchase.Afterthat,alldefective/malfunctioningNITECORE
®
products can be
repairedfreeofchargewithin60monthsfromthedateofpurchase.Beyond60
months,alimitedwarrantyapplies,coveringthecostoflaborandmaintenance,but
notthecostofaccessoriesorreplacementparts.
Thewarrantywillbenulliedif
1.theproduct(s)is/arebrokendown,reconstructedand/ormodiedbyunauthorized
parties;
2.theproduct(s)is/aredamagedduetoimproperuse;(e.g.reversedpolarity
installation)
3.theproduct(s)is/aredamagedduetobatteryleakage.
For the latest information on NITECORE
®
productsandservices,pleasecontacta
local NITECORE
®
distributororsendanemailtoservice@nitecore.com
※Allimages,textandstatementsspeciedhereinthisusermanualareforreference
purposeonly.Shouldanydiscrepancyoccurbetweenthismanualandinformation
speciedonwww.nitecore.com,SysmaxInnovationsCo.,Ltd.reservestherights
to interpret and amend the content of this document at any time without prior
notice.
SYSMAX Innovations Co., Ltd.
TEL: +86-20-83862000
FAX: +86-20-83882723
E-mail: info@nitecore.com
Web: www.nitecore.com
Address:Rm2601-06,CentralTower,
No.5XiancunRoad,Tianhe
District,Guangzhou,510623,
Guangdong,China
Please find us on facebook : NITECORE Flashlight
Thanks for purchasing NITECORE!
MH271225GTS21
Made in China
(Español) MH25GTS
Tactical Momentary Illumination
HalfpressandholdtheTailSwitchtoturnonthelightmomentarily.Releasetoturnito.
On / O
On: Whenthelightiso,presstheTailSwitchuntilaclicksoundisheardtoturnonthelight.
O:Whenthelightison,presstheTailSwitchuntilaclicksoundisheardtoturnothelight.
Note:MH25GTShasmodememory.Whenreactivated,theashlightwillautomaticallyaccess
thepreviousmemorizedbrightnesslevelorSTROBEmode(SOSandBEACONexcluded).
Brightness Levels
When the light is on, short press the mode button to cycle through the following brightness
levels:ULTRALOW–LOW–MID–HIGH–TURBO.
Direct Access to ULTRALOW
Whenthelightiso,pressandholdtheModeButton,thenclicktheTailSwitchandrelease
bothtoaccessULTRALOW.(Thisaccessdoesnothavethemodememory.)
Momentary Access to TURBO
Whenthelightison,pressandholdtheModeButtontoaccessTURBO.Releasetoreturntothe
previousmemorizedbrightnesslevel.
Special Mode (STROBE / BEACON / SOS)
Access:Whenthelightison,doublepresstheModeButtontoaccessSTROBE.
Switch: When STROBE is on, long press the Mode Button to cycle through the following special
modes:BEACON–SOS–STROBE.
Exit: When one of the special modes is on, short press the Mode Button to exit special modes
andaccessthepreviousmemorizedbrightnesslevel;orclicktheTailSwitchtoexitspecial
modesandturnothelight.
Función de carga
La MH25GTS está equipada con
unSistemainteligentedecarga.
Como se muestra, atornille hasta
apretar por completo la tapa
trasera después de insertar la
batería, luego utilice el cable
USB para conectar una fuente
de alimentación externa (por
ejemplo, un adaptador USB,
una computadora o algún otro
dispositivodecarga)alpuerto
Micro-USB localizado en la tapa
trasera para comenzar el proceso
decarga.
• Cuando el proceso de carga es normal, el indicador de carga parpadeará lentamente para
informaralusuario.
• Cuando la batería está completamente cargada, la MH25GTS detendrá el proceso de carga y
elindicadordecargapermaneceráencendidoparainformaralusuario.
• Cuandoelprocesodecargaesanormal,(porejemplo,labateríaestárota/insertada
incorrectamente), la MH25GTS detendrá el proceso de carga y el indicador de carga
parpadearárápidamenteparainformaralusuario.
• EltiempodecargaparaunabateríaLi-ion18650esdeaproximadamente8horas.
Power Indication
• Whenthebatteryisinserted,thepowerindicatorbeneaththesideswitchwillashtoshow
thebatteryvoltage(±0.1V).Forexample,whenthebatteryvoltageisat4.2V,thepower
indicatorwillash4timesfollowedbyaonesecondpauseand2moreashes.Dierent
voltagesrepresentthecorrespondingremainingbatterypowerlevels:
1×18650 battery
2×CR123 batteries
Note: whenusingtwoCR123/RCR123inseries,theindicatorwillshowtheaveragevoltage
betweenthetwobatteries.
• WhentheModeButtonispressedwhenthelightiso,thepowerindicatorwillashto
indicate the remaining power of the batteries:
1.Flashingthreetimesindicatesthatthepowerisabove50%;
2.Flashingtwiceindicatesthatthepowerisbelow50%;
3.Flashingonceindicatesthatthepowerisbelow10%.
• Whenthelightisonandthepowerleveliscloseto50%,thepowerindicatorwillashevery
2secondstoinformtheuser.Whenthelightisonandthepowerisclosetodepleted,the
powerindicatorwillashquicklyandcontinuouslytoinformtheuser.
ATR
WithincorporatedAdvancedTemperatureRegulationmodule,MH25GTSregulatesitsoutput
andadaptstotheambientenvironment,maintainingoptimalperformance.
Changing Batteries
Thebatteriesshouldbereplacedwhenthepowerindicatorashesquicklyandcontinuouslyand
theoutputappearstobedimortheashlightbecomesunresponsiveduetolowpower.
Maintenance
Every6months,threadsshouldbewipedwithacleanclothfollowedbyathincoatingofsilicon-
basedlubricant.
3.5V 3.7V 3.9V 4.2V
Low power Full power
4.8V 5.6V 6.0V 6.4V