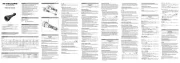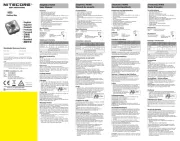
EC4GTS
• Max output of 1,800 lumens & 396 meters
• Unibody die-cast technology
• Dual side switch design
High-performance
blazing searchlight
• High-performance blazing searchlight
• Utilizes CREE XHP35 HD LED, with a maximum output of
1,800 lumens
• Maximum peak beam intensity of 39,220cd and maximum
throw of 396 meters
• Made with unibody die-cast technology
• Thumbscrew lock on tail cap doubles as a tripod connector
• Crystal coating technology combined with “Precision Digital
Optics Technology” for unparalleled reector performance
• High eciency constant circuit provides stable output up to
380 hours
• Dual switch design enables quick switch to 5 levels of
brightness and 3 special modes
• A power indicator beneath the Power switch indicates
remaining battery power (Patent No. ZL201220057767.4)
• Incorporated Advanced Temperature Regulation module
• Toughened ultra-clear mineral glass with scratch resistant
coating
• Constructed from aero grade aluminum alloy with HA III
military grade hard-anodized nish
• Waterproof in accordance with IPX8 (2 meters submersible)
• Impact resistant to 1 meter
• Tail stand capability
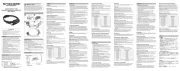
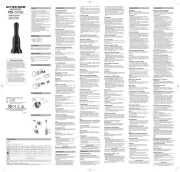
Features
Dimensions
Accessories
Battery Options
Length: 155mm (6.1”)
Head Diameter: 40mm (1.57”)
Tube: 40mm×29mm (1.57”×1.14”)
Weight: 171g (6.03oz)
Holster, Lanyard
TYPE
Nominal
Voltage
Compatibility
18650 Rechargeable
Li-ion Battery (Button Top)
18650 3.6V/3.7V
Y
(Recommended)
18650 Rechargeable
Li-ion Battery (Flat Top)
18650 ─ N
Primary Lithium Battery
CR123 3V N
Rechargeable Li-ion Battery
RCR123 3.6V/3.7V N
Note:
1. DO NOT use at-top 18650 batteries, otherwise the ashlight will
not work!
2. DO NOT use CR123/RCR123 batteries, otherwise the LED might be
damaged!
(English) EC4GTS
Operation Instructions
On/O
To Switch On: When the light is o, press the Power button to switch it on.
To Switch O: When the light is on, press the Power button to switch it o.
Brightness Levels
When the light is on, press the Mode button repeatedly to cycle through
brightness levels of Ultralow, Low, Medium, High and Turbo. The ashlight will
return to the previously used brightness level after being turned o and on
again.
Direct Access to Ultralow/Turbo
Direct Access to Ultralow: When the light is o, press and hold the Power button
to switch directly to Ultralow.
Direct Access to Turbo: When the light is o, press and hold the Mode button to
switch directly to Turbo.
Instant Access to Turbo
• When the light is on, press and hold the Mode button to switch to Turbo.
Releasing the button will go back to the previous level.
• When the light is o, press and hold the Mode button for more than 2
seconds to switch to Turbo. Releasing the button will switch o the ashlight.
Special Modes (Strobe / Location Beacon /
SOS)
When the light is o, quickly tap the Mode button twice to switch to Strobe
mode. Then press the Mode button to cycle through other special modes (Strobe
/ Location Beacon / SOS). Press the Power button to exit special mode.
Lockout / Unlock
Lockout mode is designed to prevent light from accidental activation. In Lockout
mode, the ashlight consumes a negligible amount of power, and the buttons
are locked and do not respond to clicks. Set the light to Lockout mode when it
is kept in a backpack or anywhere there is a likelihood of accidental activation.
The standby time in this status is up to 12 months.
Lockout: Press and hold both Power and Mode buttons simultaneously until
the LED ash once to indicate that the ashlight has entered Lockout mode.
Unlock: In Lockout mode, press and hold both Power and Mode buttons until
the light turns on to unlock the ashlight. The light will go back to its previous
level.
Location Indicator
To switch on the location indicator, press and hold down the Power button to
turn o the ashlight when the light is on. A blue indicator underneath the
switches will ash once every 2 seconds to indicate the location of the ashlight.
The standby time in this status is up to 6 months. Turning on the light again will
automatically switch o the location indicator.
Power Tips
When the batteries are replaced, or the Mode button is pressed when the
light is o, the blue indicator will ash to indicate the remaining power of the
batteries:
1. Flashing three times indicates that the power is above 50%;
2. Flashing twice indicates that the power is below 50%;
3. Flashing once indicates that the power is near depletion and the batteries
need recharging as soon as possible.
ATR
With incorporated Advanced Temperature Regulation module, the EC4GTS
regulates its outputs and adapts to the ambient environment, maintaining
optimal performance.
Changing Batteries
The batteries should be replaced or recharged when the output appears to be
dim or the ashlight becomes unresponsive.
Maintenance
Every 6 months, threads should be wiped with a clean cloth followed by a thin
coating of silicon-based lubricant.
FL1 STANDARD
TURBO HIGH MID LOW ULTRALOW STROBE BEACON SOS
1800
lumens
800
lumens
240
lumens
50
lumens
1
lumen
1800
lumens
1800
lumens
1800
lumens
*1h 3h15min 12h 58h 380h ─ ─ ─
396m 260m 148m 64m 9m ─ ─ ─
39220cd 16960cd 5520cd 1040cd 21cd ─ ─ ─
1m (Impact Resistance)
IPX8, 2m (Waterproof and Submersible)
Note:
The stated data is measured in accordance with the international ashlight testing standards ANSI/NEMA FL1, using 2 x 18650
Li-ion batteries (3500mAh) under laboratory conditions. The data may vary in real world use due to dierent battery usage or
environmental conditions.
* The runtime for Turbo mode is the testing result before the temperature regulation starts.
Technical Parameter
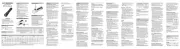
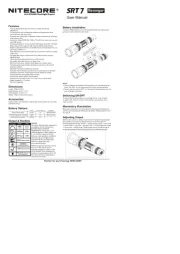
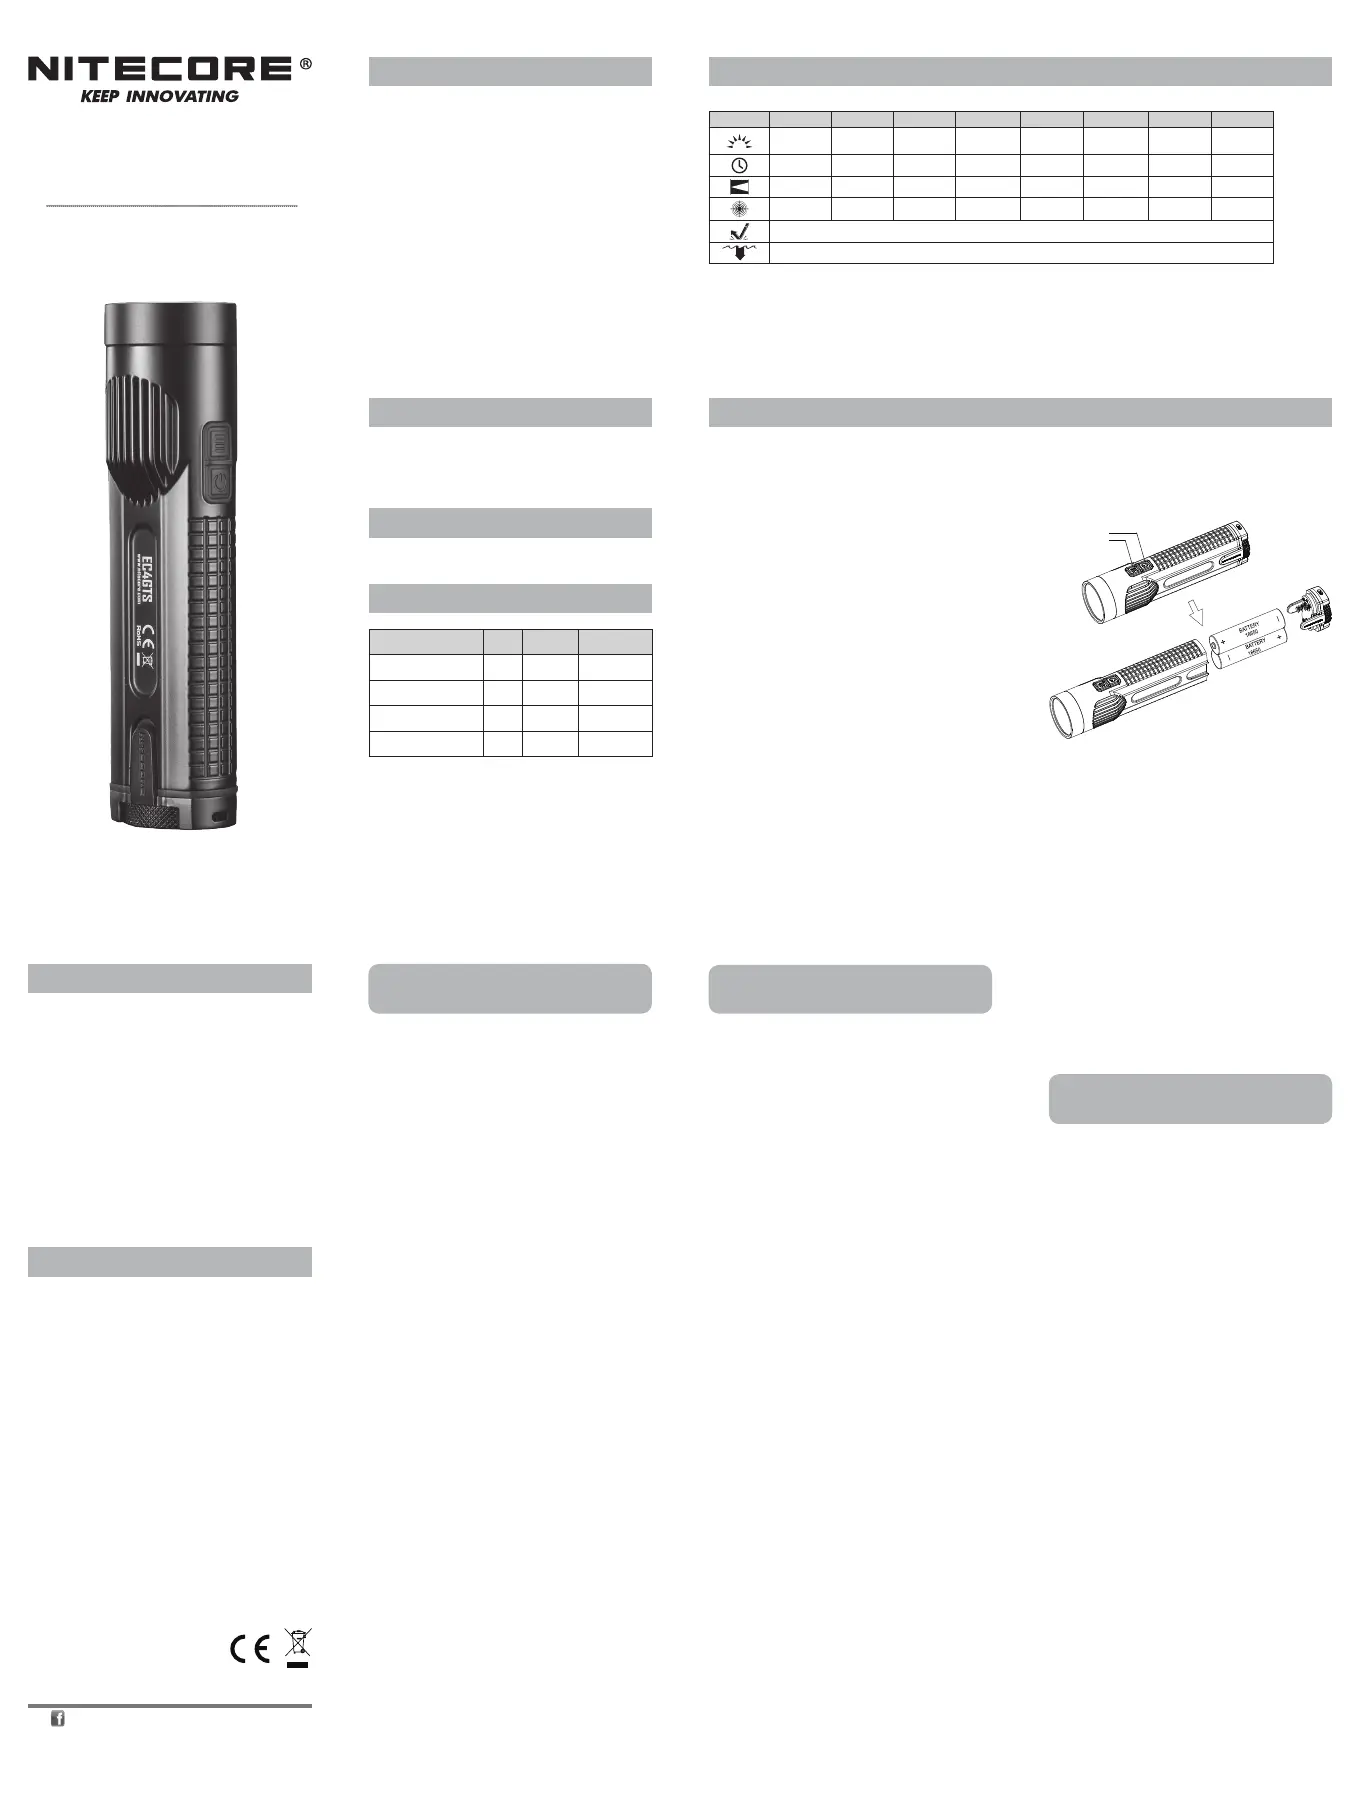
Battery Installation
As illustrated, rotate the thumbscrew lock counterclockwise and
screw the tail cap o. Check the battery chamber rst to ensure
there is nothing blocking the contacts.
Insert batteries with the negative (-) ends contacting the
springs, observing the polarity marks on the inner side wall
of the battery chamber. Using both hands, one holding down
the tail cap towards the light while the other rotating the
thumbscrew clockwise until the tail cap is well tightened. Once
closed, there should be no visible gap between the tail cap and
the light body.
Note:
After battery insertion, the power indicator light will ash to
indicate remaining battery power. Please refer to the “Power
Tips” section of this manual for more details.
Warning:
1. Ensure the batteries are inserted correctly. The EC4GTS will
not operate if batteries are incorrectly inserted.
2. DO NOT mix rechargeable and non-rechargeable batteries.
3. DO NOT mix batteries of dierent types/brands.
4. Avoid direct eye exposure to the light beam
5. When the ashlight is kept in a backpack, set the light to
Lockout mode (see section below) to prevent accidental
activation of the ashlight. When it is left unused for
prolonged times, remove all batteries to prevent battery
leakage.
6. Do not submerge the light into liquid when it is hot or attempt
to use any liquid to cool down the light. Doing so may cause
irreparable damage to the light due to the dierence of air
pressure inside and outside of the tube.
-1-
-5-
-2-
-6-
-3-
-4-
(Español) EC4GTS
Instrucciones de operación
(Deutsch) EC4GTS
Bedienungsanleitung
On/O
Encendido: Cuando la luz está apagada, presione el botón de encendido para
encenderla.
Apagado: Cuando la luz está encendida, presione el botón de encendido para
apagar.
Niveles de intensidad
Cuando la luz está encendida, presione el botón Mode repetidamente para
cambiar entre los niveles Ultra-bajo, Bajo, Medio, Alto y Turbo. La linterna
regresará a la intensidad usada previamente después de ser apagada y
encendida nuevamente.
Acceso directo a Ultra-bajo/Turbo
Acceso directo a Ultra-bajo: Cuando la luz está apagada, presione y
mantenga presionado el botón de encendido para cambiar directamente al
modo Ultra-bajo.
Acceso directo a Turbo: Cuando la luz está apagada, presione y mantenga
presionado el botón Mode para cambiar directamente al modo Turbo.
Acceso instantáneo al modo Turbo
• Cuando la luz está encendida, presione y mantenga presionado el botón
Mode para cambiar a Turbo. Al soltar el botón regresará al nivel de intensidad
previo.
• Cuando la luz está apagada, presione y mantenga presionado el botón Mode
por más de 2 segundos para cambiar a Turbo. . Al soltar el botón la linterna
se apagará.
Modos especiales (Estrobo / Baliza de
localización / SOS)
Cuando la luz está apagada, presione el botón Mode 2 veces rápidamente para
cambiar al modo Estrobo. Después presione el botón Mode para cambiar entre
los otros modos especiales (Estrobo / Baliza de localización / SOS). Presione el
botón de encendido para salir de los modos especiales.
Bloqueo/desbloqueo
El modo de bloqueo está diseñado para prevenir activación accidental de la
linterna. En modo de bloqueo, la linterna consume una cantidad insignicante
de energía, los botones están bloqueados y no reaccionan a los clicks. Congure
la linterna en modo de bloqueo cuando la guarde en una mochila o cualquier
parte en el que exista riesgo de activación accidental. El tiempo de espera en
ese estado es de hasta 12 meses.
Bloqueo: Presione y mantenga presionados simultáneamente ambos botones
hasta que el LED parpadee una vez para indicar que la linterna p1-ha entrado en
modo de bloqueo.
Desbloqueo: En modo de bloqueo, presione y mantenga presionados ambos
botones hasta que la luz encienda para desbloquear. La luz regresará al nivel de
intensidad utilizado previamente.
Indicador de localización
Para cambiar al indicador de localización, presione y mantenga presionado el
botón de encendido para apagar la linterna cuando la luz está encendida. Un
indicador azul debajo de los botones parpadeará una vez cada 2 segundos
para indicar la posición de la linterna. El tiempo de espera en este estado es de
hasta 6 meses. Encendiendo la linterna de nuevo, automáticamente apagará el
indicador de localización.
Consejos de carga
Cuando las baterías son reemplazadas, o el botón Mode es presionado cuando
la luz está apagada, el indicador azul parpadeará para indicar la carga restante
de las baterías:
1. Tres parpadeos representan un nivel de batería superior al 50%.
2. Dos parpadeos representan un nivel de batería debajo del 50%.
3. Un parpadeo indica que la carga de la batería está por agotarse y las baterías
necesitan ser recargadas lo antes posible.
ATR
Con módulo Avanzado de Regulación de Temperatura, la EC4GTS regula su
intensidad y se adapta al medio ambiente, manteniendo un rendimiento óptimo.
Cambio de baterías
Las baterías deben ser reemplazadas o recargadas cuando la intensidad del haz
sea tenue o la linterna no responda.
Mantenimiento
Cada 6 meses se deberán limpiar las juntas con un paño limpio, seguido a esto,
debe aplicarse una na capa de lubricante a base de silicón.
Ein-/Ausschalten
Einschalten: Drücken Sie den EIN-/AUS-Schalter um das Licht einzuschalten.
Ausschalten: Drücken Sie den EIN-/AUS-Schalter erneut, um das Licht
auszuschalten.
Helligkeitsstufen
Drücken Sie den Mode-Schalter bei eingeschaltetem Licht wiederholt,
um nacheinander fortlaufend durch die folgenden Helligkeitsstufen zu
schalten: Ultralow, Low, Medium, High und Turbo. Dieser Modus hat eine
Speicherfunktion, um den direkten Zugang zur zuletzt genutzten Helligkeitsstufe
sicherzustellen.
Direktzugang zum Ultralow- / Turbo-Mode
• Wenn die EC4GTS ausgeschaltet ist, drücken und halten Sie den EIN-/AUS-
Schalter länger als eine Sekunde, um in den Ultralow-Mode zu schalten.
• Wenn Sie bei ausgeschaltetem Licht den Mode-Schalter drücken und ihn
länger als eine Sekunde halten, gelangen Sie in den Turbo-Mode.
Sofort Turbo-Mode
• Wenn das Licht an ist, drücken und halten Sie die Mode-Taste, um in den
Turbo-Mode zu schalten. Durch Loslassen der Taste wird zur vorherigen
Helligkeitsstufe zurückgeschaltet.
• Wenn das Licht aus ist, drücken und halten Sie die Mode-Taste länger als 2
Sekunden, um in den Turbo-Mode zu schalten. Durch Loslassen der Taste
wird die Taschenlampe ausgeschaltet.
Sonder-Modi (Strobe / Location-Beacon /
SOS)
Wenn die EC4GTS ausgeschaltet ist, drücken Sie den Mode-Schalter zweimal
schnell nacheinander, um in den Strobe-Mode zu schalten. Wenn Sie sich im
Strobe-Mode benden, drücken Sie den Schalter wiederholt, um nacheinander
fortlaufend durch die Sonder-Modi Location-Beacon-, SOS- und Strobe-Mode zu
schalten. Um die Sonder-Modi zu verlassen, drücken Sie den EIN-/AUS-Schalter.
Sperren / Entsperren
Der Sperrmodus verhindert, dass Licht versehentlich eingeschaltet wird. Im
Sperr-Mode verbraucht die Taschenlampe eine vernachlässigbare Menge an
Strom und die Tasten sind gesperrt und reagieren nicht. Verwenden Sie den
Sperr-Mode, wenn sie in einem Rucksack aufbewahrt wird oder wenn die Gefahr
einer versehentlichen Aktivierung besteht. Die Standby-Zeit in diesem
Status beträgt bis zu 12 Monate.
Sperren: Halten Sie die Ein/Aus- und die Mode-Taste gleichzeitig gedrückt, bis
die LED einmal blinkt, um anzuzeigen, dass die Taschenlampe nun in den Sperr-
Mode geschaltet ist.
Entsperren: Halten Sie die Ein/Aus- und die Mode-Taste gleichzeitig gedrückt,
bis sich das Licht einschaltet, um die Taschenlampe zu entsperren. Es wird in
die zuletzt genutzte Helligkeitsstufe geschaltet.
Standortanzeige
Wenn das Licht an ist, halten Sie die Ein-/Aus-Taste gedrückt, um die
Taschenlampe aus- und die Standortanzeige einzuschalten. Eine blaue Anzeige
unter den Schaltern blinkt einmal alle 2 Sekunden, um den Standort der
Taschenlampe anzuzeigen. Die Standby-Zeit in diesem Mode beträgt bis zu
6 Monate. Durch erneutes Einschalten der Lampe wird die Standortanzeige
automatisch ausgeschaltet.
SYSMAX Innovations Co., Ltd.
TEL: +86-20-83862000
FAX: +86-20-83882723
E-mail: info@nitecore.com
Web: www.nitecore.com
Address:Rm2601-06,CentralTower,
No.5XiancunRoad,Tianhe
District,Guangzhou,510623,
Guangdong,China
Please find us on facebook : NITECORE Flashlight
Thanks for purchasing NITECORE!
EC27124GTS18
Made in China
Warranty Service
Contents
All NITECORE
®
products are warranted for quality. Any DOA / defective product
can be exchanged for a replacement through a local distributor/dealer within 15
days of purchase. After that, all defective / malfunctioning NITECORE
®
products
can be repaired free of charge within 60 months from the date of purchase.
Beyond 60 months, a limited warranty applies, covering the cost of labor and
maintenance, but not the cost of accessories or replacement parts.
The warranty will be nullied if
1. the product(s) is/are broken down, reconstructed and/or modied by
unauthorized parties;
2. the product(s) is/are damaged due to improper use; (e.g. reversed polarity
installation)
3. the product(s) is/are damaged due to battery leakage.
For the latest information on NITECORE
®
products and services, please contact
a local NITECORE
®
distributor or send an email to service@nitecore.com
※ All images, texts and statements specied herein this user manual are for
reference purpose only. Should any discrepancy occur between this manual
and information specied on www.nitecore.com, SYSMAX Innovations Co.,
Ltd. reserves the rights to interpret and amend the content of this document
at any time without prior notice.
English
····································
4
Español
···································
5
Deutsch
··································
6
Francais
··································
7
Русский
··································
8
日本語
······································
9
한국어
······································
10
Italiano
····································
11
Română
··································
12
简体中文
···································
14