• Utilizes 4-core MCT (Multiple Color Temperatures)
UHE LEDs to deliver a max output of 600 lumens
• Equipped with 3 color temperatures (3,000K
warm light / 4,500K neutral white light / 6,500K
• Peak beam intensity of 2,050cd and max throw
• DesignedwithaTIRopticallenstooeruniform
• Multifunctional OLED real-time display of lumens,
battery level and runtime etc.
• Built-in 330mAh Li-ion battery
• AdvancedPowerCut-O(APC)technologyfor
an ultra-low standby power consumption
• Built-in intelligent Li-ion battery charging circuit
with a USB-C charging port
• Highlyecientconstantcurrentcircuittoprovide
a stable output with a max runtime up to 85 hours
• Dual button interface for convenient operation
• 5 brightness levels available with direct access
• Level preset function available for setting the
• Intelligent memory function
• Semi lockout mode and full lockout mode available
• Incorporated Advanced Temperature Regulation
(ATR) module (Patent No. ZL201510534543.6)
• Metal tail ring pull able to withstand up to 30
• Constructed from aluminum alloy with HA III
militarygradehard-anodizednish
• Waterproof and dustproof rating in accordance
• Impact resistant to 2 meters
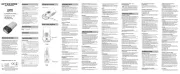
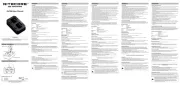
Key Clasp, USB-C Charging Cable
47.2mm x 25.4mm x 14.0mm (1.86" x 1.00" x 0.55")
20g / 0.71 oz (Accessories Not Included)
1. Dieses Produkt ist für den Gebrauch durch
Erwachsene ab 18 Jahren bestimmt. Bitte
bewahren Sie dieses Produkt außerhalb der
Reichweite von Kindern auf.
2. Das Produkt enthält kleine Montageteile.
Bitte halten Sie es von Kindern fern, um
Erstickungsgefahr zu vermeiden.
3. VORSICHT! Mögliche gefährliche Strahlung!
Blicken Sie NICHT direkt in den Lichtstrahl und
richten Sie das Licht nicht direkt in die Augen
4. Das Produkt erzeugt bei längerem Betrieb
große Hitze. Bitte seien Sie bei der
Verwendung vorsichtig. Es wird empfohlen,
hohe Helligkeitsstufen nicht über längere
Zeit zu verwenden, um Verbrennungen und
Produktschäden zu vermeiden.
5. Decken Sie das Gerät NICHT ab und stellen
Sie es nicht in die Nähe anderer Gegenstände,
da dies zu Schäden am Gerät oder Unfällen
aufgrund der hohen Temperaturen führen kann.
6. Verwenden Sie das Produkt NICHT
zur Beleuchtung von brennbaren oder
explosiven Materialien, da die hohe Hitze zu
Verbrennungen oder Explosionen führen kann.
7. Bitte verwenden Sie das Produkt auf normale
Weise, um Unfälle im Falle eines Produktausfalls
8. Wenn das Produkt in einer geschlossenen oder
entammbarenUmgebung,wiez.B.einer
Tasche oder einem Rucksack, aufbewahrt wird,
oder wenn es längere Zeit nicht benutzt wird,
schalten Sie das Produkt bitte aus und aktivieren
Sie den Sperrmodus, um eine versehentliche
Aktivierung und Gefahren durch übermäßige
Hitze zu vermeiden. Alternativ können Sie auch
die Batterie entfernen, um Schäden durch
auslaufende Batterien zu vermeiden.
9. Setzen Sie das Produkt NICHT über einen
längeren Zeitraum Temperaturen über 60°C
aus, da sonst die Gefahr einer Explosion oder
Verbrennung der Batterie besteht.
10. Bitte laden Sie das Produkt mit dem Original-
Ladekabel auf, um die Lebensdauer des Akkus
11. Bitte laden Sie das Produkt alle 6 Monate auf,
wenn es über einen längeren Zeitraum nicht
12.DieLeuchtedarfNICHTzerlegtodermodiziert
werden, da dies zu Schäden führt und die
Produktgarantie ungültig wird. Bitte beachten
Sie den Abschnitt „Garantiebedingungen“ in
dieser Bedienungsanleitung.
Die unsachgemäße Verwendung von Geräten mit
eingebauten Li-Ionen-Akkus kann zu schweren
Akkuschäden oder Sicherheitsrisiken wie
Verbrennung oder Explosion führen. Verwenden
Sie das Gerät NICHT, wenn es beschädigt ist.
Zerlegen, durchstechen, zerschneiden, zerquetschen
oder verbrennen Sie das Gerät NICHT. Wenn
Sie ein Leck oder einen ungewöhnlichen Geruch
feststellen, stellen Sie die Verwendung des Geräts
sofort ein. Entsorgen Sie das Gerät/die Batterien
in Übereinstimmung mit den geltenden örtlichen
Gesetzen und Vorschriften.
Die TINI3 ist mit einem intelligenten Ladesystem
ausgestattet. Bitte laden Sie das Produkt vor dem
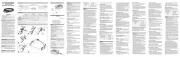
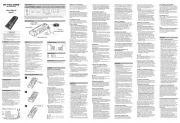
Stromanschluss: Verwenden Sie das USB-
Ladekabel wie abgebildet, um ein externes Netzteil
(z. B. einen Adapter, eine Powerbank oder andere
Ladegeräte) an den Ladeanschluss des Produkts
anzuschließen und den Ladevorgang zu starten.
• Während des Ladevorgangs zeigt das Display
den Ladefortschritt an und schaltet sich nach 10
Sekunden automatisch aus.
• Wenn das Gerät vollständig aufgeladen ist,
werden auf dem Display automatisch für 10
Sekunden ein Symbol für den vollen Akkustand
• Das Gerät kann während des Ladevorgangs
• Die Ladezeit beträgt ca. 1 Stunde 30 Minuten
(Auadenmiteinem5V/2A-Adapter).
• Wenn das Gerät vollständig aufgeladen ist,
beträgt die Standby-Zeit etwa 12 Monate.
Hinweis:DasGerätwirdbeimAuadenimSperr-
Mode automatisch entsperrt.
Multifunktionales OLED-Display
Die TINI3 ist mit einem multifunktionalen OLED-
Display ausgestattet. (Bitte entfernen Sie die
Displayschutzfolie vor dem ersten Gebrauch.)
Wenn das Licht eingeschaltet wird, zeigt das
Display nacheinander die aktuellen Informationen
(Helligkeitsstufe & Lumen sowie verbleibende
Leuchtzeit), bevor es erlischt. Nach dem
Erlöschen des Displays kann es durch kurzes
Drücken der Mode-Taste wieder aktiviert werden.
The TINI3 is equipped with an intelligent charging
system.Pleasechargetheproductbeforetherst
Power Connection: As illustrated, use the USB
charging cable to connect an external power
supply (e.g. an adapter, a power bank or other
charging devices) to the charging port of the
product to begin the charging process.
• During the charging process, the screen
will show the charging progress and go out
automatically after 10 seconds.
• When the product is fully charged, the screen
will automatically show a full battery level icon
and “100%” for 10 seconds.
• The product can be used while charging.
• The charging time is approx. 1 hour 30 minutes.
(Charged via the 5V/2A adapter)
• When fully charged, the standby time is about
Note: The product will be automatically unlocked
when charging in the Lockout Mode.
Multifunctional OLED Display
The TINI3 is equipped with a multifunctional
OLED display. (Please remove the screen protector
beforetherstuse.)Whenthelightisturned
on, the screen will successively show the current
info (Brightness Level & Lumens, and Runtime
Remaining) before it goes out. After the screen
goes out, short pressing the Mode Button can
On:Whenthelightiso,shortpressthePower
O: When the light is on, short press the Power
Color Temperatures Switching
The TINI3 has 3 color temperatures: warm light
/ neutral white light / cool white light. When
the light is on, press and hold both buttons
and the screen will successively show the color
temperatures. Release to choose.
Brightness Levels Adjusting
When any color temperature of the light and
the OLED display are on, short press the Mode
Button to cycle through the following brightness
levels: ULTRALOW – LOW – MID – HIGH. (The
product is designed with a memory function. When
reactivated, it will automatically access the previous
memorized brightness level and color temperature.)
Note: When the screen goes out, short press
the Mode Button to reactivate the screen before
adjusting the brightness levels.
The TINI3 features a preset brightness level
function.Whenthelightisoinunlockedmode,
short press the Mode Button to activate the screen.
Additional short presses of the Mode Button will
sequentially display the brightness level and
lumens of ULTRALOW, LOW, MID, and HIGH. Once
the desired brightness level appears, short press
the Power Button to activate it.
Direct Access to ULTRALOW
Whenthelightiso,longpressthePowerButton
to directly access ULTRALOW.
Whenthelightison/o,longpresstheMode
Button to directly access TURBO. Release to return
(Semi Lockout Mode) (Full Lockout Mode)
The TINI3 has two lockout modes: Semi Lockout
Mode and Full Lockout Mode.
• When the light is on, press and hold the power
button until the SEMI LOCK icon appears on
thescreentoconrmSemiLockoutModeis
• In Semi Lockout Mode, the Power Button is
unavailable to activate the product. Long press
the Mode Button to directly access TURBO and
Full Lockout Mode (Default Setting):
• When the light is on, press and hold the Power
Button until the FULL LOCK icon appears on
thescreentoconrmFullLockoutModeis
• In Full Lockout Mode, both buttons are
unavailable to activate the product.
In either Lockout Mode, press and hold both
buttons until the progress bar on the screen is
full to exit Lockout Mode and the ULTRALOW is
1. Ce produit est destiné à être utilisé par des
adultes âgés de 18 ans et plus. Veuillez garder
ce produit hors de portée des enfants.
2. Le produit contient de petites pièces à
assembler. Veuillez les tenir à l'écart des
enfantspourévitertoutrisqued'étouement
3. ATTENTION ! Risque de rayonnements
dangereux!NExezPASdirectement
le faisceau lumineux ou n'éclairez pas
directement les yeux de quelqu'un !
4. Le produit génère une chaleur importante en
cas de fonctionnement prolongé. Veuillez faire
preuve de prudence pendant l'utilisation. Il est
recommandé de ne pas utiliser des niveaux
de luminosité élevés pendant des périodes
prolongéesand'éviterlesbrûluresetles
5. NE PAS couvrir ou placer d'autres objets à
proximité de la sortie de lumière du produit,
car cela pourrait endommager le produit
ou provoquer des accidents dus à des
6. NE PAS utiliser le produit pour éclairer des
matériauxinammablesouexplosifs,carla
chaleur élevée peut entraîner une combustion
7. Veuillez utiliser le produit de manière
appropriéeand'évitertoutaccidentencasde
8. Lorsque le produit est placé dans un
environnementclosouinammable,telqu'un
sac à dos, ou lorsqu'il n'est pas utilisé pendant
une période prolongée, veuillez activer le
modedeverrouillagecompletand'éviterune
activation accidentelle et les dangers causés
par une chaleur excessive.
9. N'exposez PAS le produit à des températures
supérieures à 60°C (140°F) pendant une
période prolongée, car cela pose un risque
d'explosion ou de combustion de la batterie.
10. Veuillez recharger le produit avec le câble de
charged'origineand'éviterderéduirela
durée de vie de la batterie.
11. Rechargez le produit tous les 6 mois s'il n'est
pas utilisé pendant une période prolongée.
12.NEPASdémonteroumodierceproduit,car
cela l'endommagerait et rendrait la garantie
du produit invalide. Veuillez-vous référer
à la section garantie du manuel pour des
informations complètes sur la garantie.
L'utilisation inappropriée d'appareils dotés de
batteries Li-ion intégrées peut entraîner de
graves dommages à la batterie ou des risques
de sécurité tels que la combustion ou l'explosion.
N'utilisez PAS l'appareil s'il est endommagé. NE
PAS démonter, percer, couper, écraser ou incinérer
l'appareil. En cas de fuite ou d'odeur anormale,
cessez immédiatement d'utiliser l'appareil. Recyclez
l'appareil/les piles conformément aux lois et
réglementations locales en vigueur.
Le TINI3 est équipé d'un système de
rechargement intelligent. Veuillez recharger le
produit avant la première utilisation.
Connexion à une source d'alimentation :
Comme illustré, utilisez le câble de chargement
USB pour connecter une source d'alimentation
externe (par exemple un adaptateur, une batterie
externe ou d'autres dispositifs de chargement) au
port de chargement du produit pour commencer le
processus de rechargement.
• Pendant le processus de rechargement, l'écran
achelaprogressiondelachargeets'éteint
automatiquement au bout de 10 secondes.
• Lorsque le produit est complètement chargé,
l'écranacheautomatiquementuneicône
de niveau de batterie complet et « 100% »
• Le produit peut être utilisé pendant la charge.
• Le temps de charge est d'environ 1 heure 30
minutes (charge via l'adaptateur 5V/2A).
• Lorsqu'il est complètement chargé, l'autonomie
en veille est d'environ 12 mois.
Remarque : Le produit sera automatiquement
déverrouillé lorsqu'il sera rechargé en mode
Écran OLED multifonctions
Le TINI3 est équipée d'un écran OLED multifonctions
(veuillezretirerlelmprotecteurdel'écranavantla
première utilisation). Lorsque la lampe est allumée,
l'écranachesuccessivementlesinformationsen
cours (niveau de luminosité et lumens, et durée
d'utilisation restante) avant de s'éteindre. Une fois
que l'écran s'est éteint, une brève pression sur le
bouton mode peut réactiver l'écran.
On : Lorsque la lumière est éteinte, appuyez
brièvement sur le bouton d'alimentation pour
O : Lorsque la lumière est allumée, appuyez
brièvement sur le bouton d'alimentation pour
Sélection des températures de couleur
Le TINI3 dispose de 3 températures de couleur :
lumière chaude / lumière blanche neutre / lumière
blanche froide. Lorsque la lumière est allumée,
appuyez sur les deux boutons et maintenez-
lesenfoncés;l'écranachesuccessivementles
températures de couleur. Relâchez pour choisir.
Réglage des niveaux de luminosité
Lorsque la température de couleur de la lumière
et l'écran OLED sont allumés, appuyez brièvement
surleboutonModepourfairedélerlesniveaux
de luminosité suivants : ULTRA-FAIBLE - FAIBLE
- MOYENNE - ÉLEVÉE. (Le produit est doté d'une
fonction de mémorisation. Lorsqu'il est réactivé, il
1. Данныйпродуктпредназначендля
использованиявзрослымиввозрастеот
18летистарше.Пожалуйста,храните
устройствовнедоступномдлядетейместе.
2. Продуктсодержитмелкиедетали.
Пожалуйста,хранитееговнедоступномдля
детейместе,чтобынеподвергатьихриску
3. ВНИМАНИЕ!Возможенвредздоровью!
НЕсмотритепрямонасветовойлучиНЕ
направляйтееговглазадругимлюдям!
4. Придлительнойработеустройствовыделяет
значительноеколичествотепла.Соблюдайте
осторожностьприиспользовании.
Рекомендуетсяизбегатьработынавысоких
уровняхяркостивтечениедлительного
периодавременивоизбежаниеожоговили
5. НЕнакрывайтеустройствоиНЕразмещайте
предметывблизисветовоговыхода,во
избежаниеповрежденияинесчастных
случаев,вызванныхвоздействиемвысоких
6. НЕиспользуйтеустройстводля
освещениялегковоспламеняющихся
иливзрывоопасныхматериалов,таккак
воздействиевысокойтемпературыможет
привестикихвозгораниюиливзрыву.
7. Используйтеустройствотолькостандартным
ручнымспособомвоизбежаниенесчастных
случаевприегонеисправности.
8. Еслиустройствонаходитсявзамкнутом
пространствеилипространстве,впределах
котороговозможновозгорание,например,
Improper use of devices with built-in Li-ion
batteries may result in severe battery damage or
safety hazards such as combustion or explosion.
DO NOT use the device if it is damaged. DO NOT
disassemble, puncture, cut, crush, or incinerate the
device. If any leakage or abnormal odor is noticed,
stop using the device immediately. Dispose of the
device/batteries in accordance with applicable local
1. This product is intended for use by adults aged
18 and over. Please keep this product out of
2. The product contains small assembly parts.
Please keep it away from children to avoid
dangerofchokingorsuocation.
3. CAUTION! Possible dangerous radiation! DO
NOT stare directly into the light beam or shine
the light directly into the eyes of anyone!
4. The product will generate massive heat during
prolonged operation. Please exercise caution
during use. It is recommended not to use
high brightness levels for extended periods to
prevent burns and product damage.
5. DO NOT cover or place other objects near the
light outlet of the product, as this may cause
damage to the product or accidents due to
6. DO NOT use the product to illuminate
ammableorexplosivematerials,asthehigh
heat may lead to combustion or explosion.
7. Please use the product in a standard handheld
manner to avoid accidents in the event of
8. When the product is placed in an enclosed or
ammableenvironmentsuchasabackpack,or
when it is left unused for an extended period,
please activate the Full Lockout Mode to avoid
accidental activation and dangers caused by
9. DO NOT expose the product to temperatures
above 60°C (140°F) for a prolonged time,
as this poses a risk of battery explosion or
10. Please recharge the product with the original
charging cable to avoid shortening the lifespan
11. Please recharge the product every 6 months
when left unused for a prolonged time.
12. DO NOT disassemble or modify this product as
doing so will cause damage to it and render
the product warranty invalid. Please refer
to the warranty section in the manual for
complete warranty information.
Thanks for purchasing NITECORE!
Please read this manual carefully before using the
product and follow the instructions.
This manual contains important safety information and
operating instructions. Please keep it for future reference.
In case of updates, please refer to the latest version
availableontheocialwebsite.
products are warranted for quality.
Any DOA / defective product can be exchanged
for a replacement through a local distributor/
dealer within 15 days of purchase. After that, all
defective / malfunctioning NITECORE
can be repaired free of charge within 24 months
from the date of purchase. Beyond 24 months, a
limited warranty applies, covering the cost of labor
and maintenance, but not the cost of accessories or
Thewarrantywillbenulliedif
1. the product(s) is/are broken down, reconstructed
and/ormodiedbyunauthorizedparties;
2. the product(s) is/are damaged due to improper
For the latest information on NITECORE
and services, please contact a local NITECORE
distributor or send an email to service@nitecore.com
Worldwide Warranty Service
Model number Date of purchase
Serial number Store Stamp
Thisisthecerticateofauthenticityofthis
itemandweconrmthatithasbeensubjected
to the most exacting quality controls by
SYSMAX Innovations Co., Ltd.
Please ensure this warranty card is fully
completed by the distributor or retailer after
purchasing the product. Should the product fail
to operate correctly during the warranty period,
it may be returned with the completed warranty
card and original sales receipt to the retailer or
local distributor for replacement or repair.
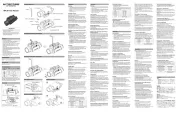
FL1 STANDARD TURBO HIGH MID LOW ULTRALOW
*600 Lumens 200 Lumens 65 Lumens 15 Lumens 1 Lumen
*2,050cd 800cd 260cd 55cd 9cd
Note: The stated data is measured by using the built-in rechargeable Li-ion battery (330mAh) under laboratory
conditions.Thedatamayvaryinrealworlduseduetodierentenvironmentalconditions.
* The data is tested without the temperature regulation.
(Advanced Temperature Regulation)
The integrated ATR technology regulates the
output of the TINI3 according to the working
condition and ambient environment to maintain
Whenthelightisoinunlockedmode,shortpress
the Mode Button and the screen will display the
battery level icon, the percentage of remaining
battery level and the memorized brightness level
Note: When the battery level icon on the screen
startsashingtoinformtheuserofthelowpower
status, please charge the product as soon as
Einschalten: Wenn das Licht ausgeschaltet ist,
drücken Sie kurz die EIN-/AUS-Taste, um das Licht
Ausschalten: Wenn das Licht eingeschaltet ist,
drücken Sie kurz die EIN-/AUS-Taste, um das Licht
Umschalten der Farbtemperaturen
Die TINI3 verfügt über 3 Farbtemperaturen:
warmes Licht / neutralweißes Licht / kaltweißes
Licht. Wenn das Licht eingeschaltet ist, halten
Sie beide Tasten gedrückt und das Display zeigt
nacheinander die Farbtemperaturen an. Zum
Einstellen der Helligkeitsstufen
Wenn eine beliebige Farbtemperatur des
Lichts und das OLED-Display eingeschaltet
ist, drücken Sie kurz auf die Mode-Taste, um
zwischen den folgenden Helligkeitsstufen zu
wechseln: „ULTRALOW“ – „LOW“ – „MID“ –
„HIGH“. (Die TINI3 ist mit einer Speicherfunktion
ausgestattet. Wenn es wieder aktiviert wird,
greift sie automatisch auf die zuvor gespeicherte
Helligkeitsstufe und Farbtemperatur zurück).
Hinweis: Wenn das Display ausgeht, drücken Sie
kurz die Mode-Taste, um es wieder zu aktivieren,
bevor Sie die Helligkeitsstufen einstellen.
Die TINI3 verfügt über eine Funktion zur
Voreinstellung der Helligkeitsstufe. Wenn die
Leuchte im entsperrten Mode ausgeschaltet
ist, drücken Sie kurz die Mode-Taste, um das
Display zu aktivieren. Durch weiteres kurzes
Drücken der Mode-Taste werden nacheinander die
Helligkeitsstufen und Lumen von „ULTRALOW“,
„LOW“, „MID“ und „HIGH“ angezeigt. Sobald die
gewünschte Helligkeitsstufe angezeigt wird, drücken
Sie kurz die EIN-/AUS-Taste, um sie zu aktivieren.
Direkter Zugriff auf ULTRALOW
Wenn das Licht ausgeschaltet ist, drücken Sie
lange auf die EIN-/AUS-Taste, um direkt auf
Direkter Zugriff auf TURBO
Wenn das Licht an/aus ist, drücken Sie lange
auf die Mode-Taste, um direkt auf „TURBO“
zuzugreifen. Loslassen, um zum vorherigen Status
(Semi Lockout Mode) (Full Lockout Mode)
Die TINI3 verfügt über zwei Sperr-Modi: Semi-
Lockout-Mode und Full-Lockout-Mode.
• Wenn das Licht eingeschaltet ist, halten Sie
die EIN-/AUS-Taste gedrückt, bis das Symbol
„SEMI LOCK“ auf dem Display erscheint, um
zu bestätigen, dass der Semi-Lockout-Mode
• Im Semi-Lockout-Mode ist die EIN-/AUS-Taste
nicht verfügbar, um das Gerät zu aktivieren.
Drücken Sie lange auf die Mode-Taste, um direkt
auf „TURBO“ zuzugreifen, und lassen Sie sie los,
um das Gerät auszuschalten.
Wenn das Licht eingeschaltet ist, halten Sie
die EIN-/AUS-Taste gedrückt, bis das Symbol
„FULL LOCK“ auf dem Display erscheint, um zu
bestätigen, dass der Full-Lockout-Mode aktiviert ist.
• Im Full-Lockout-Mode sind beide Tasten nicht
verfügbar, um das Gerät zu aktivieren.
Halten Sie in beiden Sperr-Modi beide Tasten
gedrückt, bis der Fortschrittsbalken auf dem
Display voll ist, um den Sperr-Mode zu beenden
und „ULTRALOW“ zu aktivieren.
Mit integriertem „Advanced Temperature
Regulation-Modul“ passt die TINI3 ihre Leistung
an die Umgebungstemperatur an und erhält so die
Wenn die Leuchte im nicht gesperrten Mode
ausgeschaltet ist, drücken Sie kurz die Mode-Taste.
Auf dem Display werden das Batteriestand-Symbol,
der Prozentsatz der verbleibenden Energie und die
gespeicherte Helligkeitsstufe angezeigt, bevor die
Hinweis: Wenn das Batteriestand-Symbol auf
dem Display zu blinken beginnt, um über den
niedrigen Energiestatus zu informieren, laden Sie
das Produkt bitte so bald wie möglich auf.
Entsorgung von Elektro- und
Die durchgestrichene Mülltonne bedeutet,
dassSiegesetzlichverpichtetsind,
diese Geräte einer vom unsortierten
Siedlungsabfall getrennten Erfassung
zuzuführen. Die Entsorgung über die
Restmülltonne oder die gelbe Tonne ist untersagt.
Enthalten die Produkte Batterien oder Akkus, die
nicht fest verbaut sind, müssen diese vor der
Entsorgung entnommen und getrennt als Batterie
accède automatiquement au niveau de luminosité
et à la température de couleur précédemment
Remarque : lorsque l'écran s'éteint, appuyez
brièvement sur le bouton Mode pour réactiver
l'écran avant de régler les niveaux de luminosité.
Fonction de préréglage du niveau de
Le TINI3 est doté d'une fonction de préréglage du
niveau de luminosité. Lorsque la lampe est éteinte
en mode déverrouillé, appuyez brièvement sur le
bouton Mode pour activer l'écran. Des pressions
courtes supplémentaires sur le bouton Mode
achentsuccessivementleniveaudeluminosité
et les lumens d’ULTRA-FAIBLE, FAIBLE, MOYENNE
et ÉLEVÉE. Une fois que le niveau de luminosité
souhaité apparaît, appuyez brièvement sur le
bouton d'alimentation pour l'activer.
Accès direct à mode ULTRA-FAIBLE
Lorsque la lumière est éteinte, appuyez longuement
sur le bouton d'alimentation pour accéder
directement au niveau de luminosité ULTRA-FAIBLE.
Accès direct au mode TURBO
Lorsque le voyant est allumé/éteint, appuyez
longuement sur le bouton de mode pour accéder
directement au mode TURBO. Relâchez le bouton
pour revenir à l'état précédent.
Verrouillage / Déverrouillage
(Semi Lockout Mode) (Full Lockout Mode)
Le TINI3 dispose de deux modes de verrouillage
: Semi Lockout Mode (mode semi-verrouillage) et
Full Lockout Mode (mode de verrouillage total).
• Lorsque le voyant est allumé, appuyez sur le
bouton d'alimentation et maintenez-le enfoncé
jusqu'àcequel'icôneSEMILOCKapparaisse
àl'écranpourconrmerquelemodesemi-
• En mode semi-verrouillage, le bouton
d'alimentation n'est plus disponible pour activer
le produit. Appuyez longuement sur le bouton
mode pour accéder directement au mode
TURBO et relâchez-le pour l'éteindre.
Mode de verrouillage complet (réglage
• Lorsque le voyant est allumé, appuyez sur le
bouton d'alimentation et maintenez-le enfoncé
jusqu'àcequel'icôneFULLLOCKapparaisse
àl'écranpourconrmerquelemodede
verrouillage complet est activé.
• En mode de verrouillage complet, les deux
boutons ne sont pas disponibles pour activer le
Dans l'un ou l'autre des modes de verrouillage,
appuyez sur les deux boutons et maintenez-les
enfoncés jusqu'à ce que la barre de progression
à l'écran soit pleine pour sortir du mode de
verrouillage et activer le mode ULTRALOW.
ATR (régulation avancée de la
La technologie ATR intégrée régule la puissance
du TINI3 en fonction des conditions de travail et
del'environnementambiantandemaintenirdes
Lorsque la lampe est éteinte en mode déverrouillé,
appuyez brièvement sur le bouton Mode et l'écran
acheral'icôneduniveaudebatterie,lepourcentage
du niveau de batterie restant et le niveau de
luminosité mémorisé avant qu'elle ne s'éteigne.
Remarque :lorsquel'icônedeniveaudebatterie
sur l'écran commence à clignoter pour informer
l'utilisateur de l'état de faible puissance, veuillez
recharger le produit dès que possible.
врюкзаке,илиеслиононеиспользуется
втечениедлительногопериодавремени,
активируйтережимполнойблокировкидля
предотвращенияслучайнойактивациии
9. НЕподвергайтеустройствовоздействию
температурывыше60°C(140°F)втечение
длительногопериодавремени,таккакэто
можетпривестиквзрывуиливозгоранию
10.Заряжайтеустройствотолькооригинальным
заряднымкабелемвоизбежание
сокращениясрокаслужбыаккумулятора.
11.Незабывайтезаряжатьустройствокаждые
6месяцев,есливыимнепользуетесьв
течениедлительногопериодавремени.
12.НЕразбирайтеустройствоиНЕвносите
изменениявегоконструкцию,таккакэто
приведёткегоповреждению,атакже
аннулируетгарантиюнапродукт.Подробная
информацияогарантийномобслуживании
приведенавсоответствующемразделе.
⚠ Безопасность аккумулятора
Неправильноеиспользованиевстроенного
литий-ионногоаккумулятораможетпривести
ксерьезнымповреждениям,возгораниюили
взрыву.НЕиспользуйтеустройство,еслионо
повреждено.НЕразбирайте,НЕпрокалывайте,
НЕразрезайтеиНЕподжигайтеустройство.
Припоявленииутечкиилистранногозапаха
немедленнопрекратитеиспользование
устройства.Утилизируйтеустройство/
аккумуляторвсоответствиисместным
законодательствомипринятымиввашем
Устройствооснащеноинтеллектуальной
системойзарядки.Передпервым
использованиемзарядитеаккумулятор.
Подключение к источнику питания.Для
зарядкииспользуйтеUSB-кабельиподключите
егоотпортаустройствакисточникупитания
(адаптеру,пауэрбанкуилидругомуустройству)
так,какэтопоказанонаиллюстрации.
1.Приподключениикисточникупитания
отобразитсяшкалапрогрессазарядки,
котораячерез10секундпогаснет.
2.Поокончанииотобразятсязначокполного
уровнязарядаисоответствующеезначение:
«100%».Экранпогаснетчерез10секунд.
3.Устройствоможнопродолжатьиспользовать
4.Времяполнойзарядкисоставляет
приблизительно1час30минут(при
использованииадаптера5В/2А).
5.Врежимеожиданияустройствосполным
зарядомсохраняетзаряддо12месяцев.
Примечание.Приподключениикисточнику
питанияврежимеблокировки,устройство
автоматическиразблокируется.
Многофункциональный OLED-дисплей
Устройствооснащеномногофункциональным
OLED-дисплеем.(Передпервым
использованиемнезабудьтеснятьзащитную
пленкусэкрана).Приактивациифонаряна
дисплеепоследовательноотобразитсятекущая
информация(уровеньяркостиилюмены,
атакжеоставшеесявремяработы),после
чегоэкранпогаснет.Повторноактивировать
дисплейможноприпомощикратковременного
нажатиянакнопкурежима.
Включение:когдафонарьвыключен,
кратковременнонажмитенакнопкупитания,
Выключение:когдафонарьактивирован,
кратковременнонажмитенакнопкупитания,
Выбор цветовой температуры
Устройствоподдерживает3цветовые
температуры:теплый/нейтральныйбелый
/холодныйбелыйсвет.Вовключенном
состояниизажмитеиудерживайтеобекнопки,
послечегонаэкранепоследовательно
отобразятсяцветовыетемпературы.Отпустите
кнопкидлявыборанужногорежима.
Врежимеработыоднойизцветовых
температурприактивированномдисплее
кратковременнонажимайтенакнопкурежима,
чтобыпоследовательнопереключатьсямежду
следующимиуровнямияркости:СВЕРХНИЗКИЙ
–НИЗКИЙ–СРЕДНИЙ–ВЫСОКИЙ.При
повторнойактивациифонарьбудетиметьтеже
уровеньяркостиицветовуютемпературу,что
былиустановленывпоследнийраз.
Примечание.Еслидисплейпогас,
кратковременнонажмитенакнопкурежима,
чтобыегоактивировать,послечеговыснова
получитедоступквыборууровняяркости.
Функция предустановки уровня
Устройствооснащенофункцией
предварительнойнастройкиуровняяркости.
Когдафонарьвыключениненаходитсяв
режимеблокировки,кратковременнонажмите
накнопкурежима,чтобыактивироватьдисплей.
Повторныекратковременныенажатиянакнопку
режимабудутпоследовательноотображать
уровнияркостиисоответствующиеимлюмены
вследующемпорядке:СВЕРХНИЗКИЙ,НИЗКИЙ,
СРЕДНИЙиВЫСОКИЙ.Послевыборажелаемого
уровняяркостикратковременнонажмитена
кнопкупитаниядляегоактивации.
СВЕРХНИЗКОГО уровня яркости
Ввыключенномсостояниизажмитеи
удерживайтекнопкупитаниядляактивации
фонаряврежимеСВЕРХНИЗКОГОуровняяркости.