Optex Redwall SIP-3020-IP-BOX Manual

Optex Ikke kategoriseret Redwall SIP-3020-IP-BOX

Læs gratis den danske manual til Optex Redwall SIP-3020-IP-BOX (12 sider) i kategorien Ikke kategoriseret. Denne vejledning er vurderet som hjælpsom af 11 personer og har en gennemsnitlig bedømmelse på 5.0 stjerner ud af 6 anmeldelser. Har du et spørgsmål om Optex Redwall SIP-3020-IP-BOX, eller vil du spørge andre brugere om produktet?

Side 1/12
- 1 -
ENGLISH FRANÇAIS DEUTSCH ITALIANO ESPAÑOL
2.3-4.0 m
(7.6-13 ft.)
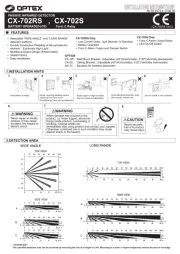
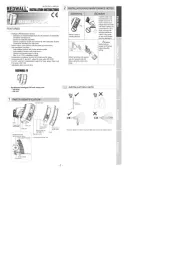
INSTALLATION AND MAINTENANCE NOTES
Warning Caution
Never repair or
modify product
Hold the main unit
securely when you
install or service it.
If you remove your
hands from the main
unit when cables are
connected to it, the
main unit may fall
and the connector
cables may break
or the circuit board
may be damaged.
Caution
Verify that the
power is off before
connecting the
wiring.
2
PARTS IDENTIFICATION
1
No. 59-1494-2 0911-01
INSTALLATION INSTRUCTIONS
Synthesized Intelligent PIR
REDWALL-V series
Synthesized Intelligent PIR
REDWALL-V series
FEATURES
* Intelligent PIR Detection System
- Detection of ambient temperature and illuminance for
automatic sensitivity management
- Advanced detection algorithm
- Three dual pyro-elements with patented Double Conductive
Shielding
* Anti-vandalism functions
- Anti-rotation function with 3-axis accelerometer
- Anti-masking function with photo-beam
- Reinforced polycarbonate housing
- Max. 4 m (13 ft.) installation height
* Independent sensitivity selector for near/far areas
* Detection logic selector
* Detection range selector
* Independent N.C. and N.O. outputs
* Adjustable alarm interval time
SIP-3020CAM DN (EU), SIP-3020CAM DN (US)
* High-quality camera image: Day (colour)/Night (B/W)
* 480 TV lines
* Varifocal lens 3-9 mm
* Minimum illumination: Day (colour) 0.5 lx, Night (B/W): 0.03 lx
REDWALL-V REDWATCH-V
: Synthesized Intelligent PIR
SIP-3020
SIP-4010
SIP-404
: Synthesized Intelligent PIR
with D/N camera
SIP-3020CAM DN (EU)
SIP-3020CAM DN (US)
SIP-3020CAM DN
Mount the detector so that the majority of traf c ow is across the detection pattern.
*1: Not used for the SIP-4010 and SIP-404.
2-1
INSTALLATION HINTS
Base
Fixing screw
for the base
Main unit
Masking plate for near
area (*1)
Fixing rubber
form (*1)
Window
Fixing screw
for the cover
Cover
Far area mirror
Masking plate for far area
Fixing rubber form
Adjustment screws
(two facing each other)
Angle adjustment guide
Camera unit
Near area mirror
Arrow marking
Fixing screw
Nylon wire
loop
When servicing, the sensor
can be hooked onto the
base using the nylon wire
loop.
- 2 -
3-1
W all Mounting
Attach the paper template (an accessory) onto the wall,
and drill a 6-mm dia. mounting hole and a cabling hole.
Insert the anchor bolt (an accessory) into the board mount
hole.
Using an allen key , remove the main unit from the base
Drill through the bushing of the wiring hole, pass the cable
through the hole, and secure the base to the wall.
Connect the cable to the terminal block (see Step 3-3).
Mount the main unit onto the base.
Cautions>>
When mounting the main unit, take care not to trap the
nylon wire loop. Also, take care not to get your fingers
caught.
Check to see that the various settings and operations are
correct.
Caution>>
When the red LED flashes after the power turns on,
this signifies that the system is warming up. W ait for
approximately 60 seconds.
INST ALLA TION AN
3(1)
(2)
(3)
(4)(5)
(6)
3-2
Inside View of the Base
3-3
WIRING
*1: T AMPER terminals to be connected to a 24 hour supervisory
Name Function
TROUBLE
OUTPUT
T rouble out is used for anti-masking signal. When
an object is placed close to the lens surface, for a
period of more than 20 seconds (approx.), the IR
anti-masking circuit will activate and generate a
trouble signal.
T AMPER
OUTPUT
It is detected when the cover is opened.
It is detected when the main unit is removed from
its base.
Anti-Rotation:
Damage sustained by the main unit is detected.
When the system power switch is turned on while
the cover is closed, the mounting position of the
main unit itself will be determined and stored in
memory after approximately 10 seconds. Then,
if the main unit is impacted in a horizontal or
vertical direction and if the position of the main
unit has changed, damage sustained by the main
unit will be detected. However , if you remove the
cover while keeping the system power turned on,
and if you close the cover again after correcting
the position of the main unit, the new position
of the main unit will be stored in memory after
approximately 10 seconds.
Waterproof seal
(Do not remove
this seal.)
Base
Bushing of wiring
hole
Open wiring cap
Main unit connector
Wall mounting hole
BNC terminal
(SIP-3020CAM DN ONL Y)
Wall mounting hole
Bushing of wiring
hole Wiring terminals
1 Loosen the
xing screw
for the
base.
2 Open.
3 Unplug the cable
connector .
4 Pull out.
BNC terminal
(SIP-3020CAM DN ONL Y)
POWER INPUT
T AMPER OUTPUT *1
ALARM OUTPUT (N.C.)
ALARM OUTPUT (N.O.)
TROUBLE OUTPUT
SP ARE
4 Tighten and
secure the
xing screw
2 Connect the
connector .
3 Close.1 Insert and
secure here.Nylon wireloop Distance from the ground to the bottom of the template must be between 2.3 m (7.6 ft.) and 4 m (13 ft.).


Produkt Specifikationer

Mærke: Optex
Kategori: Ikke kategoriseret
Model: Redwall SIP-3020-IP-BOX

Har du brug for hjælp?

Hvis du har brug for hjælp til Optex Redwall SIP-3020-IP-BOX stil et spørgsmål nedenfor, og andre brugere vil svare dig