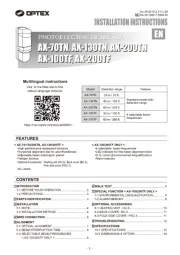
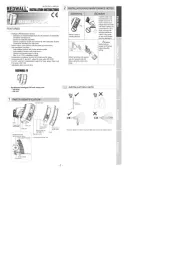
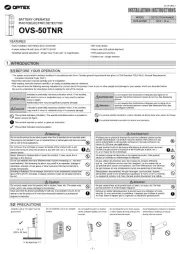
Optex SL-200TNR Manual


Læs nedenfor 📖 manual på dansk for Optex SL-200TNR (4 sider) i kategorien Ikke kategoriseret. Denne guide var nyttig for 20 personer og blev bedømt med 4.5 stjerner i gennemsnit af 2 brugere

Side 1/4
This symbol indicates prohibition. The specific prohibited action is provided in and/or
around the figure.
Warning
Caution
Warning
Caution
INSTALLATION INSTRUCTIONS
No. 59-2032-2
FEATURES
Indicates a potentially hazardous situation which, if not avoided, will result
in minor or moderate injury, or may result in serious injury or death.
Additionally there may be significant property damage.
Indicates a potentially hazardous situation which, if not avoided, may result
in minor or moderate injury or in property damage.
Read this instruction manual carefully prior to installation.
After reading, store this manual carefully in an easily accessible place for reference.
This manual uses the following warning indications for correct use of the product, harm to you
or other people and damage to your assets, which are described below. Be sure to understand
the description before reading the rest of this manual.
This symbol requires an action or gives an instruction.
This symbol indicates recommendation.
INTRODUCTION
1
1-1 BEFORE YOUR OPERATION
30m/100ft.
SL-100 TNR
60m/200ft.
SL-200 TNR
DETECTION RANGEMODEL
Do not use the product for purposes other than the detection of moving objects such as people and vehicles.
Do not use the product to activate a shutter, etc., which may cause an accident.
Do not touch the unit base or power terminals of the product with a wet hand (do not touch
when the product is wet with rain, etc.). It may cause electric shock.
Never attempt to disassemble or repair the product. It may cause fire or damage to the devices.
Do not use batteries that have different levels of power remaining (i.e., new and used batteries).
Not observing the above may result in an explosion, leakage of electrolyte, emission of toxic
gases or other outcomes that may be harmful to people and property.
[Handling of Batteries] Do not recharge, short circuit, crush, disassemble, exceed heat above
100°C (212°F), incinerate, or expose contents to water. Do not solder directly to the cell.
Do not pour water over the product with a bucket, hose, etc. The water may enter, which may
cause damage to the devices.
Clean and check the product periodically for safe use. If any problem is found, do not attempt to
use the product as it is and have the product repaired by a professional engineer or electrician.
BATTERY OPERATED
PHOTOELECTRIC DETECTOR
Smart Line series
BATTERY OPERATED
PHOTOELECTRIC DETECTOR
Smart Line series
1-2 PRECAUTIONS
PREPARATIONS
- 1 -
2
1-3 PARTS IDENTIFICATION
Do not install the
unit on an unstable
surface.
Do not install the pole
in a location where
sufficient stability can
not be ensured.
Do not install the unit in
trees, leaves, or other
objects that may swing
in the wind and block
the beam.
Do not install the
receiver in a
location where it is
exposed to direct
sunlight.
Do not allow the infrared
beam from a another detector
to reach the receiver.
Install the unit at a height
where an object can be
detected without fail.
The pole size should be
43 to 48 mm dia.
(1.69 to 1.89 inch dia.).
Install the unit at least 1
m (3.3 ft.) away from the
wall or fence that may be
running parallel to the
beam.
Accessories>>
Velcro tape: 1 set
U-brackets: 2Pole brackets: 2
4×20 self tapping for wall mounting
(with rubber washer): 4
M4×16 screws for pole mounting
(with rubber washer): 4
Cables: 3
Receiver
Transmitter
(another
detector)
Receiver
(another
detector)
Transmitter
1 m (3.3 ft.)
Battery operated detector
- D size lithium battery or CR123A lithium battery (OPTION CRH-5)
Simplified optical adjustment
- Sniper View Finder with ×2 magnification
Avoids having to install a wireless transmitter in the photoelectric transmitter.
- IR signal transmission technology transfers the low battery signal to the receiver
Possible to connect the power and alarm cables to both the receiver and the transmitter or either of them
- OPTION PCU-5
Long battery life
Battery saving function
Intermittent output function
Slim body design
Easy to see vivid interior color
for optical alignment
IP65 waterproof structure
Tamper function
Indicator LED for an easy alignment
Various options (Refer to page 4.)
(BCU-5, CRH-5, PCU-5)
Detector power source Battery type Wireless transmitter power source D-size
4 pcs.From detector battery
From independence battery
From detector battery
From independence battery
From detector battery
From independence battery
From detector battery
From independence battery
From detector battery
From independence battery
4 pcs.
2 pcs.
2 pcs.
16 pcs.
Wireless
Either Transmitter or
Receiver
Both Transmitter and
Receiver
Wired
16 pcs.
8 pcs.
8 pcs.
2 sets
2 sets
1 set
1 set
1 set
1 set
1 set
1 set
1 set
1 set
1 set
1 set
1 set
2 sets
2 sets
No
Need
No
Need
D size
CR123A
D size
CR123A
No
Need
No
Need
No
Need
CR123A CRH-5 BCU-5 PCU-5
BATTERY OPTION*
For Wireless transmitter
Main unit cover
Battery cover
Main unit Back box
Viewfinder
Optical
alignment dial
Optical lens
Battery cover
lock screw
Main unit cover
lock screw
Main unit mounting
bracket
Dip SW
(Receiver only)
* Refer to “9 OPTIONS” on page 4.
Unit: mm (inch)
141 (5.6)
35 (1.4)
47 (1.9)
Wireless transmitter size
.


Produkt Specifikationer

Mærke: Optex
Kategori: Ikke kategoriseret
Model: SL-200TNR

Har du brug for hjælp?

Hvis du har brug for hjælp til Optex SL-200TNR stil et spørgsmål nedenfor, og andre brugere vil svare dig


Ikke kategoriseret Optex Manualer
Optex

Optex FTN-RAM Manual

25 April 2024
Optex

Optex FD525 Manual

10 Februar 2024
Optex

Optex SL-200QN Manual

27 Oktober 2023
Optex

Optex CDX-NAM Manual

7 Oktober 2023
Optex

Optex AX-330PLUS Manual

16 September 2023
Optex

Optex SL-650QDM Manual

28 Juli 2023
Optex

Optex HX-40RAM Manual

21 Juli 2023
Optex

Optex QXI-MW Manual

25 Juni 2023

Ikke kategoriseret Manualer

Nyeste Ikke kategoriseret Manualer