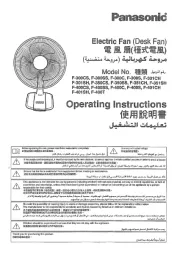
Panasonic F-409Q Manual


Læs gratis den danske manual til Panasonic F-409Q (2 sider) i kategorien Ventilator. Denne vejledning er vurderet som hjælpsom af 3 personer og har en gennemsnitlig bedømmelse på 4.4 stjerner ud af 2 anmeldelser. Har du et spørgsmål om Panasonic F-409Q, eller vil du spørge andre brugere om produktet?

Side 1/2
409QH8001ZM
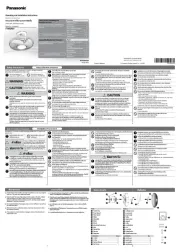
WIRING DIAGRAM
Note
This model is without plug because it is permanently connecting to fix wiring and mounting on th e
ceiling.
(This model to be installed by contractor.)
ASSEMBLE AND INSTALLATION INSTRUCTION
Installation and wiring should be done by dealer or authorized person.
Rotary switch control
ADJUSTMENT OF CIRCULATING ANGLE /
The oscillation angle can be adjusted to 15, 30 or 50 degrees.
NR PM RM
%
%
%
50°
30°
15°
Fig. A
Fig. B
Fig. C
2.5m
1.5m
0.75m
50°
15°
30°
3~3.5m
3~3.5m
3~3.5m
CLEANING AND MAINTENANCE /
CAUTION/
:
There must be a double pole switch with a minimum 3mm contact gap in the fixed installation circuit.
3
Note / :
This model is without plug because it is permanently connecting to fixed wiring and mounting on the
ceiling. (This model is to be installed by contractor)
1. Keep in a dry place, free of excessive humidity and water.
2. Keep the fan clean. Wipe away dirt with a clean soft cloth, ordinary soap and water, wipe dry.
Do not use solvents......etc.(gasoline or petroleum).
3. Do not spray with insecticides.
1.
2.
3.
Ensure that the fan is switched off from supply main before cleaning or maintenance.
Other wise it may cause the sets to move suddenly, injuries and electric shock.
Switched off
OPERATION /
This appliance is not intended for use by persons (including children) with reduced physical, sensory
or mental capabilities, or lack of experience and knowledge, unless they have been given supervision
or instruction concerning use of the appliance by a person responsible for their safety.
To avoid the possibility of causing injury to users or damage properties, please follow all the
explanation written below. The manufacturer is not responsible for accidents and injuries caused
by defective or deficient installation.
本設備是不打算供與(包括兒童)身體,感官或心理能力欠佳人士使用,或缺乏經驗和知識,
除非他們是在負責他們安全的人員監督下或有關使用該設備的指示下使用。
為了避免可能造成傷害用戶或損壞財產, 請遵守以下所有的書面解釋。
製造商不會因有缺陷或不足的安裝所造成的意外及傷而亡負責。
Children should be supervised to ensure that they do not play with the appliance.
兒童應該受到監督以確保它們不玩該設備。
Thank you for purchasing this product.
感謝您選購此產品。
F-409QS
F-409QH
45 - 51.5
Panasonic Corporation
Web Site: http://panasonic.net
1 2 3 4 5
(1, 2, 3, 4, or 5).
0
3
1
4
2
5
WIRING DIAGRAM
MOTOR
CAPACITOR
SOURCE
REGULATOR
YELLOW
THERMAL FUSE
BROWN
TERMINAL
BROWN
YELLOW
BLUE
BLACK
BLUE (N)
BROWN (L)
GREEN/YELLOW
(FOR EARTH)
WHITE
WHITE
RED
BLACK
0
1
2c
3
4
5
BROWN (CORD)
BROWN
CAPACITOR
D
E
F
H
G
B
A
C
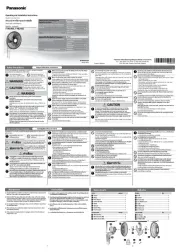
PARTS IDENTIFICATION /
HOW TO ASSEMBLE /
Mounting the rear guard /
Align the projection
A
with the hol e B
of the rear guard,
and attach the rear guard to the motor.
A
B
1
Re-tighten 2 wing bolts
C
.
C
2
Place the blade boss
D
onto the shaft, and push it all
the away until the groove
E of the blade boss is
correctly fitted to the pin F
of the shaft.
D
E
F
3
Align the projection with the hole G H
of the blade,
and attach the blade to the blade boss.
G
H
4
184mm
Ø
458mm
3
1
2
4
7
"
#
!
.
9
$
8
%
6
5
1 Guard clip
2 Front guard
3 Rear guard
4 Blade
5 Wing bolt
6 Motor
7 Stand
8 Fitting base
9 Carl bolt plug
10 Anchor for safety wire
11 Ceiling
12 Supporting plate
13 Set screw
14 dRo
15 Regulator base
16 Regulator cover
17 Switch
18 Switch knob
19 Capacitor
20 Cover set screw
21 Fitting hole
22 Safety wire
Next turn spinner counter clockwise in order to securely
tighten the blade.
5
6
Spinner
Attach the front guard.
Mounting the blade
Front guard
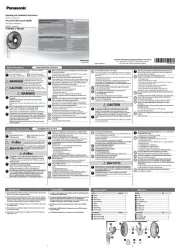
HOW TO INSTALL THE FAN /
CAUTION
This fan is specially design for mounting above 2.3m from the floor. (Mounting height shall be 2.3m)
2.3m
2.3m
Recommended position
of earth termination point
150 mm
3-Ø9.5
150 mm
22
1Drill hole.
2
Insert carl bolt plug
using slight force.
3Place fitting base/
safety wire into bolt
& tighten.
CAUTION: Raw plug & screw are not permitted.
Ramsetting is not acceptable.
Remove the set screw and fitting base from stand
base before installing the fan.
1
Install the fitting base and carl bolt plug.
2
CEILING
Safety cord anchor
Safety wire
Safety washer
Carl bolt
plug
Fitting
base
(Fig./
1)
Install safety wire using the additional carl bolt provided.
Note: 4 pieces Carl bolt plug will be provided.
:
4
3
:
Recommended
position of safety wire
4-Ø 8.5 hole /
(Depth /
33mm)
HOW TO INSTALL THE REGULATOR /
CAUTION
This must be a double pole switch with minimum 3mm contact gap in the fixed installation circuit.
“Double Pole”
3mm
Disassemble as follows.
Use a Philips screwdriver to remove the cover set screw.
1
Fix the regulator base on the wall.
2
Wiring Termination
Live-Brown (
)
Neutral-Blue (
)
Earth-Yellow/Green (
/ )
7.5°, 15° or 25°
Prohibited
Do not tangle motor lead with power cord.
Install the safety wire and safety cord anchor.
A separate anchoring point must be installed according to (Fig. 1).
The fan suspension system shall be examined, regularly at least once in every two years.
1
4
Fix the body to the fitting base by turning the body
so that the hole aligns the screw hole .J I
J
I
J
I
5
- A free length of “EARTH” wire which must be longer than the “LIVE” and “NEUTRAL” wires and of at
least 600 mm, must be provided to ensure Earth continuity in the event of mounting failure of the unit.
- This free length of “EARTH” wire must be measure from the “Anchor point” to the “Fan body” to ensure
that the “EARTH” wire remains intact even after mounting failure and when the “Safety Wire” is in operation.
-
” (EARTH)
” (LIVE)
” (NEUTRAL)
600 mm
(EARTH)
-
” (EARTH)
(EARTH)
6
Tighten the set screw K.
K
7
Caution:
Be sure to tighten the set screw; otherwise the unit will drop.
:
K
Warning
HOW TO INSTALL /
L
3
1
4
2
5
0
1
2
3
4
5
83.5
114
4.5
118
41.25
40
20


Produkt Specifikationer

Mærke: Panasonic
Kategori: Ventilator
Model: F-409Q

Har du brug for hjælp?

Hvis du har brug for hjælp til Panasonic F-409Q stil et spørgsmål nedenfor, og andre brugere vil svare dig