Panasonic F-MU408 Manual


Læs gratis den danske manual til Panasonic F-MU408 (2 sider) i kategorien Ventilator. Denne vejledning er vurderet som hjælpsom af 3 personer og har en gennemsnitlig bedømmelse på 4.0 stjerner ud af 2 anmeldelser. Har du et spørgsmål om Panasonic F-MU408, eller vil du spørge andre brugere om produktet?

Side 1/2
3 4
Safety Precautions
Always follow these instructions
Make sure all screws (include the Safety Screw) must be always
connected and tighten.
The product may become unstable and fall down. It may cause injury
or damage of the product if drops.
Make sure the power plug is fully inserted into socket.
or re due to overheat. Do not use the damaged plug or loosen socket.
When a failure or malfunction occurs, stop using the product
immediately and disconnect the power plug.
Heat generation etc. may occur and cause electrical shock or re.
• [Examples of failure/malfunction]
Abnormal noise is observed during operation.
Moving the power cord stops operation.
Burning smell is observed.
Motor unit, power cord or plug becomes abnormally hot.
Contact the authorized dealer immediately for maintenance or
repairing.
Switch off power supply and wait until the Blade is fully static,
before cleaning or doing any maintenance jobs.
Can cause Wall Fan to move suddenly, injuries or electrical shock.
Kindly refer to your authorized dealer for repairing or maintenance.
Wipe off dust on the power plug periodically.
If the plug is used with dust accumulated on it, humid air etc. may
cause poor insulation and re.
• Disconnect the power plug and wipe it with a dry cloth.
• Disconnect the power plug when not using for a long period.
Do not use power supply other than rated voltage mentioned.
Overheating can cause electrical shock or re.
Do not plug line cord into outlet until fan has been assembled
completely.
Can cause electrical shock or injury.
To avoid the possibility of causing injury to users or damage to properties,
please follow all the explanations written below.
This symbol denotes an
action that is COMPULSORY.
This symbol denotes an
action that is PROHIBITED.
WARNING
A state that may be caused by the
mishandling of products, which, if not
avoided, may lead to the possibility of
death or serious injury of users.
CAUTION
A state that may be caused by the
mishandling of products, which, if not
avoided, may result in the injury of users
or property damage.
WARNING
Strictly follow all the instructions given in this manual for
installation.
Electrical and installation work needs to be performed by a
quali ed individual.
Installation error can cause re, electrical shock, injury or Wall Fan to
drop.
Stop using the product when any abnormality or failure occurs
and turn “OFF” the Miniature Circuit Breaker (MCB).
Risk of smoke, re, electrical shock or Wall Fan to drop.
Please contact your authorized dealer for repairing or maintenance.
This appliance is not intended for use by persons (including
children) with reduced physical, sensory or mental capabilities, or
lack of experiences and knowledge, unless they have been given
supervision or instruction concerning use of the appliance by a
person responsible for their safety.
Children should be supervised to ensure that they do not play
with the appliance.
Do not damage the power cord or plug.
(Do not cut or modify. Do not forcefully bend, twist or pull. Do not put
near heating appliances or put anything heavy on it. Do not bundle the
power cord)
If damaged power cord or plug is used, short circuit etc. may occur and
cause electrical shock or re.
• Contact the authorized dealer for repairing the power cord or plug.
If the supply cord is damaged, it must be replaced by the
manufacturer, its authorized dealer or similarly quali ed persons
in order to avoid a hazard.
Do not connect or disconnect the power plug with wet hands.
It may cause electrical shock.
Do not immerse the product in water, or put water on it.
Do not sprinkle water to Wall Fan.
Do not wet Wall Fan.
Can cause re or electrical shock due to short circuit.
Do not dismantle the Wall Fan unless stated by this manual.
Must use only supplied parts.
Can cause re, electrical shock, injury or Wall Fan to drop.
CAUTION
To avoid the possibility of causing injury to users or damage
to properties, please follow all the explanation written in this
manual. The manufacturer will not be responsible for any
accidents and injuries caused by defective, de cient installation
or installation which does not follow to instruction manual.
Hold the plug when disconnect from main supply, never pull the
cord.
May cause short circuit and damage of power supply cord and leading
to re or electrical shock.
The fan is to be installed so that the blades are more the 2.3 m
above the oor (for fans intended to be mounted at high level).
Can cause injury if hit by Blades.
Do not use the product at the following locations:
such as gas ranges.
• Where it is exposed to rain or water.
• Flame failure, catching re, explosion, short circuit, etc. may occur
and cause electrical shock or re.
• Where it becomes unstable or place near the obstacles.
• The product may fall down and cause injury.
• Where it is exposed to direct sunlight or wind-driven rain.
Overheat etc. may occur and cause electrical shock or re.
Do not operate the product before the Stand is fully insert to the
bracket.
The product may become unstable and fall down. It may cause injury.
Avoid continuous exposure to direct wind from the Wall Fan.
It may cause uncomfortable.
Do not use solvents (gasoline, petroleum, thinner, benzine,
alcohol, cleaning powder, alkaline detergent) or any other
chemicals.
Wipe away dirt with a clean soft cloth, ordinary soap and water to
keep Wall Fan clean.
Can cause plastic part deformation or metal corrosion.
Can cause injury if parts drop.
Do not put your ngers into the guard or any moving part of the
product.
It may cause injury.
5 6
อควรระวงเพอความปลอดภ ื ัย
โปรดปฏตามคําแนะนําเหลาน
โปรดแน่ใจว่าจะตองตดสกรู (รวมถงสกรูนรภ ย) และขนใหแน่นทุกต
ผลตภัณฑนีอาจไม่มันคงหรือตกหล่นได
ึ
งหากตกหล่นอาจเปนเหตุใหเกดการ
บาดเจ็บหรือผลตภัณฑได รับความเส
ยหายได
โปรดแน่ใจว่าไดเส
ยบปลกไฟเขาในเตาเส
ยบจนสุด
หากเส
ยบปลักเข าเตาเส
ยบหลวมๆ อาจทําใหเกดไฟฟาช
อตหรือเกดไฟไหม
เนืองจากเครืองรอนเกนไป อย่าใช
ปลักทีช
ารุดหรือเต าเส
ยบทีหลวม
หากเกดขอผดพลาดหรอทํางานผดปกต ใหหยุดใช
ผลตภณฑและด
ปลกไฟออกทนท
อาจเกดความรอน ฯลฯ และเปนเหตุใหเกดไฟฟาช
อตหรือไฟไหม
[ตัวอย่างข อผิดพลาด/การทํางานผิดปกต]
งเกตเส
ยงทีดปกติขณะใช
งาน
การยายสายไฟทําให เครืองหยุดทํางาน
งเกตกล
นเหม็นไหม
มอเตอร สายไฟ หรือปลักรอนผดปกต
ดต่อตวแทนทีไดบอนุญาตเพือขอให
อมบํารุงหรอซ
อมแซมทนท
ดสวตช
แหล่งจ่ายไฟแลวรอจนกว่าใบพดจะหยุดสนท ก่อนทีจะทําความ
สะอาดหรอซ
อมบํารุง
อาจเปนเหตุใหพัดลมตดผนังหมุนทันที ทําใหบาดเจ็บ หรือไฟฟาช
อตได
โปรดตดต่อตัวแทนทีได รับอนุญาตเพือทําการซ
อมหรือซ
อมบํารุง
เช
ดฝุ นบนปลกไฟเป นระยะๆ
หากใช
งานปลักขณะทีมีฝุ นสะสม ลมช
ื
น ฯลฯ อาจทําใหฉนวนช
ารุดและเกดไฟ
ไหมได
ถอดปลักไฟและเช
ดด วยผ าแห
ถอดปลักไฟเมือไม่ไดใช
เปนระยะเวลานานๆ
อย่าใช
แหล่งจ่ายไฟทีนอกเหนอจากแรงด นไฟฟ าพดตามทีระบุไว
อุปกรณ์ทีอนเกนไปอาจเปนเหตุให เกดไฟฟาช
อตหรือไฟไหมได
อย่าเส
ยบสายไฟเขาเตาเส
ยบจนกว่าจะประกอบพดลมเสร็จเรยบรอยแล
อาจทําใหเกดไฟฟาช
อตหรือบาดเจ็บได
เพือหลกเลียงการบาดเจ็บทีอาจเกิดขึนไดับผู ใช
หรือทรัพย
นเส
ยหาย โปรดทําตามคํา
อธบายด านล่าง
ญลักษณ์นีหมายถงการกระ
ทําที องดําเนินการ
ญลักษณ์นีหมายถงการกระ
ทําที ามทํา
คําเตอน
ในสถานการณ์ทีอาจเกดจากการใช
ผลตภัณฑ
อย่างไม่ถูกต อง ซ
ึ
งหากไม่หลกเลียงอาจทําให
ผูใช
งแก่ความตายหรือบาดเจ็บรายแรงได
อควรระว
ในสถานการณ์ทีอาจเกดจากการใช
ผลตภัณฑ
อย่างไม่ถูกต อง ซ
ึ
งหากไม่หลกเลียงอาจส
งผล
ใหผู ใช
ได รับบาดเจ็บหรือทรัพย์ส
นได รับความ
เส
ยหาย
คําเตอน
โปรดปฏตามคําแนะนําทีใหไวในคู่มอการตดตังน
อย่างเคร่งคร
งานไฟฟ าและงานตดต ังจําเป นตองดําเนนการโดยผูีผ่านการร บรอง
การตดตังทีผดพลาดอาจเป นสาเหตุให เกดไฟไหม ไฟฟาช
อต บาดเจ็บ หรือ
พัดลมตดผนังหล่นได
หยุดใช
ผลตภณฑหากผลตภณฑ
ทํางานผดปกตหรอเกดขอผดพลาด
และให “ปด” เบรคเกอรขนาดเล็ก (MCB)
เส
ี
ยงต่อการเกดควัน ไฟไหม ไฟฟาช
อต หรือพัดลมตดผนังหล่นได
โปรดตดต่อตัวแทนทีได รับอนุญาตเพือทําการซ
อมหรือซ
อมบํารุง
อุปกรณ์น
ไม่เหมาะส
าหรบบุคคล (รวมถงเด็ก) ทีอบกพร่องทีเกียวก
ร่างกายหรอสต
มปช
ญญะ หรอเป นผูีขาดประสบการณ์และความร
ยกเวนจะได บการควบคุมดูแลหรอคําแนะนําทีเกียวของกบการใช
อุปกรณ์จาดผูบผดชอบต่อความปลอดภยของบ
ุคคลเหล่านั
เด็กควรไดบการดูแลเพือใหแน่ใจว่าจะไม่เล่นกบอุปกรณ์ดงกล่าว
อย่าทําใหสายไฟหรอปลกเส
ยหาย
(อย่าตัดหรือดัดแปลง อย่าดัด บด หรือดงแรงๆ อย่าวางไว ใกล อุปกรณ์ทําความ
อนหรือวางของหนกทับไว อย่ามัดสายไฟ)
หากใช
สายไฟหรือปลักทีช
ารุด อาจเกดไฟฟาลัดวงจร ฯลฯ และเปนเหตุใหเก
ไฟฟาช
อตหรือไฟไหมได
ิดต
่อตัวแทนทีไดรับอนุญาตเพือขอซ
อมสายไฟหรือปลั
หากสายจ่ายไฟช
ารุด จะตองใหผลต ตวแทนทีไดบอนุญาต หรอผูี
คุณสมบคลายคลงกนเป นผูเปลียนใหเพือหลกเลียงอนตราย
อย่าตอหรอดงปลกไฟขณะทีอเป ยก
เนืองจากอาจทําใหเกดไฟฟาช
อตได
อย่าจุ่มผลตภณฑลงในนําหรอเทนําใส
อย่าฉดนําใส
ดลมตดผน
อย่าทําใหดลมตดผนงเป ยก
อาจเปนเหตุใหเกดไฟไหม หรือไฟฟาช
อตเนืองจากไฟฟาลัดวงจรได
อย่าร
อพดลมตดผนง ยกเวนระบุไวในคู่มอน
องใช
เฉพาะช
ิ
นส
วนทีใหมาดวยเท่านั
อาจเปนสาเหตุใหเกดไฟไหม ไฟฟาช
อต บาดเจ็บ หรือพัดลมตดผนังหล่นได
ข้อควรระวัง
เพือหลกเลียงการบาดเจ็บทีอาจเกดข
นไดบผใช
หรอทรพย
นเส
ยหาย
โปรดทําตามคําอธบายในคู่มอน
ผูผลตจะไม่รบผดชอบต่ออุบเหตุและ
การบาดเจ็ ีเกดจากการชบใดๆ ท
ารุ ดตังทีบกพร อการตดตัด การต อง หร
ีไม่เป
นไปตามคู่มอคําแนะนํา
ใหบทีปลกเมือถอดปลกจากแหล่งจ่ายไฟหลก หามดงสายไฟ
อาจเปนเหตุใหเกดไฟฟาลัดวงจรและทําให สายจ่ายไฟเส
ยหาย เปนเหตุใหเก
ไฟไหมหรือไฟฟาช
อตได
องตดต ังพดลมเพือใหใบพดอยู่เหนอพ
นมากกว่า ม. (ส2,3
าหรบพดลม
ีจะตองตดตังในระดบสูง)
อาจเปนเหตุใหเกดการบาดเจ็บได หากถูกใบพัดต
อย่าใช
ผลตภณฑในบรเวณต่อไปน
:
บริเวณทีอาจมีก๊าซไวไฟหรือใกลแหล่งเปลวไฟ เช
น เตาแก๊ส
บริเวณทีส
มผัสกับฝนหรือนํ
ไม่มีเปลวไฟ ไฟประทุ การระเบิด ไฟฟาลัดวงจร ฯลฯ และเปนเหตุให เกดไฟ
าช
อตหรือไฟไหมได
บริเวณทีไม่มันคงหรือวางใกล
ิ
งกดขวาง
บริเวณทีส
มผัสกับแสงแดดหรือลมฝนโดยตรง
บริเวณทีส
มผัสกับแสงแดดหรือลมฝนโดยตรง
อาจทําให อนมากเกนไป ฯลฯ และเปนเหตุใหเกิดไฟฟาช
อตหรือไฟไหม
อย่าใช
งานผลตภณฑ่อนทีจะใส
ขาตังลงในฐานรองจนสุด
ผลตภัณฑนีอาจไม่มันคงหรือตกหล่นได อาจทําให เกิดการบาดเจ็บได
หลกเลียงอย่าส
มผสกบลมจากพดลมตดผนงอย่างต่อเนืองโดยตรง
เนืองจากอาจทําใหรู
กไม่สบายตัวได
อย่าใช
วทําละลาย (แกสโซลน นํามนปโตรเลยม เบนซ
น ทนเนอร
แอลกอฮอล ผงช
าระลาง สารชะลางทีเป นด่าง) หรอสารเคมืนใด
เช
ดส
ิ
งสกปรกดวยผานุ่มสะอาด สบู่ธรรมดา และนําเพือใหดลมตดผน
สะอาดอยู่เสมอ
อาจเปนเหตุให
ิ
นส
วนทีเปนพลาสตกเส
ยรู
ปหรือโลหะเกดการกัดกร่อนได
อาจเปนเหตุใหเกดการบาดเจ็บได หากช
ิ
นส
วนตกหล่น
อย่าแหย่นิวลงในตะแกรงพดลมหรอขยบส
วนใดของผลตภณฑ
อาจทําใหเกดการบาดเจ็บได
7
8
Maintenance
การบํารุงรกษา
1
Check the Wall Fan condition annually. If a problem occurs, stop using the
Wall Fan. Then refer to an authorized dealer.
2
Keep the Wall Fan clean. Wipe away dirt with a clean, soft cloth, ordinary
soap and damp cloth. Wipe it again to dry it. Do not use solvents (gasoline,
petroleum, thinner, benzine, alcohol, cleaning powder, alkaline detergent)
or any other chemicals. (Refer to page 4 for Safety Precautions.)
3
Do not paint the Blade. If damaged, order a new set of Blade (1 piece) from
an authorized dealer.
4
When referring to an authorized dealer, show these instructions to them
and maintain correctly.
5
If the product is severely broken or damaged, remove from the wall and
replace with a new.
1
ตรวจสอบสภาพพดลมตดผนงทุกป หากมปัญหาเกดข
น ใหหยุดใช
ดลมตดผน
จากนันตดต่อตวแทนทีได บอนุญาต
2
กษาพดลมตดผนงใหสะอาดอยู่เสมอ เช
ดส
ิ
งสกปรกดวยผานุ่มสะอาด สบู่ธรรมดา
และผาหมาดๆ เช
ดอกครังใหแหง อย่าใช
วทําละลาย (แก๊สโซลน นําม
โตรเลยม เบนซ
น ทนเนอร แอลกอฮอล ผงช
าระลาง สารชะลางทีเป นด่าง) หรือ
สารเคมืนใด (โปรดดูหน อควรระวงเพ6
ือความปลอดภย)
3
อย่าทาส
ใบพด หากช
ารุด ให
งซ
อใบพดชุดใหม่ (
1
ิ
น) จากตวแทนทีได
อนุญาต
4
ขณะตดต่อตวแทนทีได บอนุญาต โปรดแสดงคําแนะนําเหล่าน
ใหวแทนดูและ
อมบํารุงใหถูกตอง
5
หากผลตภณฑงหรอเส
ยหายมาก ใหถอดออกจากผนงแลวเปลียนใหม
D
F
G
H
I J K
2
1
Name of parts
ื
อช
ิ
นส
วน
Parts pieces
A
Stand
…………………………………………………………
1
B
Motor
…………………………………………………………
1
C
Rear Guard
…………………………………………………
1
D
Guard Set Nut
………………………………………………
1
E
Blade
…………………………………………………………
1
F
Spinner
………………………………………………………
1
G
Guard Ring
…………………………………………………
1
H
Front Guard
…………………………………………………
1
Accessories pieces
I
Wall Bracket
…………………………………………………
1
J
Wood Screw (M5)
…………………………………………
2
K
Safety Screw (M4)
…………………………………………
1
3 4
A
B
C
E
ิ
นส
วน
ิ
A
ขาตั
…………………………………………………………
1
B
มอเตอร
………………………………………………………
1
C
ตะแกรงหล
…………………………………………………
1
D
แหวนล็อคตะแกรง
…………………………………………
1
E
ใบพ
…………………………………………………………
1
F
วล็อคใบพ
…………………………………………………
1
G
ขอบตะแกรง
…………………………………………………
1
H
ตะแกรงหน
…………………………………………………
1
อุปกรณ์เสร
ิ
I
วยดผน
……………………………………………………
1
J
สกรูเกลยว (M5)
……………………………………………
2
K
สกรูล็อค (M4)
………………………………………………
1
MU4088802ZM
Printed in Malaysia
Panasonic Manufacturing Malaysia Berhad
(196501000304)
No. 3, Jalan Sesiku 15/2, Section 15, Shah Alam Industrial Site,
40200 Shah Alam, Selangor Darul Ehsan, Malaysia.
MU4088802ZM
M1020-4050
Model No. / หมายเลขรุ่น
F-MU408, F-MU453
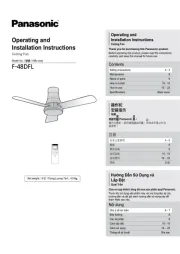
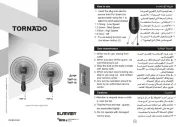
Operating and Installation Instructions
Electric Fan (Wall Fan)
คําแนะนําการใช
งานและการตดตั
พัดลมไฟฟ พัดลมตดผน ( )
ขอบคุณที
งซ
อผลตภณฑ Panasonic
ก่อนใ
ผลตภณฑ ี โปรดอานคาแนะน าโดยละเอยด
และเกบค ู่มอนไวี ใช
ในอนาคต
อควรระวังเพือความปลอดภัย
5 - 6
การบํารุงรักษา
7
ื
อช
ิ
นส
วน
8
การประกอบ
9 - 12
การใช
งาน
13
อมูลจําเพาะ
14
เนื้อหา
ผลตภัณฑนีส
าหรับใช
ในครัวเรือน
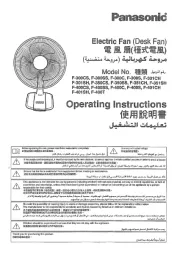
Thank you for purchasing this
Panasonic product.
Before operating this product, please read the
instructions carefully, and save this manual for
future use.
Safety precautions 3 - 4
Maintenance 7
Name of parts 8
How to assemble 9 - 12
How to use 13
Speci cations 14
Contents
This product is for household use.
11
9
10
13 14
12
1
1
I
c
b
Installing the Wall Bracket
How to assemble
การประกอบ
Ceiling /
เพดาน
Wall /
ผนัง
Floor /
พืน
1
Check the desired location for the installation*
1
.
F-MU453:
b
At least 0.4 m (around 16 inch) from side wall.
c
At least 0.6 m (around 22 inch) away from ceiling.
F-MU408:
b
At least 0.35 m (around 14 inch) from side wall.
c
At least 0.5 m (around 20 inch) away from ceiling.
*1: Recommended installation height
d
is 2.4 m or more than 2.4 m (around
95 inch) from the oor.
2
Drill hole on the wall.
For the installation of the Wall Bracket, choose a wall which is thicker than half
an inch or a part of the wall covering a pillar or a crosspiece. For wooden wall
no need to use wall plug.
Insert wall plug
e
(2 pcs) (not included) and secure the Wall
Bracket
I
onto a vertical wall using the Wood Screws
J
.
The Wall Bracket and Safety Screw must be able to withstand a load of 392 N/
40 k
g
(for F-MU408) or 490 N/ 50 k
g
(for F-MU453) when properly xed to the
wall.
The gure shows a general method of installation on concrete or brick wall.
Variation on wall and plug quality would affect secureness of installation.
Please consult quali ed person(s) if there is dif culty during
installation.
การตดตังตวยดผน
a
d
2
J
I
Wall /
ผนัง
30 mm /
30 มม
Or / หรือ
e
e
1
ตรวจสอบตําแหน่งทีตองการจะตดตั*
1
F-MU453:
b
อยู่ห่างจากผนังอย่างนอย ม. (ประมาณ นิว) 0,4 16
c
อยู่ห่างจากเพดานอย่างนอย ม. (ประมาณ นิว)0,6 22
F-MU408:
b
อยู่ห่างจากผนังอย่างนอย ม. (ประมาณ นิว) 0,35 14
c
อยู่ห่างจากเพดานอย่างนอย ม. (ประมาณ นิว)0,5 20
*1: แนะนาว่าควรติดตังสูงจากพืน
d
2,4 2,4 95 ม. หรือมากกว่า ม. (ประมาณ นิว)
2
เจารูบนผน
าหรับการตดตังตัวยึดผนัง ให เลือกผนังทีมีความหนามากกว่าครึงนิวหรือส
วนของผนังป
เสาหรือคานอยู่ ส
าหรับผนังไม ไม่จําเป นต องใช
ปลักผนัง
ใส
ปลกผน
e
( 2
ิ
น) (ไมไดใหมา) และตดตวยดผน
I
ใหแน่นบน
ผนงแนวดิงโดยใช
สกรูเกลยว
J
ตัวยดผนังและสกรูล็อคจะต องสามารถรับนําหนักได ิวตัน/ กก. (ส392 40
าหรับรุ่น
F-MU408 490 50) หรือ นิวตัน/ กก. (ส
าหรับรุ่น ) หลังจากทีึดเขากับผนังF-MU453
เรียบรอยแล
รูปแสดงวีการทัวไปส
าหรับตดตังบนคอนกรีตหรือผนงอ
ผน
ังและปลักทีมีคุณภาพแตกต่างกันอาจมีผลต่อความความปลอดภัยของการตดตั
โปรดสอบถามผูี่านการรบรองหากประสบปัญหาขณะตดตั
1
2
How to assemble
การประกอบ
Installing the Stand
g
h
f
K
2
j
1
Hook the Stand
A
on the Wall Bracket through opening
f
on
the bottom plate
h
.
Please mark the Safety Screw hole
g
on the wall for drilling
purpose.
Unhook the Stand
A
and drill the marked point.
Insert a proper wall plug (not included).
• For wooden wall no need to use wall plug to install Safety Screw
K
.
2
Fix the Stand
A
as shown in gure.
• Do not put the power cord
i
between the wall and the Stand
A
.
• Check that the Stand
A
has been hooked properly.
• Make sure the Stand
A
is not tilted and fully insert to the Wall Bracket.
3
Install the Safety Screw
K
until stopper
j
only.
Do not overtighten.
• Drill hole on the wall, insert wall plug
e
before install Safety Screw
K
.
A
A
การตดตังขาตั
i
i
3
e
1
เกียวขาตั
A
เขากบตวยดผนงผ่านช
อง
f
ของแผนดานล่าง
h
โปรดทําเครืองหมายส
าหรบรูของสกรูล็อค
g
บนผนงเพือทําการเจาะ
งขาตั
A
ออกแลวเจาะรูทีทําเครืองหมายไว
ใส
ปลกผน งใหเขาที (ไม่ไดใหมา)
าหรับผนังไม ไม่จําเป นต องใช
ปลักผนังในการติดสกรูล็อค
K
2
ดขาตั
A
งแสดงในรูป
อย่าวางสายไฟ
i
ไว ระหว่างผนังและขาตั
A
ตรวจสอบดูว่าเกียวขาต
A
ไว เหมาะสมดแล
แน่ใจว่าขาตั
A
ไม่เอยงและเส
ยบเข ากับตัวยดผนังจนสุด
3
นสกรูล็อค
K
จนถงตวหยุด
j
เทานั
อยาขนจนแน่นเกนไป
เจาะรูบนผนง เส
ยบปลักผนัง
e
ก่อนทีจะขันสกรูล็อค
K
3
41
2
How to assemble
การประกอบ
3
o
n
l
m
3
Align the pin
n
on the Motor shaft with the slot
o
in the rear of
the Blade
E
.
4
Tighten the Spinner
F
as shown.
• Tighten the Spinner
F
securely, so that it does not become loose during
operation.
Installing the Rear Guard and Blade
1
Remove the cap
k
and wipe excess grease off the Motor shaft.
Remove the Guard Set Nut
D
from Motor
B
.
2
Align each 3 projections
l
and 3 holes
m
, then x the Rear
Guard
C
to the Motor
B
. Tighten the Guard Set Nut
D
.
• Tighten the Guard Set Nut
D
securely, so that it does not become loose
during operation.
D
D
C
E
BB
การตดตังตะแกรงหลงและใบพ
k
F
3
ดเดอยรองแกน
n
บนเพลามอเตอรใหตรงกบรองบ่า
o
ีานหล
ของใบพ
E
4
นตวล็อคใบพ
F
ใหแน่นดงรูป
ันตัวล็อคใบพัด
F
ใหแน่นเพือมใหหลวมในขณะใช
งาน
1
ถอดฝา
k
และเช
ดจาระบ
วนเกนออกจากเพลามอเตอร
ถอดแหวนล็อคตะแกรง
D
ออกจากมอเตอร
B
2
ดเดอยทั 3
l
ใหตรงกบรู รู 3
m
จากนันยดตะแกรงหล
C
เขาก
มอเตอร
B
นแหวนล็อคตะแกรง
D
ใหแน่น
ันแหวนล็อคตะแกรง
D
ให แน่นเพือมให หลวมในขณะใช
งาน
4
1
Open the guard clip
p
of the Front Guard
H
.
2
Align the hook
q
at the Front Guard
H
with the alignment mark
r
at the top of Rear Guard
C
.
3
Align and insert all the way around of the Front Guard
H
and
Rear Guard
C
until “Click” sound is heard.
4
Engage the guard clip
p
upwards to hold x the Front Guard
H
and Rear Guard
C
as shown in the gure.
Installing the Front Guard
How to assemble
การประกอบ
การตดตังตะแกรงหน
1
างขาล็อค
p
ตะแกรงดานหน
H
ออก
2
ดตะขอเกียว
q
ของตะแกรงหน
H
ใหตรงกบรอยบาก
r
ของ
ตะแกรงหล
C
3
ดใหตรงและประกบตะแกรงหน
H
และตะแกรงหล
C
ใหครบจน
รอบจนกว่าจะไดนเส
ยง “คลก”
4
ผลกขาล็อค
p
นเพือยดตะแกรงหน
H
เขากบตะแกรงหล
C
แสดงในรูป
How to use
การใช
งาน
Operating the Wall Fan
1
To turn ON the fan, pull the speed control cord
u
.
To turn it OFF, pull the speed control cord
u
until the indicator
s
points to “0”.
When autom
a
tic oscillation is desired, pull the oscillation cord
t
.
Pull the oscillation cord
t
again to stop oscillation.
2
The air direction can be adjusted upward or downward by simply
moving the guard up or down as shown in the gure. Adjust the
angle of the fan only after con rming that it has stopped rotating.
If the fan did not stop at the desired angle, use a screwdriver to
tighten the bolt
v
.
3
To change the direction of the air ow, push the edge of the
guard to the desired position after con rming that it has stopped
rotating.
การใช
งานพดลมตดผน
53°63°
18°
18°
1
23
s
t
u
v
F-MU408 F-MU453
v
1
หากตองการเป ดพดลม ใหงสายควบคุมแรงลม
u
หากตองการป ด ใหงสายควบคุมแรงลม
u
จนกว่าแป นบอกสถานะ
s
จะช
ไปที “0”
หากตองการให
ายอตโนม ใหงทีสายปรบส
าย
t
งสายปรบส
าย
t
กครังหากตองการใหหยุดส
าย
2
คุณสามารถปรบทศทางลมข
นหรอลงไดโดยขยบตะแกรงข
นลงดงแสดง
ในรูป ใหปรบมุมของพดลมหลงจากทีแน่ใจแลวว่าพดลมหยุดหมุนแล
เทานั
หากพดลมยงไม่หยุด ณ มุมทีคุณตองการ ใหใช
ไขควงขนสลดใหแน่น
v
3
หากตองการเปลียนทศทางการไหลเวยนของลม ใหผลกขอบตะแกรงไป
งตําแหน่งทีองการหลงจากทีแน่ใจว่าพดลมหยุดหมุนแล
Model Voltage (VAC) Frequency (Hz)
Power
(W)
Rotation (RPM)
Air velocity
(m/min)
Air delivery
(m
3
/min)
LOW HIGH
รุ่น
แรงดันไฟฟ
(VAC)
ความถี (เฮ
รตซ
)
กําลังไฟ
(วัตต)
การหมุน (รอบต่อนาท)
ความเร็วลม
(เมตร/นาท)
ปรมาณลม
(เมตร
3
/นาท)
ตํา ูง
F-MU408 220 50 48 765 1080 230 80
F-MU453 220 50 53 741 1007 220 83
Speci cations
อมูลจําเพาะ
“Click”
зјѧд
“Click”
зјѧд
“Click”
зјѧд
F-MU453
F-MU408
1
23
4
q
r
C
H
H
C
p
F-MU453 F-MU408
p
p
p


Produkt Specifikationer

Mærke: Panasonic
Kategori: Ventilator
Model: F-MU408

Har du brug for hjælp?

Hvis du har brug for hjælp til Panasonic F-MU408 stil et spørgsmål nedenfor, og andre brugere vil svare dig