3 4
Safety Precautions
Always follow these instructions
The safety wire must be always connected.
Can cause injury if drops.
When a failure or malfunction occurs, stop using the product
immediately and disconnect the supply cord.
Heat generation etc. may occur and cause electrical shock or fi re.
• [Examples of failure/malfunction]
Abnormal noise is observed during operation.
Moving the supply cord stops operation.
Burning smell is observed.
Motor unit, supply cord or plug becomes abnormally hot.
Contact the authorized dealer immediately for maintenance or
repairing.
Switch off power supply and wait until the Blade is fully static,
before cleaning or doing any maintenance jobs.
Can cause Auto Fan to move suddenly, injuries or electrical shock.
Kindly refer to your authorized dealer for repairing or maintenance.
Fix Mounting Plate Assembly correctly to the concrete ceiling and
tighten Nut fi rmly.
Can cause injury if Auto Fan drops.
Do not use power supply other than rated voltage mentioned.
Overheating can cause electrical shock or fi re.
Do not damage the supply cord.
(Do not cut or modify. Do not forcefully bend, twist or pull. Do not put
near heating appliances or put anything heavy on it. Do not bundle the
supply cord)
If damaged supply cord is used, short circuit etc. may occur and cause
electrical shock or fi re.
• Contact the authorized dealer for repairing the supply cord.
If the supply cord is damaged, it must be replaced by the
manufacturer, its authorized dealer or similarly qualifi ed persons
in order to avoid a hazard.
To avoid the possibility of causing injury to users or damage to properties,
please follow all the explanations written below.
This symbol denotes an
action that is COMPULSORY.
This symbol denotes an
action that is PROHIBITED.
WARNING
A state that may be caused by the
mishandling of products, which, if not
avoided, may lead to the possibility of
death or serious injury of users.
CAUTION
A state that may be caused by the
mishandling of products, which, if not
avoided, may result in the injury of users
or property damage.
WARNING
Strictly follow all the instructions given in this manual for
installation.
Electrical and installation work needs to be performed by a
qualifi ed individual.
Installation error can cause fi re, electrical shock, injury or Auto Fan to
drop.
Stop using the product when any abnormality or failure occurs
and turn “OFF” the Miniature Circuit Breaker (MCB).
Risk of smoke, fi re, electrical shock or Auto Fan to drop.
Please contact your authorized dealer for repairing or maintenance.
This appliance is not intended for use by persons (including
children) with reduced physical, sensory or mental capabilities, or
lack of experiences and knowledge, unless they have been given
supervision or instruction concerning use of the appliance by a
person responsible for their safety.
Children should be supervised to ensure that they do not play
with the appliance.
Do not plug line cord into outlet until fan has been assembled
completely.
Can cause electrical shock or injury.
Do not dismantle the Auto Fan unless stated by this manual. Must
use only supplied parts. Never try to take apart, repair, or modify
this product.
Can cause fi re, electrical shock, injury or Auto Fan to drop.
• Contact the authorized dealer for repairing the supply cord or plug.
Do not connect or disconnect the cord with wet hands.
It may cause electrical shock.
Do not immerse the product in water, or put water on it.
Do not sprinkle water to Auto Fan. Do not wet Auto Fan.
Can cause fi re or electrical shock due to short circuit.
CAUTION
To avoid the possibility of causing injury to users or damage
to properties, please follow all the explanation written in this
manual. The manufacturer will not be responsible for any
accidents and injuries caused by defective, defi cient installation
or installation which does not follow to instruction manual.
Make sure all screws and connection are tightly screwed and
secured.
Please install the safety screw before fi xing the guard.
Can cause injury if drops.
The fan is recommended to be installed so that the blades are
more the 2.5 m above the fl oor (for fans intended to be mounted
at high level).
Can cause injury if hit by Blades.
Installation must strictly follow to wiring diagram provided.
Can cause electrical shock, current leakage, and fi re if miswiring.
Ensure area of mounting fi xture has suffi cient strength.
Can cause injury and product fall.
Do not fi x at area exposed to strong vibration and knocking.
Can cause injury and product fall.
Do not place the fan on unstable surface or near obstacles.
Risk on injury by falling fan.
Avoid continuous exposure to direct wind from the Auto Fan.
It may cause uncomfortable.
Do not use the product at the following locations:
• Where it may be exposed to fl ammable gas or near sources of fl ame
such as gas ranges.
• Where it is exposed to rain or water.
• Flame failure, catching fi re, explosion, short circuit, etc. may occur
and cause electrical shock or fi re.
• Where it becomes unstable or place near the obstacles.
• The product may fall down and cause injury.
• Where it is exposed to direct sunlight or wind-driven rain.
Overheat etc. may occur and cause electrical shock or fi re.
Do not put your fi ngers into the guard or any moving part of the
product.
It may cause injury.
This product is suitable for fl at concrete ceiling only.
Do not install at incline type ceiling.
Can cause injury if Auto Fan drops.
7
8
Maintenance
การบํารุงรักษา
1
Check the Auto Fan condition annually. If a problem occurs, stop using the
Auto Fan. Then refer to an authorized dealer.
2
Keep the Auto Fan clean. Wipe away dirt with a clean, soft cloth, ordinary
soap and damp cloth. Wipe it again to dry it. Do not use solvents
(gasoline, petroleum, thinner, benzine, alcohol, cleaning powder, alkaline
detergent) or any other chemicals.
3
Do not paint the Blade. If damaged, order a new set of Blade (1 piece) from
an authorized dealer.
4
When referring to an authorized dealer, show these instructions to them
and maintain correctly.
5
If the product is severely broken or damaged, remove from the wall and
replace with a new.
1
ตรวจสอบสภาพพัดลมส
่
ายรอบตัวทุกปี หากมีปัญหาเกิดขึ
น ให้หยุดใช
้
พัดลมส
่
าย
รอบตัว จากนันติดต่อตัวแทนทีได้รับอนุญาต
2
รักษาพ ัดลมส
่
ายรอบตัวให้สะอาดอยู่เสมอ เช
็
ดส
ิ
งสกปรกด้วยผ้านุ่มสะอาด สบู่
ธรรมดา และผ้าหมาดๆ เช
็
ดอีกคร ังให้แห้ง อย่าใช
้
ตัวทําละลาย (แก๊สโซลีน นํามัน
ปิ โตรเลียม เบนซ
ิ
น ทินเนอร์ แอลกอฮอล์ ผงช
ํ
าระล้าง สารชะล้างทีเป็ นด่าง) หรือ
สารเคมีอืนใด
3
อย่าทาส
ี
ใบพัด หากช
ํ
ารุด ให้ส
ั
งซ
ื
อใบพัดชุดใหม่ (
1 ช
ิ
น) จากตัวแทนทีได้รับ
อนุญาต
4
ขณะติดต่อตัวแทนทีได้รับอนุญาต โปรดแสดงคําแนะนําเหล่านี
ให้ตัวแทนดูและ
ซ
่
อมบํารุงให้ถูกต้อง
5
หากผลิตภัณฑ์พังหรือเส
ี
ยหายมาก ให้ถอดออกจากผนังแล้วเปลียนใหม่
MQ4098802ZM
Printed in Malaysia
Panasonic Corporation
Web site: http://panasonic.net/
© Panasonic Ecology System Co., Ltd 2020
MQ4098802ZM
M1020-4050
Model No. / หมายเลขรุ่น
F-MQ409
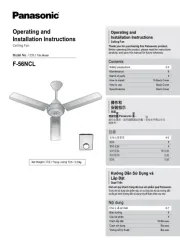
Operating and Installation Instructions
Electric Fan (Auto Fan)
คําแนะนําการใช
้
งานและการติดตัง
พัดลมไฟฟ้า (พัดลมส
่
ายรอบตัว)
5 6
ข ้อควรระวังเพือความปลอดภัย
โปรดปฏิบัติตามคําแนะนําเหล่านี
สายนิรภัยจะต้องเช
ื
อมต่ออยู่เสมอ
อาจเป็นเหตุให ้เกิดการบาดเจ็บได ้หากตกหล่น
หากเกิดข้อผิดพลาดหรือทํางานผิดปกติ ให้หยุดใช
้
ผลิตภัณฑ์และดึง
สายไฟออกทันที
อาจเกิดความร ้อน ฯลฯ และเป็นเหตุให ้เกิดไฟฟ้าช
็
อตหรือไฟไหม ้
• [ตัวอย่างข ้อผิดพลาด/การทํางานผิดปกติ]
ส
ั
งเกตเส
ี
ยงทีผิดปกติขณะใช
้
งาน
การย ้ายสายไฟทําให ้เครืองหยุดทํางาน
ส
ั
งเกตกลินเหม็นไหม
้
มอเตอร์ สายไฟ หรือปลักร ้อนผิดปกติ
ติดต่อตัวแทนทีได้รับอนุญาตเพือขอให้ซ
่
อมบํารุงหรือซ
่
อมแซมทันที
ปิดสวิตช
์
แหล่งจ่ายไฟแล้วรอจนกว่าใบพัดจะหยุดสนิท ก่อนทีจะทําความ
สะอาดหรือซ
่
อมบํารุง
อาจเป็นเหตุให ้พัดลมส
่
ายรอบตัวหมุนทันที ทําให ้บาดเจ็บ หรือไฟฟ้าช
็
อตได ้
โปรดติดต่อตัวแทนทีได ้รับอนุญาตเพือทําการซ
่
อมหรือซ
่
อมบํารุง
ยึดฐานยึดพัดลมเข้ากับเพดานคอนกรีตให้ถูกต้องและขันนอตให้แน่น
อาจเป็นเหตุให ้เกิดการบาดเจ็บได ้หากพัดลมส
่
ายรอบตัวตกหล่น
อย่าใช
้
แหล่งจ่ายไฟทีนอกเหนือจากแรงดันไฟฟ้ าพิก ัดตามทีระบุไว้
อุปกรณ์ทีร ้อนเกินไปอาจเป็ นเหตุให ้เกิดไฟฟ้าช
็
อตหรือไฟไหม ้ได ้
อย่าทําให้สายจ่ายไฟเส
ี
ยหาย
(อย่าตัดหรือดัดแปลง อย่าดัด บิด หรือดึงแรงๆ อย่าวางไว ้ใกล ้อุปกรณ์ทําความ
ร ้อนหรือวางของหนักทับไว ้ อย่ามัดสายจ่ายไฟ)
หากใช
้
สายจ่ายไฟทีช
ํ
ารุด อาจเกิดไฟฟ้าลัดวงจร ฯลฯ และเป็นเหตุให ้เกิดไฟฟ้า
ช
็
อตหรือไฟไหม ้ได ้
• ติดต่อตัวแทนท
ีได ้รับอนุญาตเพือขอซ
่
อมสายจ่ายไฟหรือ
หากสายจ่ายไฟช
ํ
ารุด จะต้องให้ผู้ผลิต ต ัวแทนทีได้รับอนุญาต หรือผู้ทีมี
คุณสมบัติคล้ายคลึงก ันเป็ นผู้เปลียนให้เพือหลีกเลียงอันตราย
เพือหลีกเลียงการบาดเจ็บทีอาจเกิดขึนได ้กับผู ้
ใช
้
หรือทรัพย์ส
ิ
นเส
ี
ยหาย โปรดทําตามคํา
อธิบายด ้านล่าง
ส
ั
ญลักษณ์นีหมายถึงการกระ
ทําทีต ้องดําเนินการ
ส
ั
ญลักษณ์นีหมายถึงการกระ
ทําทีห ้ามทํา
คําเตือน
ในสถานการณ์ทีอาจเกิดจากการใช
้
ผลิตภัณฑ์
อย่างไม่ถูกต ้อง ซ
ึ
งหากไม่หลีกเลียงอาจทําให ้
ถึงผู ้ใช
้
แก่ความตายหรือบาดเจ็บร ้ายแรงได ้
ข้อควรระวัง
ในสถานการณ์ทีอาจเกิดจากการใช
้
ผลิตภัณฑ์
อย่างไม่ถูกต ้อง ซ
ึ
งหากไม่หลีกเลียงอาจส
่
งผล
ให ้ผู้ใช
้
ได ้รับบาดเจ็บหรือทรัพย์ส
ิ
นได ้รับความ
เส
ี
ยหาย
คําเตือน
โปรดปฏิบัติตามคําแนะนําทีให้ไว้ในคู่มือการติดตังนี
อย่างเคร่งครัด
งานไฟฟ้ าและงานติดตังจําเป็ นต้องดําเนินการโดยผู้ทีผ่านการรับรอง
การติดตังทีผิดพลาดอาจเป็นสาเหตุให ้เกิดไฟไหม ้ ไฟฟ้าช
็
อต บาดเจ็บ หรือ
พัดลมส
่
ายรอบตัวหล่นได ้
หยุดใช
้
ผลิตภัณฑ์หากผลิตภ ัณฑ์นี
ทํางานผิดปกติหรือเกิดข้อผิดพลาด
และให้ “ปิด” เบรคเกอร์ขนาดเล็ก (MCB)
เส
ี
ยงต่อการเกิดควัน ไฟไหม้ ไฟฟ้าช
็
อต หรือพัดลมส
่
ายรอบตัวหล่นได ้โปรด
ติดต่อตัวแทนทีได ้รับอนุญาตเพือทําการซ
่
อมหรือซ
่
อมบํารุง
อุปกรณ์นี
ไม่เหมาะส
ํ
าหรับบุคคล (รวมถึงเด็ก) ทีมีข้อบกพร่องทีเกียวก ับ
ร่างกายหรือสติส
ั
มปช
ั
ญญะ หรือเป็ นผู้ทีขาดประสบการณ์และความรู้
ยกเว้นจะได้รับการควบคุมดูแลหรือคําแนะนําทีเกียวข้องกับการใช
้
อุปกรณ์จาดผู้รับผิดชอบต่อความปลอดภัยของบ
ุคคลเหล่านัน
เด็กควรได้ร ับการดูแลเพือให้แน่ใจว่าจะไม่เล่นกับอุปกรณ์ด ังกล่าว
อย่าเส
ี
ยบสายไฟเข้าเต้าเส
ี
ยบจนกว่าจะประกอบพัดลมเสร็จเรียบร้อยแล้ว
อาจทําให ้เกิดไฟฟ้าช
็
อตหรือบาดเจ็บได ้
อย่ารื
อพัดลมส
่
ายรอบตัว ยกเว้นระบุไว้ในคู่มือนี
ต้องใช
้
เฉพาะช
ิ
นส
่
วนทีให้มาด้วยเท่านัน
อย่าถอด ซ
่
อม หรือดัดแปลงผลิตภ ัณฑ์นี
เด็ดขาด
อาจเป็นสาเหตุให ้เกิดไฟไหม ้ ไฟฟ้าช
็
อต บาดเจ็บ หรือพัดลมส
่
ายรอบตัว
หล่นได ้ติดต่อตัวแทนทีได ้รับอนุญาตเพือขอซ
่
อมสายจ่ายไฟหรือปลัก
อย่าต่อหรือดึงสายไฟขณะทีมือเปียก
เนืองจากอาจทําให ้เกิดไฟฟ้าช
็
อตได ้
อย่าจุ่มผลิตภัณฑ์ลงในนําหรือเทนําใส
่
อย่าฉีดนําใส
่
พัดลมส
่
ายรอบตัว
อย่าทําให้พัดลมส
่
ายรอบตัวเปี ยก
อาจเป็นเหตุให ้เกิดไฟไหม ้หรือไฟฟ้าช
็
อตเนืองจากไฟฟ้าลัดวงจรได ้
ข้อควรระวัง
เพือหลีกเลียงการบาดเจ็บทีอาจเกิดขึ
นได้กับผู้ใช
้
หรือทําให้ทรัพย์ส
ิ
นเส
ี
ย
หาย โปรดทําตามคําอธิบายในคู่มือนี
ผู้ผลิตจะไม่รับผิดชอบต่ออุบัติเหตุ
และการบาดเจ็บใดๆ ทีเกิดจากการช
ํ
ารุด การติดต ังทีบกพร่อง หรือการ
ติดตังที
ไม่เป็ นไปตามคู่มือคําแนะนํา
แน่ใจว่าได้ขันสกรูและตัวต่อทังหมดให้แน่นดี
โปรดขันสกรูล็อคก่อนทีจะติดตะแกรง
อาจเป็นเหตุให ้เกิดการบาดเจ็บได ้หากตกหล่น
ควรติดต ังพัดลมเพือให้ใบพ ัดอยู่เหนือพื
นมากกว่า 2.5 ม. (ส
ํ
าหรับพ ัดลม
ทีจะต้องติดต ังในระดับสูง)
อาจเป็นเหตุให ้เกิดการบาดเจ็บได ้หากถูกใบพัดตี
ต้องติดตังตามแผนภาพการเดินสายไฟทีให้มาอย่างเคร่งครัด
อาจเป็นเหตุให ้เกิดไฟฟ้าช
็
อต ไฟรัว และไฟไหม ้ได ้หากหมุนไม่ถูกต ้อง
แน่ใจว่าบริเวณทียึดน ันมีความแข็งแรงเพียงพอ
อาจเป็นเหตุให ้เกิดการบาดเจ็บและผลิตภัณ์ตกหล่นได ้
อย่ายึดกับบริเวณทีมีการส
ั
นสะเทือนและไม่มันคง
อาจเป็นเหตุให ้เกิดการบาดเจ็บและผลิตภัณ์ตกหล่นได ้
อย่าติดพ ัดลมบนพื
นผิวทีไม่สมําเสมอหรือใกล้ส
ิ
งกีดขวาง
เส
ี
ยงต่อการบาดเจ็บจากพัดลมตกหล่น
หลีกเลียงการรับลมต่อเนืองโดยตรงจากพัดลมส
่
ายรอบตัว
เนืองจากอาจทําให ้รู ้ส
ึ
กไม่สบายตัวได ้
อย่าใช
้
ผลิตภัณฑ์ในบริเวณต่อไปนี
:
• บริเวณทีอาจมีก๊าซไวไฟหรือใกล้แหล่งเปลวไฟ เช
่
น เตาแก๊ส
• บริเวณทีส
ั
มผัสกับฝนหรือนํา
• ไม่มีเปลวไฟ ไฟประทุ การระเบิด ไฟฟ้าลัดวงจร ฯลฯ และเป็นเหตุให้เกิดไฟ
ฟ้าช
็
อตหรือไฟไหม ้ได ้
• บริเวณทีไม่มันคงหรือวางใกล้ส
ิ
งกีดขวาง
• บริเวณทีส
ั
มผัสกับแสงแดดหรือลมฝนโดยตรง
• บริเวณทีส
ั
มผัสกับแสงแดดหรือลมฝนโดยตรง
อาจทําให ้ร ้อนมากเกินไป ฯลฯ และเป็ นเหตุให ้เกิดไฟฟ้าช
็
อตหรือไฟไหม ้
อย่าแหย่นิวลงในตะแกรงพัดลมหรือขยับส
่
วนใดของผลิตภัณฑ์
อาจทําให ้เกิดการบาดเจ็บได ้
ผลิตภัณฑ์นี
เหมาะส
ํ
าหรับเพดานคอนกรีตเรียบๆ เท่านัน
อย่าติดต ังบนเพดานทีลาดเอียง
อาจเป็นเหตุให ้เกิดการบาดเจ็บได ้หากพัดลมส
่
ายรอบตัว
ตกหล่น
Name of parts
ช
ื
อช
ิ
นส
่
วน
ช
ิ
นส
่
วน
A
ขาล็อคตะแกรง
B
ตะแกรงหน้า
C
ตะแกรงหลัง
D
ใบพัด
E
นอตหางปลา
F
มอเตอร์
G
ขาตัง
H
ฐานยึดพัดลม
I
ก้าน
J
สายนิรภัย
K
ตัวล็อคใบพ ัด
L
สวิตซ
์
ควบคุมแรงลม
อุปกรณ์เสริม
ช
ิ
น
M
สกรูหัวแฉก
…………………………………
2
N
นอตหัวแฉก
…………………………………
2
O
แหวนสปริง
……………………………………
2
P
สกรูตัวหนอน
…………………………………
1
Parts
A
Guard Clip
B
Front Guard
C
Rear Guard
D
Blade
E
Wing Bolt
F
Motor
G
Stand
H
Mounting Plate Assy
I
Rod
J
Safety Wire
K
Spinner
L
Regulator
Accessories pieces
M
H. Bolt
………………………………………
2
N
H. Nut
…………………………………………
2
O
Spring Washer
……………………………
2
P
Set Screw
……………………………………
1
ขอบคุณทีส
ั
งซ
ื
อผลิตภัณฑ์ Panasonic
ก่อนใช
้
ผลิตภัณฑ์นี โปรดอ่านคําแนะนําโดยละเอียด
และเก็บคู่มือนีไว ้ใช
้
ในอนาคต
ข ้อควรระวังเพือความปลอดภัย
5 - 6
การบํารุงรักษา
7
ช
ื
อช
ิ
นส
่
วน
8
วิธีการติดตังตัวสวิตซ
์
ควบคุมแรงลม
9
วิธีการประกอบ
10 - 11
วิธีการติดตังพัดลม
12-13
การใช
้
งาน
14-15
ข ้อมูลจําเพาะ
16
เนื้อหา
ผลิตภัณฑ์นีส
ํ
าหรับใช
้
ในครัวเรือน
Thank you for purchasing this
Panasonic product.
Before operating this product, please read the
instructions carefully, and save this manual for
future use.
Safety precautions 3 - 4
Maintenance 7
Name of parts 8
How to install the regulator 9
How to assemble 10 - 11
How to install the fan 12-13
Operation 14-15
Specifi cations 16
Contents
This product is for household use.
H
G
I
F
C
E
D
K
B
A
J
L
M
N
O
P
