Phaesun Solar Rise One 2.0 Manual

Phaesun Solpanel Solar Rise One 2.0

Læs gratis den danske manual til Phaesun Solar Rise One 2.0 (2 sider) i kategorien Solpanel. Denne vejledning er vurderet som hjælpsom af 4 personer og har en gennemsnitlig bedømmelse på 4.5 stjerner ud af 2.5 anmeldelser. Har du et spørgsmål om Phaesun Solar Rise One 2.0, eller vil du spørge andre brugere om produktet?

Side 1/2
Phaesun GmbH · Brühlweg 9 · 87700 Memmingen · Germany | Telefon +49
(
8331
)
990 42 0 · Telefax +49
(
8331
)
990 42 12 | info
@
phaesun.com · www.phaesun.com
1
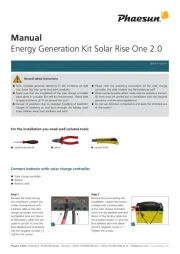
Manual
Energy Generation Kit Solar Rise One 2.0
600077 • 05/2014
General safety instructions
Solar modules generate electricity in low incidence of light
too! Cover the solar panel and work carefully!
Make sure that the installation of the solar charge controller
takes place in a stable, flat and dry environment. Please note
to keep a distance of 15 cm around the unit!
Danger of explosion due to improper handling of batteries!
Danger of receiving an acid burn through the battery acid!
Keep children away from batteries and acid!
Please note the operating instructions of the solar charge
controller, the solar module and the battery as well!
When connecting the cables, make sure the polarity is correct!
All work must be carried out in compliance with the national
provisions and the local regulations!
Do not use defective components and keep the intended use
of the system!
Step 1
Remove the fuses during
the installation. Loosen the
screws distinguished with
a battery label at the solar
charge controller. Insert the
red labelled wire end sleeve
of the battery cable into the
positive contact (+) and the
blue labelled wire end sleeve
into the negative contact (–).
Tighten the screws.
Step 2
Remove the fuses during the
installation. Loosen the screws
marked with a battery label
at the solar charge controller.
Insert the red labelled wire end
sleeve of the battery cable into
the positive contact (+) and the
blue labelled wire end sleeve
into the negative contact (–).
Tighten the screws.
Connect batterie with solar charge controller
Solar charge controller
Battery
Battery cable
For the installation you need well isolated tools:
small screwdriver pliers carpet knife
Phaesun GmbH · Brühlweg 9 · 87700 Memmingen · Germany | Telefon +49
(
8331
)
990 42 0 · Telefax +49
(
8331
)
990 42 12 | info
@
phaesun.com · www.phaesun.com
4
600077 • S. 2
Step 3
Strip the insulation off the
module cable. Carefully remove
a piece of the upper coating so
two individual wires become
visible.
Step 4
Strip 10 mm of the insulation
of the two cable ends. Cut the
wires carefully and remove the
coating.
Step 5
Loosen the screws distinguis-
hed with a solar module label
at the solar charge controller.
Insert the positive wire (brown)
into the positive contact (+)
and the negative wire (blue)
into the negative contact (–).
Tighten the screws.
Step 6
Connect the solar module with
the solar charge controller.
Connect solar module to solar charge controller
Solar module
Module cable


Produkt Specifikationer

Mærke: Phaesun
Kategori: Solpanel
Model: Solar Rise One 2.0

Har du brug for hjælp?

Hvis du har brug for hjælp til Phaesun Solar Rise One 2.0 stil et spørgsmål nedenfor, og andre brugere vil svare dig