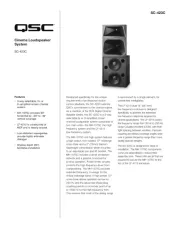
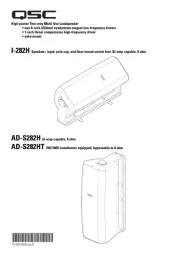
QSC AcousticDesign AD-S162T Manual

QSC Højttaler AcousticDesign AD-S162T

Læs gratis den danske manual til QSC AcousticDesign AD-S162T (4 sider) i kategorien Højttaler. Denne vejledning er vurderet som hjælpsom af 11 personer og har en gennemsnitlig bedømmelse på 4.6 stjerner ud af 6 anmeldelser. Har du et spørgsmål om QSC AcousticDesign AD-S162T, eller vil du spørge andre brugere om produktet?

Side 1/4
1
TD-001504-00-B
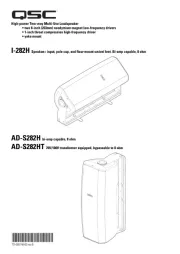
AD-S802T and AD-S162T
Quick Start Guide
Installation
AD-S802T and AD-S162T passive column loudspeaker systems require amplified audio signals. A pass-through on each loudspeaker permits connection to multiple
loudspeakers.
The pluggable "Eurostyle" connectors allow the installer to pre-wire the audio system on site before the loudspeakers are installed.
TD-001504-00-B
*TD-001504-00*
The loudspeaker comes with a weather cover for the input cup to protect the input connections and switches
from precipitation and other weather hazards (Figure 1). Use the weather cover for all outdoor installations or any
applications where the loudspeaker may be exposed to moisture. To ensure a good seal in the cable gland, use
outdoor-rated cable with a round jacket up to 0.37 in or 9.4 mm in diameter.
To use the weather cover:
1. Loosen the nut on the cable gland.
2. Pass the cable all the way through the nut and the rest of the gland.
3. Attach the input connector to the wires (see
Input Connector
, below).
4. Once the loudspeaker enclosure is installed, plug the input connector into the loudspeaker's input cup. Secure
the connector to the loudspeaker using the two captive retaining screws, one on each end.
5. Make sure that the transformer tap selection switch is set properly. On the AD-S162T loudspeaker, also make
sure that the vertical dispersion angle switch is set as desired.
6. Place the cover onto the loudspeaker's input cup and attach it using the four screws, lock washers, and flat
washers provided.
7. Dress the cable so there is no undue strain on it. Tighten the gland nut until the grommet inside the gland has
made a tight seal onto the cable jacket.
Input Connector
AD-S802T and AD-S162T Weather Cover
Diameter
up to
0.37 in
9.4 mm
— Figure 1 –
Strip wire
¼ in
6.3 mm
Up to
10 GAW
6 mm²
Turn screw fully
counterclockwise.
Insert wire fully.
Turn screw clockwise
to clamp wire tightly.
— Figure 2 –
INPUT
THRU To other
loudspeaker(s),
if necessary
— Figure 3 –
The pluggable "Eurostyle" input connector (Figure 2) has four terminals to facilitate connection on a distributed
line. It also allows the installer to pre-wire the venue before the loudspeakers themselves are installed. The
connector accommodates wire up to 10 AWG or 6 mm2. Be sure of proper and consistent polarity at each connector
(Figure 3). If one or more loudspeakers is out of polarity with others, the acoustic performance will suffer. Always
secure the connector to the loudspeaker using the retaining screws at both ends.
Mounting
Tilt/Swivel Bracket
The bracket provided with the loudspeaker allows 0, 5,
10, 15, and 20 degrees of downward tilt (Figure 4), and
up to ±51 degrees of horizontal panning (Figure 5).
These angles may be constrained by the loudspeaker
enclosure and adjacent walls or other structural elements.
For mounting that requires no panning left or right, the
bracket kit includes a zero-pan locking screw to keep the
loudspeaker securely in place.
— Figure 4 –
2
TD-001504-00-B
The AD-S802T has three attachment locations for the bracket and the AD-S162T has
seven. Figures 6 and 7 show their center points, including distances from the bottom
edge of the enclosure. Four M6 × 20 screws with flat washers are included for
attaching the bracket to the rear panel of the enclosure.
An M6 eyebolt is included with the loudspeaker for attaching a safety tether, as
may be required by building codes in your jurisdiction. Both models have three M6
threaded mounting holes along the centerline of the rear panel for attaching the
eyebolt.
The tables below describe the pan range for different bracket positions and tilt angles.
AD-S802T Maximum Pan Range
Bracket
Position tilt tilt 1 tilt 1 tilt 20° tilt
Tilt bracket
removed
1 ±47° ±51° ±5 ±43° ±33° ±5
2 ±47° ±51° ±51° ±5 ±5 ±5
3 ±47° ±36° N/A N/A N/A N/A
AD-S162T Maximum Pan Range
Bracket
Position tilt tilt 1 tilt 1 tilt 20° tilt
Tilt bracket
removed
1 ±47° ±49° ±28° N/A ±5
2 ±47° ±51° ±51° ±5 ±5 ±5
3 ±47° ±8° N/A N/A N/A ±5
4 ±4 N/A N/A N/A ±5
5 ±4 N/A N/A N/A N/A ±5
6 ±4 N/A N/A N/A N/A ±5
7 ±4 N/A N/A N/A N/A ±5
— Figure 5 –
110.6 mm
4.35 in
322.6 mm
12.70 in
742.6 mm
29.24 in
813.6 mm
32.03 in
884.6 mm
34.83 in
955.6 mm
37.62 in
1026.6 mm
40.42 in
Eyebolt
position
Position
2
Position
1
Position
7
Position
6
Position
5
Position
4
Position
3
— Figure 6 –
109.6 mm
4.31 in
180.6 mm
7.11 in
497.6 mm
19.59 in
Eyebolt
position
Position
1
Position
2
Position
3
— Figure 7 –
Attaching the wall piece
Attach the wall piece to the wall or other mounting surface. Use the template in
Figure 8. Consult a structural engineer for guidance in selecting mounting locations
and appropriate fasteners.
Attaching the loudspeaker bracket pieces to allow tilting
1. Select the appropriate attachment location for the bracket on the enclosure
rear panel. Note that because of the wall or mounting surface, in most cases
the lowest attachment location offers the widest range of tilt options, while the
highest offers few, if any, tilt options.
2. Use all four M6×20 screws and their washers to secure the bracket to the
enclosure. Note that the bracket has six mounting holes; some attachment
locations use the long-spaced holes and some use the shorter ones.
NOTE: For convenience reasons we recommend configuring the tilt angle (Figure 9)
before the loudspeaker and bracket are attached to the wall piece. However, you can
adjust the tilt later, even after the loudspeaker has been installed.
3. Continue to Attaching the loudspeaker to the wall piece.


Produkt Specifikationer

Mærke: QSC
Kategori: Højttaler
Model: AcousticDesign AD-S162T

Har du brug for hjælp?

Hvis du har brug for hjælp til QSC AcousticDesign AD-S162T stil et spørgsmål nedenfor, og andre brugere vil svare dig