This document describes the activities related to the creation of a PV plant, set-up and commissioning of a Solplanet
inverter and connecting the Solplanet inverter to a WiFi network.
The contents of this quick guide apply to the following models:
• ASWx000S-S
• ASWx000-S
• ASWx000-T
• ASWxxK-LT
• ASWxxK-LT-G2
• ASW TLCx000
The firmware of the Solplanet WiFi stick should be 19B01-0021R or greater. Please contact the Solplanet service team in
your region if in doubt.
• Solplanet inverter with a WiFi stick
• WiFi stick with firmware greater than 19B01-0021R
• iOS or Android based mobile device
• Solplanet app
Please ensure the following has been completed before using this quick guide:
• A Solplanet inverter installed as per the Solplanet guidelines
• A Solplanet WiFi stick has been connected to the inverter
• The inverter has been connected to a string of solar panels of the appropriate voltage or to a DC power source
• The inverter DC switch is in the “ON” position
• Ensure the WiFi stick´s green LED is solid ON and the blue LED is OFF
If the blue LED is solid ON before your first attempt to begin, the WiFi stick may have already connected to a WiFi network.
Please contact the Solplanet service team in your region if this is the case.
There are two LED indicators on the WiFi stick, the state of each LED indicator is defined in the table below:
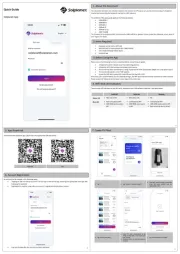
An account can be created in the following ways:
• Tapping on “Do not have an account?” on the login screen of the app, selecting the appropriate user type and
following the prompts
• Registration is possible using either an email or a registered cellular phone number
• Log into the App after the account has been registered.
5. Enter PV plant information in all
fields marked with a red asterix and
tap “Create”
6. Optional: turn on the App location
services