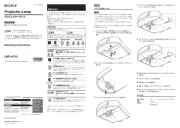
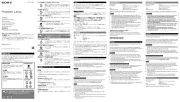
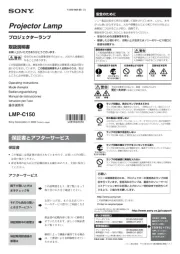
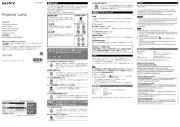
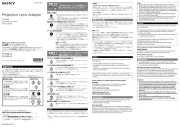
Sony LMP-H202 Manual
Sony
Tilbehør til projektor
LMP-H202
Læs nedenfor 📖 manual på dansk for Sony LMP-H202 (2 sider) i kategorien Tilbehør til projektor. Denne guide var nyttig for 3 personer og blev bedømt med 4.6 stjerner i gennemsnit af 2 brugere
Side 1/2

Projector Lamp
プロジェクターランプ
取扱説明書
.......................................................... (JP)
Operating Instructions (GB) .....................................
Mode d’emploi (FR) ....................................................
Bedienungsanleitung ....................................... (DE)
Manual de instrucciones (ES) ..................................
Istruzioni per d’uso (IT) ............................................
.............................................................. (CS)
お買い上げいただきありがとうございます。
安全のための注意事項を守らないと、火災や人身事故に
なることがあります。
この説明書には、事故を防ぐための重要な注意事項と製品の取り扱いか
たを示しています。 、製品を安全にお使この説明書をよくお読みのうえ
いください。お読みになったあとは、いつでも見られるところに必ず保
管してください。
4-125-427- (1)12
© 2022 Sony Corporation
Printed in China
保証書とアフターサービス
保証書
ˎ
この製品には保証書が添付されていますので、お買い上げの際にお受
け取りください。
ˎ
所定事項の記入および記載内容をお確かめのうえ、大切に保存してく
ださい。
アフターサービス
調子が悪いときはまずチェックを
プロジェクターの取扱説明書をもう一度ご覧になって取り付けかたをご
確認ください。
それでも具合の悪いときはサービスへ
ソニーの相談窓口にご相談ください。(裏表紙)
保証期間中の修理は
保証書の記載内容に基づいて修理させていただきます。詳しくは保証書
をご覧ください。
保証期間経過後の修理は
修理によって機能が維持できる場合は、ご要望により有料修理させてい
ただきます。
使用済みランプを廃棄する場合
本機の光源用ランプの中には水銀が含まれています。使用済み光源
用ランプは、地域の蛍光管の廃棄ルールに従って廃棄してください。
安全のために
ソニー製品は安全に充分に配慮して設計されています。しかし、まちがっ
た使いかたをすると、火災や感電などにより死亡や大けがなど人身事故
につながることがあり、危険です。
事故を防ぐために次のことを必ずお守りください。
ˎ安全のための注意事項を守る。
ˎ破損したら使わずに、ソニーの相談窓口に修理を依頼する。
警告表示の意味
この取扱説明書および製品では、次のような表示をしています。表示の内容を
よく理解してから本文をお読みください。
この表示の注意事項を守らないと、火
災や高温などにより死亡や大けがなど
人身事故につながることがあります。
この表示の注意事項を守らないと、事
故によりけがをしたり周辺の物品に損
害を与えたりすることがあります。
行為を指示する記号 行為を禁止する記号 注意を促す記号
下記の注意を守らないと、
高温・火災
などにより
死亡
や
大けが
につながることがあります。
ランプ交換はランプが充分に冷えてから行う
電源を切った直後はランプが高温になっており、触るとやけどの原因となる
ことがあります。ランプ交換の際は、電源を切ってから
1
時間以上たって、
充分にランプが冷えてから行ってください。
他の製品に使用しない
このプロジェクターランプは、ソニープロジェクター用の交換用ランプで
す。他の製品には絶対にお使いにならないでください。火災や故障などの
原因になります。
ランプの分解や改造をしない
ランプを分解・改造して使用すると火災や感電の原因となります。
ランプ交換の際はプラグをコンセントから抜く
ランプを交換する前に必ず電源を切り、電源プラグをコンセントから抜いて
ください。感電の原因となります。
ランプの収納部に異物を入れない
ランプを抜いた後のランプの収納部に金属類や燃えやすい物などの異物を
入れないでください。火災や感電の原因となります。
下記の注意を守らないと、
けが
をしたり、周辺の
物品
に
損害
を与えることがあります。
ランプを傾けて持たない
ランプを傾けて持つとランプの破損時にランプの破片が飛び、けがの原因と
なることがあります。水平に、ハンドルを持ってください。
ぬれた手で電源プラグに触らない
ぬれた手で電源プラグの抜き差しをすると、感電の原因となることがありま
す。
水のある場所に置かない
水が入ったり、濡れたり、風呂場などで使うと、火災や感電の原因となりま
す。雨天や降雪中の窓際でのご使用や、海岸、水辺でのご使用は特にご注意
ください。
日本語
このプロジェクターランプは、ソニープロジェクターの交換用ランプで
す。
お使いになる前に、お持ちのプロジェクターの取扱説明書をご覧になり、
このランプが使用できるかどうかを必ず確認してください。
ランプを交換するときは、必ずランプに付属しているエアフィルターも
交換してください。また吸気口の掃除も行ってください。
ランプ
/
エアフィルターの交換のしかたについては、プロジェクターの取
扱説明書をご覧ください。
注意
ランプ交換後は以下の操作が必要になりますので、必ず行うようにして
ください。以下を行わないと、ランプ交換後すぐに「ランプ
/
フィルター
を交換してください。」というメッセージが出る場合があります。
1
電源コードを接続する。
2
プロジェクターの電源を入れ、「
初期設定」メニューのランプ設定
を選択すると、以下のようなメニュー画面が表示される。
「ランプを交換したときの設定です。ランプを交換しましたか?」
この画面が表示されたら、「はい」を選択する。
続いて「ランプ設定が完了しました。」と表示されるので、「
OK
」を選択
する。
主な仕様
最大外形寸法 約
105
×
101
×
114 mm
(幅
/
奥行き
/
高さ)
質量 約
0.2 kg
付属品 エアフィルター(1)
取扱説明書(本書)
保証書(1)
本機の仕様及び外観は、改良のため予告なく変更することがありますが、
ご了承ください。
English
The projector lamp is designed to be used with the Sony projector. Before
replacing the lamp, read the Operating Instructions of the projector and
make sure that this lamp can be used for your projector.
When you replace the lamp, make sure you replace the air filter attached to
the lamp. Also, clean the ventilation holes (intake) at the same time.
To replace the lamp/air filter, refer to the Operating Instructions of the
projector.
Cautions
ˎ
The lamp becomes a high temperature after turning off the projector with
the
/
key
. If you touch the lamp, you may scald your finger. When you
replace the lamp, wait for at least an hour for the lamp to cool.
ˎ
When removing the lamp unit, make sure it remains horizontal. If you
pull out the lamp unit while tilted and if the lamp breaks, the pieces may
scatter, causing injury.
Notes
ˎ
If the lamp breaks, consult with qualified Sony personnel.
ˎ
Please do the following operations after replacing the lamp with a new
one. If you don’t so, the message “Please replace the Lamp/Filter.” may
appear at once after replacing the lamp.
1
Plug the AC power cord into a wall outlet.
2
Turn on the projector, then select Setup
menu. The following menu
appears.
“Settings for lamp replacement. Has the projection lamp been replaced?”.
Select “Yes”, if this screen appears.
If the message “Lamp replacement process is now complete” appears,
select “OK”.
Disposal of the used lamp
For the customers in the USA
Lamp in this product contains mercury. Disposal of these
materials may be regulated due to environmental considerations.
For disposal or recycling information, please contact your local
authorities or the Telecommunications Industry Association
(www.eiae.org).
Specifications
Dimensions Approx. 105 × 101 × 114 mm (w/d/h)
(4
1
/
8
× 3
31
/
32
× 4
1
/
2
inches)
Mass Approx. 0.2 kg (9 oz)
Supplied accessories Air filter (1)
Operating Instructions (this manual)
Design and specifications are subject to change without notice.
The manufacturer of this product is Sony Corporation, 1-7-1 Konan,
Minato-ku, Tokyo, 108-0075 Japan. The Authorized Representative for EMC
and product safety is Sony Deutschland GmbH, Hedelfinger Strasse 61,
70327 Stuttgart, Germany. For any service or guarantee matters please refer
to the addresses given in separate service or guarantee documents.
LMP-H202
「999」+「#」

Français
La lampe du projecteur est conçue pour être utilisée avec le projecteur
Sony. Avant de remplacer la lampe, lisez attentivement le mode d’emploi du
projecteur pour vérifier que celle-ci peut être utilisée avec votre projecteur.
Lorsque vous remplacez la lampe, veillez à remplacer le filtre à air monté
sur la lampe. Nettoyez aussi les orifices d’aération (entrée) en même temps.
Pour remplacer la lampe/filtre à air, reportez-vous au mode d’emploi du
projecteur.
Attentions
ˎ
La lampe est encore brûlante après que vous avez mis le projecteur hors
tension à l’aide de la
touche
/
. Si vous touchez la lampe, vous risquez
de vous brûler les doigts. Lorsque vous voulez remplacer la lampe,
attendez au moins une heure qu’elle ait refroidi.
ˎ
Pour retirer le module de lampe, maintenez-le bien à l’horizontale. Si vous
extrayez le module de lampe en l’inclinant et si la lampe se brise, il se peut
que vous vous blessiez avec les éclats.
Remarques
ˎ
Si la lampe se brise, consultez le personnel Sony qualifié.
ˎ
Veuillez exécuter les opérations suivantes après avoir remplacé la lampe
par une neuve. Sinon le message « Remplacer la lampe/filtre.» risque de s’
afficher tout de suite après le remplacement de la lampe.
1
Branchez le cordon d’alimentation secteur sur une prise murale.
2
Mettez le projecteur sous tension et sélectionnez le menu Réglage
. Le
menu suivant apparaît.
« Réglages de remplacement lampe. Lampe de projection remplacée ? ».
Sélectionnez « Oui » si cet écran apparaît.
Si le message « Processus de remplacement terminé » apparaît,
sélectionnez « OK ».
Mettre à disposition de la lampe usagée
Pour les clients aux États-Unis
La lampe dans ce produit contient du mercure. La disposition de
ces matériaux peut être réglementée suite à des considérations
environnementales. Pour obtenir des informations de disposition
ou de recyclage, veuillez communiquer avec vos autorités locales
ou la Telecommunications Industry Association (www.eiae.org).
Pour les clients en France
Spécifications
Dimensions Approx. 105 × 101 × 114 mm (l/p/h)
(4
1
/
8
× 3
31
/
32
× 4
1
/
2
pouces)
Poids Approx. 0,2 kg (9 oz)
Accessoires fournis Filtre à air (1)
Mode d’emploi (ce manuel)
La conception et les spécifications sont sujettes à modifications sans préavis.
Le fabricant de ce produit est Sony Corporation, 1-7-1 Konan, Minato-ku,
Tokyo, 108-0075 Japon. Le représentant autorisé pour EMC et la sécurité
des produits est Sony Deutschland GmbH, Hedelfinger Strasse 61, 70327
Stuttgart, Allemagne. Pour toute question concernant le service ou la
garantie, veuillez consulter les adresses indiquées dans les documents de
service ou de garantie séparés.
Deutsch
Die Projektorbirne ist für einen Projektor von Sony konzipiert. Lesen Sie
vor dem Austauschen der Birne in der Bedienungsanleitung zum Projektor
nach und vergewissern Sie sich, dass diese Birne mit Ihrem Projektor
verwendet werden kann. Wenn Sie die Lampe auswechseln, wechseln Sie
auch unbedingt den an der Lampe angebrachten Luftfilter aus. Reinigen Sie
gleichzeitig auch die Lüftungsöffnungen (Einlass). Wenn Sie die Birne/
Luftfilters austauschen wollen, schlagen Sie bitte in der Bedienungsanleitung
zum Projektor.
Vorsicht
ˎ
Die Birne bleibt noch längere Zeit heiß, wenn Sie den Projektor mit
der
Taste
/
ausschalten. Wenn Sie die Birne berühren, besteht
Verbrennungsgefahr. Wenn Sie die Birne austauschen wollen, warten Sie
mindestens eine Stunde, bis die Birne abgekühlt ist.
ˎ
Achten Sie beim Entfernen der Birneneinheit darauf, die Birneneinheit
waagerecht zu halten. Wenn Sie die Birneneinheit nicht waagerecht halten
und die Birne bricht, können die Splitter Verletzungen verursachen.
Hinweise
ˎ
Wenn die Birne kaputt geht, wenden Sie sich bitte an qualifiziertes
Fachpersonal von Sony.
ˎ
Führen Sie bitte die folgenden Schritte aus, nachdem Sie die alte durch
die neue Birne ersetzt haben. Andernfalls erscheint möglicherweise
unmittelbar nach dem Auswechseln der Birne die Meldung „Bitte Lampe/
Filter auswechseln.“.
1
Stecken Sie das Netzkabel in eine Netzsteckdose.
2
Schalten Sie den Projektor ein, und wählen Sie dann das Menü
Einrichtung
. Das folgende Menü erscheint.
„Einstellungen für Lampenwechsel. Wurde Projektorlampe gewechselt?“.
Wählen Sie „Ja“, wenn diese Anzeige erscheint.
Wenn die Meldung „Lampenwechsel ist nun beendet“ erscheint, wählen
Sie „OK“.
Technische Daten
Abmessungen ca. 105 × 101 × 114 mm (B/T/H)
Gewicht ca. 0,2 kg
Mitgeliefertes Zubehör Luftfilter (1)
Bedienungsanleitung (vorliegende Anleitung)
Änderungen, die dem technischen Fortschritt dienen, bleiben vorbehalten.
Der Hersteller dieses Produkts ist Sony Corporation, 1-7-1 Konan, Minato-
ku, Tokyo, 108-0075 Japan. Der autorisierte Repräsentant für EMV und
Produktsicherheit ist Sony Deutschland GmbH, Hedelfinger Strasse 61,
70327 Stuttgart, Deutschland. Bei jeglichen Angelegenheiten in Bezug auf
Kundendienst oder Garantie wenden Sie sich bitte an die in den separaten
Kundendienst- oder Garantiedokumenten aufgeführten Anschriften.
Español
La lámpara del proyector se p2-ha diseñado para utilizarse con el proyector
Sony. Antes de sustituir la lámpara, consulte el manual de instrucciones del
proyector y asegúrese de que dicha lámpara es la adecuada para el proyector.
Cuando sustituya la lámpara, no olvide sustituir el filtro de aire adjunto a
la lámpara. Al mismo tiempo, limpie también los orificios de ventilación
(aspiración). Para sustituir la lámpara/filtro de aire, consulte el manual de
instrucciones del proyector.
Precauciones
ˎ
La lámpara alcanza una temperatura alta después de apagar el proyector
con la
tecla
/
. Si toca la lámpara, puede quemarse el dedo. Antes de
sustituir la lámpara, espere al menos una hora para que se enfríe.
ˎ
Cuando extraiga la unidad de lámpara, asegúrese de que la mantiene
en posición horizontal. Si tira de la unidad de lámpara para extraerla
mientras está inclinada y si la lámpara se rompe, los trozos pueden
esparcirse, causando heridas.
Notas
ˎ
Si la lámpara se rompe, consulte con personal Sony especializado.
ˎ
Realice las siguientes operaciones tras la sustitución de la lámpara por otra
nueva. De lo contrario, podría aparecer el mensaje “ Por favor, cambie la
lámpara/filtro.” inmediatamente después de reemplazarla.
1
Conecte el cable de alimentación de ca a una toma de pared.
2
Encienda el proyector y a continuación seleccione el menú Configuración
. Aparecerá el siguiente menú.
“ Conf. para sustituir lámpara. Sustituyó lámpara proyección?”.
Seleccione “Sí” si aparece esta pantalla.
Si aparece el mensaje “Sustitución lámp. proy. Completa”, seleccione
“Aceptar”.
Especificaciones
Dimensiones Aprox. 105 × 101 × 114 mm (an/prf/al)
(4
1
/
8
× 3
31
/
32
× 4
1
/
2
pulgadas)
Peso Aprox. 0,2 kg (9 oz)
Accesorios suministrados Filtro de aire (1)
Manual de instrucciones (este manual)
Diseño y especificaciones sujetos a cambio sin previo aviso.
El fabricante de este producto es Sony Corporation, con dirección en 1-7-1
Konan, Minato-ku, Tokio, 108-0075 Japón. El Representante autorizado para
EMC y seguridad del producto es Sony Deutschland GmbH, Hedelfinger
Strasse 61, 70327 Stuttgart, Alemania. Para asuntos relacionados con el
servicio y la garantía, consulte las direcciones entregadas por separado para
los documentos de servicio o garantía.
Italiano
La lampada del proiettore è stata concepita per l’uso con il proiettore Sony.
Prima di sostituire la lampada, leggere le istruzioni per l’uso del proiettore
e assicurarsi che la lampada sia compatibile con il proiettore acquistato.
Quando si sostituisce la lampada, sostituire anche il relativo filtro
dell’aria. Pulire inoltre le prese di ventilazione (aspirazione). Per sostituire
la lampada/filtro dell’aria, fare riferimento alle istruzioni per l’uso del
proiettore.
Attenzione
ˎ
Dopo aver spento il proiettore con il
tasto
/
, la temperatura della
lampada è elevata. Non toccare la lampada, onde evitare di scottarsi le
dita. Per sostituire la lampada, attendere almeno un’ora che questa si
raffreddi.
ˎ
Quando si estrae la lampada, assicurarsi che rimanga in posizione
orizzontale. Se viene estratta in posizione inclinata e si rompe, i pezzi
potrebbero essere causa di ferite.
Note
ˎ
Se la lampada si rompe, consultare il personale qualificato Sony.
ˎ
Dopo avere sostituito la lampada con una lampada nuova, effettuare
le operazioni riportate di seguito. Diversamente, è possibile che venga
visualizzato il messaggio “Sostituire la lampada/filtro. ”.
1
Collegare il cavo di alimentazione CA a una presa di rete.
2
Accendere il proiettore, quindi selezionare il menu Impostazione
.
Appare il menu che segue.
“Impostazioni cambio lampada. È stata cambiata la lampada?”.
Se appare questa schermata, selezionare “Sì”.
Se appare il messaggio “Cambio lampada terminato”, selezionare “OK”.
Caratteristiche tecniche
Dimensioni Circa 105 × 101 × 114 mm (l/p/a)
Peso Circa 0,2 kg
Accessori in dotazione Filtro del aire (1)
Istruzioni d’uso (questo manuale)
Disegni e specifiche sono soggetti a modificha senza preavviso.
Il fabbricante di questo prodotto è la Sony Corporation, 1-7-1 Konan,
Minato-ku, Tokyo, 108-0075 Giappone. La rappresentanza autorizzata per
EMC e la sicurezza dei prodotti è la Sony Deutschland GmbH, Hedelfinger
Strasse 61, 70327 Stoccarda, Germania. Per qualsiasi questione riguardante
l’assistenza o la garanzia, si prega di rivolgersi agli indirizzi riportati nei
documenti sull’assistenza o sulla garanzia a parte.
中⽂
产品名称 :投影机灯泡
使⽤产品前请仔细阅读本使⽤说明书,并请妥善保管。
关于废弃产品的处理
请不要将废弃的产品与⼀般⽣活垃圾⼀同弃置。
正确处置废弃的产品有助于避免对环境和⼈类健康造成潜在的负
⾯影响。
具体的处理⽅法请遵循当地的规章制度。
本投影灯⽤于Sony投影机。在更换投影灯之前,请先阅读投影机的
使⽤说明书并确认此投影灯可以⽤于您的投影机。更换投影灯时,
请务必更换投影灯上安装的空⽓滤⽹。此外,也请同时清洁通风孔
(进⽓)。要更换投影灯/滤⽹时,请参阅您投影机的使⽤说明书进
⾏。
警告
⽤
/
键关闭投影机后投影灯处于⾼温状态。如果触摸投影灯,
可能会烫伤⼿指。更换投影灯时,请⾄少等待1⼩时让投影灯冷
却。
取下投影灯单元时,请务必保持其⽔平。如果倾斜着拔出投影灯
单元,⽽且如果投影灯破裂,碎⽚可能会溅开,引起⼈⾝伤害。
注意
若投影灯已破碎,则请与有资格的Sony技术⼈员联系。
更换新投影灯之后请进⾏以下操作。如若不然,则在更换投影灯
之后会⽴即出现“请更换灯泡/滤⽹”。
1 将交流电源线插头插⼊电源插座。
2 接通投影机电源,然后选择设置
菜单。将出现如下菜单。
“投影灯更换设定。
是否已经更换了投影灯?”。
如果出现此画⾯,选择“是”。
如果出现“投影灯的更换⼯作到此结束”信息,选择“确定”。
规格
体积 约 105 mm × 101 mm × 114 mm(宽 / 厚 / ⾼)
重量 约 0 .2 kg
附件空⽓滤 ⽹(1)
使⽤说明书 (本⼿册)
规格及 外观因改进⽽ 变更 时,恕 不另 ⾏通知 。
产品中有害物质的名称及含量
使⽤环境条件 :
请参考装备了主体的说明书的操作条件
部件名称
有害物质
铅
(Pb)
汞
(Hg)
镉
(Cd)
六价铬
(Cr(VI) )
多溴联苯
(PBB)
多溴⼆苯醚
(PBDE)
投影机灯泡
本表格依据 SJ/T 11364 的规定编制。
: 表⽰该有害物质在该部件所有均质材料中的含量均在
GB/T 26572 规定的限量要求以下。
: 表⽰该有害物质⾄少在该部件的某⼀均质材料中的含量超出
GB/T 26572 规定的限量要求。
W27-1
制造商:上海索⼴映像有限公司
地址 :上海市浦东新区川沙路3777 号
产品执⾏标准 :Q/SSVE0012
出版⽇期 :
2022
年
10
⽉
Produkt Specifikationer
Mærke: | Sony |
Kategori: | Tilbehør til projektor |
Model: | LMP-H202 |
Lampe type: | UHP |
Harmoniseret systemkode (HS): | 85299097 |
Pæreeffekt: | 200 W |
Kapabilitet: | Sony VPL-VW95ES/HW30ES |
Har du brug for hjælp?
Hvis du har brug for hjælp til Sony LMP-H202 stil et spørgsmål nedenfor, og andre brugere vil svare dig
Tilbehør til projektor Sony Manualer
4 Juni 2025

3 Juni 2025

3 Juni 2025

3 Juni 2025

3 Juni 2025

3 Juni 2025

3 Juni 2025
Tilbehør til projektor Manualer
- Tilbehør til projektor Omnitronic
- Tilbehør til projektor Da-Lite
- Tilbehør til projektor BenQ
- Tilbehør til projektor Sanyo
- Tilbehør til projektor Barco
- Tilbehør til projektor Peerless-AV
- Tilbehør til projektor Tempest
- Tilbehør til projektor XGIMI
- Tilbehør til projektor InFocus
- Tilbehør til projektor Projecta
- Tilbehør til projektor Mustang
- Tilbehør til projektor Optoma
- Tilbehør til projektor NEC
- Tilbehør til projektor Viewsonic
- Tilbehør til projektor Panasonic
Nyeste Tilbehør til projektor Manualer
26 Februar 2025

10 Januar 2025

2 December 2024

27 Maj 2024

26 Maj 2024

26 Maj 2024

24 Maj 2024

24 Maj 2024

19 Maj 2024

18 Maj 2024