Detachable
stand
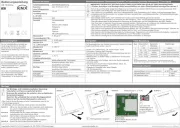
SET-Taste
Abnehmbarer
Tischständer
TEMPERATURSTATION
Betriebsanleitung
MERKMALE:
• LCD-Uhr mit 12- oder 24-Stundenanzeige
• Temperatursonde zur Aussentemperaturmessung mit Kabel
(3m lang)
• Raum- oder Aussentemperaturanzeige in Grad Celsius (°C)
oder Grad Fahrenheit (°F) mit Speicherung der Minimal- und
Maximalwerte
• Alle Minimal- und Maximalmesswerte können wieder zurück
gesetzt werden
• Wandmontage oder Tischaufstellung (abnehmbarer
Tischständer).
GRUNDEINSTELLUNG:
1. Setzen Sie unter Beachtung der korrekten Polarität 1 x 1,5V-
Micro Batterie vom Typ AAA/IEC LR3 in das Batteriefach.
2. Überprüfen Sie, ob die Temperaturstation in der Sektion
“OUTDOOR” (AUSSEN) des LCD-Bildschirms die von der
Temperatursonde erfasste Temperatur anzeigt.
3. Wird die Temperatur korrekt angezeigt, so verlegen Sie das
Sondenkabel sorgfältig zu einer passenden Stelle im
Aussenbereich und fixieren es.
4. Stellen Sie Ihre Thermo-Uhr auf eine ebene Unterlage oder
hängen Sie sie an einer gewünschten Stelle an die Wand
(siehe Punkt unten). Plazierung der Temperaturstation
Bemerkung:
Vermeiden Sie bitte bei der Verlegung und Fixierung von
Temperatursonde und Kabel den Kontakt mit Feuchtigkeit, Regen,
direktem Sonnenlicht oder anderen extremen
Umgebungsbedingungen, da diese zu Beschädigungen oder
zumindest ungenauer Anzeige führen können.
FUNKTIONSTASTEN:
SET-Taste (Einstellung):
• Drücken und halten Sie die Taste zum Eintritt in folgende
manuelle Einstellmodi: Temperaturanzeige °C/°F, 12-/24-
Stunden-Zeitanzeigeformat, und Manuelle Zeiteinstellung.
MIN/MAX-Taste:
• Wird diese Taste gedrückt, so schaltet die Anzeige
wechselweise zwischen dem aktuellen sowie dem Minimal-
und Maximalwert der Raum- und Aussentemperatur hin und
her.
• Wird die MIN/MAX-Taste gedrückt und gehalten, werden die
gespeicherten Minimal- und Maximalwerte für Raum- und
Aussentemperatur jeweils auf den aktuellen Wert
zurückgesetzt.
LCD-BILDSCHIRM:
Der LCD-Bildschirm der Temperaturstation besteht aus drei Zeilen.
Sind die Batterien eingesetzt. So werden alle Segmente dieser
dreizeiligen Anzeige kurz aufleuchten, bevor sie folgendes anzeigen:
1. Zeit “0:00”
2. Raum- und Aussentemperatur in Grad Celsius (°C) oder Grad
Fahrenheit (°F)
MANUELLE EINSTELLUNGEN:
Die folgenden Einstellungen können nach Drücken der -Taste SET
manuell geändert werden:
• Einstellung Temperaturanzeige °C/°F
• Einstellung 12-/24-Stunden-Zeitanzeigeformat
• Manuelle Zeiteinstellung
EINSTELLUNG TEMPERATURANZEIGE °C/°F
Die Temperaturanzeige kann so eingestellt werden, dass die
Temperaturdaten in °C oder °F ausgegeben werden (Voreinstellung
°C):
1. Drücken und halten Sie die -Taste zum Einstellung SET
Temperaturanzeige °C/°F.
2. Benützen Sie die MIN/MAX-Taste, um zwischen “C” oder “F”
umzuschalten.
3. Drücken Sie zur Bestätigung der Wahl und zum Eintritt in den
Modus Einstellung 12-/24-Stunden-Anzeigeformat SET die -
Taste.
EINSTELLUNG 12-/24-STUNDEN-ANZEIGEFORMAT:
Die Uhrenanzeige kann so eingestellt werden, dass die Zeit im 12-
oder 24-Stundenformat angezeigt wird (Voreinstellung 24-Stunden-
Anzeige):
1. Benützen Sie die MIN/MAX-Taste, um zwischen “12h” oder
“24h” umzuschalten.
2. Drücken Sie zur Bestätigung der Wahl und zum Eintritt in den
Modus die -Taste.Manuelle Zeiteinstellung SET
MANUELLE ZEITEINSTELLUNG:
Folgend dem Modus 12- oder 24-Stunden-Einstellung:
1. Die Stundenstellen in der Zeitanzeige-Sektion beginnen zu
blinken.
2. Stellen Sie durch Drücken der MIN/MAX-Taste die Stunden
auf die aktuelle Zeit und drücken Sie dann die -Taste. Die SET
Minutenstellen beginnen zu blinken.
3. Drücken Sie anschließend wieder die MIN/MAX-Taste und
stellen die Minuten ein.
4. Verlassen Sie dann durch Drücken der -Taste den SET
Einstellmodus. Ihre Temperaturstation ist damit voll
betriebsbereit.
ANZEIGE DER GESPEICHERTEN MINIMALEN UND
MAXIMALEN INNEN-UND
AUSSENTEMPERATURWERTE:
Benutzen Sie die MIN/MAX-Taste, um zwischen den Anzeigen der
aktuellen und gespeicherten minimalen und maximalen Innen-und
Außentemperaturwerte umzuschalten. Wird eine neue Höchst- oder
Tiefsttemperatur erreicht, so wird diese automatisch die in der
Temperaturstation gespeicherten Werte überschreiben.
RÜCKSTELLUNG DER GESPEICHERTEN MINIMALEN
UND MAXIMALEN TEMPERATURWERTE:
Durch Drücken und Halten der MIN/MAX-Taste für etwa 3 Sekunden
werden die gespeicherten minimalen und maximalen Raum- und
Aussentemperaturwerte auf die aktuellen Werte der Raum- und
Aussentemperatur zurück gestellt.
PLATZIERUNG DER TEMPERATURSTATION:
Die Temperaturstation wird komplett mit einem abnehmbaren
Tischständer geliefert. Dadurch ist entweder Tischaufstellung oder
Wandmontage möglich ist. Bitte stellen Sie vor der Wandmontage
sicher, dass die
Außentemperaturmesswerte an der gewünschten
Montagestelle korrekt empfangen werden
können. Zur Wandmontage verfahren Sie wie
folgt:
1. Schraube (nicht im Lieferumfang) in Wand
einschrauben. Dabei den Schraubenkopf
etwa 5mm von der Wand abstehen
lassen.
2. Ständer von der Temperaturstation
abziehen. Temperaturstation an der
Schraube einhängen. Bitte darauf achten,
dass diese sicher einrastet, bevor sie die
Temperaturstation loslassen
BATTERIEWECHSEL:
Für optimale Anzeigegenauigkeit sollte die Batterie einmal
jährlich gewechselt werden.
Bitte beteiligen Sie sich am aktiven Umweltschutz und
entsorgen Sie Altbatterien nur bei den dafür
vorgesehenen Sammelstellen.
PFLEGE UND INSTANDHALTUNG:
• Extreme Temperatureinwirkungen, Vibrationen und
Stossbelastungen sollten vermieden werden, da dies zu
Beschädigungen der Geräte und falschen Vorhersagen und
Angaben führen kann.
• Reinigung von Anzeigen und Gehäusen nur mit einem
weichen, leicht feuchten Tuch. Keine lösenden oder
scheuernden Reinigungsmittel verwenden, da diese LCD-
Anzeigen sowie Gehäuse angreifen könnten.
• Geräte nicht in Wasser tauchen.
• Leistungsschwache Batterien sofort entnehmen, um ein
Auslaufen und dadurch verursachte Folgeschäden zu
verhindern. Zum Austausch nur Batterien des empfohlenen
Typs verwenden.
• Reparaturbedürftige Geräte zum Händler bringen und dort von
qualifiziertem Fachpersonal überprüfen lassen. Öffnen des
Gehäuses sowie eigene Reparaturversuche führen zum
Erlöschen der Garantieansprüche.
• Gerät keinen extremen und plötzlichen
Temperaturschwankungen aussetzen, da dies zu schnellem
Wechsel der Anzeigeangaben und damit zur Beeinträchtigung
der Genauigkeit der Messwerte führt.
TECHNISCHE DATEN:
Temperaturmessbereich
Innenraum : -9,9ºC bis +59,9ºC mit 0,1ºC Auflösung
14,2ºF bis 139,8ºF mit 0,2ºF Auflösung
(Anzeige OF.L ausserhalb dieses Bereichs)
Aussenbereich : -40ºC bis +59,9ºC mit 0,1ºC Auflösung
-40ºF bis +139,8ºF mit 0,2ºF Auflösung
(Anzeige --.- ausserhalb dieses Bereichs)
Temperatur-Prüfintervall
Raumtemperatur : Alle 10 Sekunden
Außentemperatur : Alle 10 Sekunden
Spannungsversorgung : 1 x 1,5V-Batterie Micro AAA, IEC LR3
Batterielebensdauer : Etwa 12 Monate
(Alkali-Batterien empfohlen)
Abmessungen (L x B x H) : 60 x 20,7 x 150 mm
HAFTUNGSAUSSCHLUSS:
• Elektrischer und elektronischer Abfall enthält schädliche
Substanzen. Die Entsorgung von Elektronikabfall in der freien
Natur und/oder auf nicht genehmigten Schuttabladeplätzen
zerstört nachhaltig die Umwelt.
• Zur Erlangung der Adressen legaler Schuttabladeplätze mit
selektiver Abfallverwertung kontaktieren Sie bitte Ihre lokalen
und/oder regionalen Verwaltungsbehörden.
• Alle elektronischen Geräte müssen ab sofort dem Recycling
zugeführt werden. Dazu muss jeder Anwender seinen aktiven
Beitrag bei der Erfassung, dem Recycling und der
Wiederverwendung von elektrischem oder elektronischem
Abfall leisten.
• Die uneingeschränkte Entsorgung von Elektronikabfall schadet
der öffentlichen Gesundheit und der Qualität der Umwelt.
• Elektronischer Abfall darf unter keinen Umständen mit dem
normalen Restmüll entsorgt werden.
• Wie auf der Geschenkverpackung und auf dem Produkt
vermerkt, ist es für den Anwender höchst empfehlenswert, die
“Bedienungsanleitung“ aufmerksam zu lesen.
• Hersteller und Händler übernehmen keine Verantwortung für
inkorrekte Messwerte und Folgen, die sich daraus ergeben.
• Dieses Produkt darf nicht für medizinische Zwecke oder für die
Information der Öffentlichkeit benützt werden.
• Dieses Produkt ist nur für den Heimgebrauch als Indikator des
künftigen Wetters gedacht und liefert keine 100%-ige
Genauigkeit. Die Wettervorhersagen dieses Gerätes sind als
Anhaltswerte zu sehen und stellen keine absoluten genauen
Voraussagen dar.
• Die technischen Daten dieses Gerätes können ohne vorherige
Ankündigung geändert werden.
• Dieses Gerät ist kein Spielzeug. Außerhalb der Reichweite von
Kindern aufbewahren.
• Diese Anleitung darf ohne schriftliche Genehmigung durch den
Hersteller auch nicht auszugsweise vervielfältigt werden.
TEMPERATURE STATION
Instructions manual
FEATURES:
• LCD clock in 12/24 hour time format display
• 3 meters cable with sensing probe for the outdoor temperature
• Display indoor and outdoor temperature in degrees Celsius
(°C) or degree Fahrenheit (°F) with MIN/MAX records
• All MIN/MAX records can be reset
• Table standing or wall mountable (detachable table stand)
SETTING UP:
Battery
compartment