TP-Link XZ000-G3 Manual
Læs gratis den danske manual til TP-Link XZ000-G3 (2 sider) i kategorien Router. Denne vejledning er vurderet som hjælpsom af 26 personer og har en gennemsnitlig bedømmelse på 4.9 stjerner ud af 13.5 anmeldelser.
Har du et spørgsmål om TP-Link XZ000-G3, eller vil du spørge andre brugere om produktet?
Produkt Specifikationer
| Mærke: | TP-Link |
| Kategori: | Router |
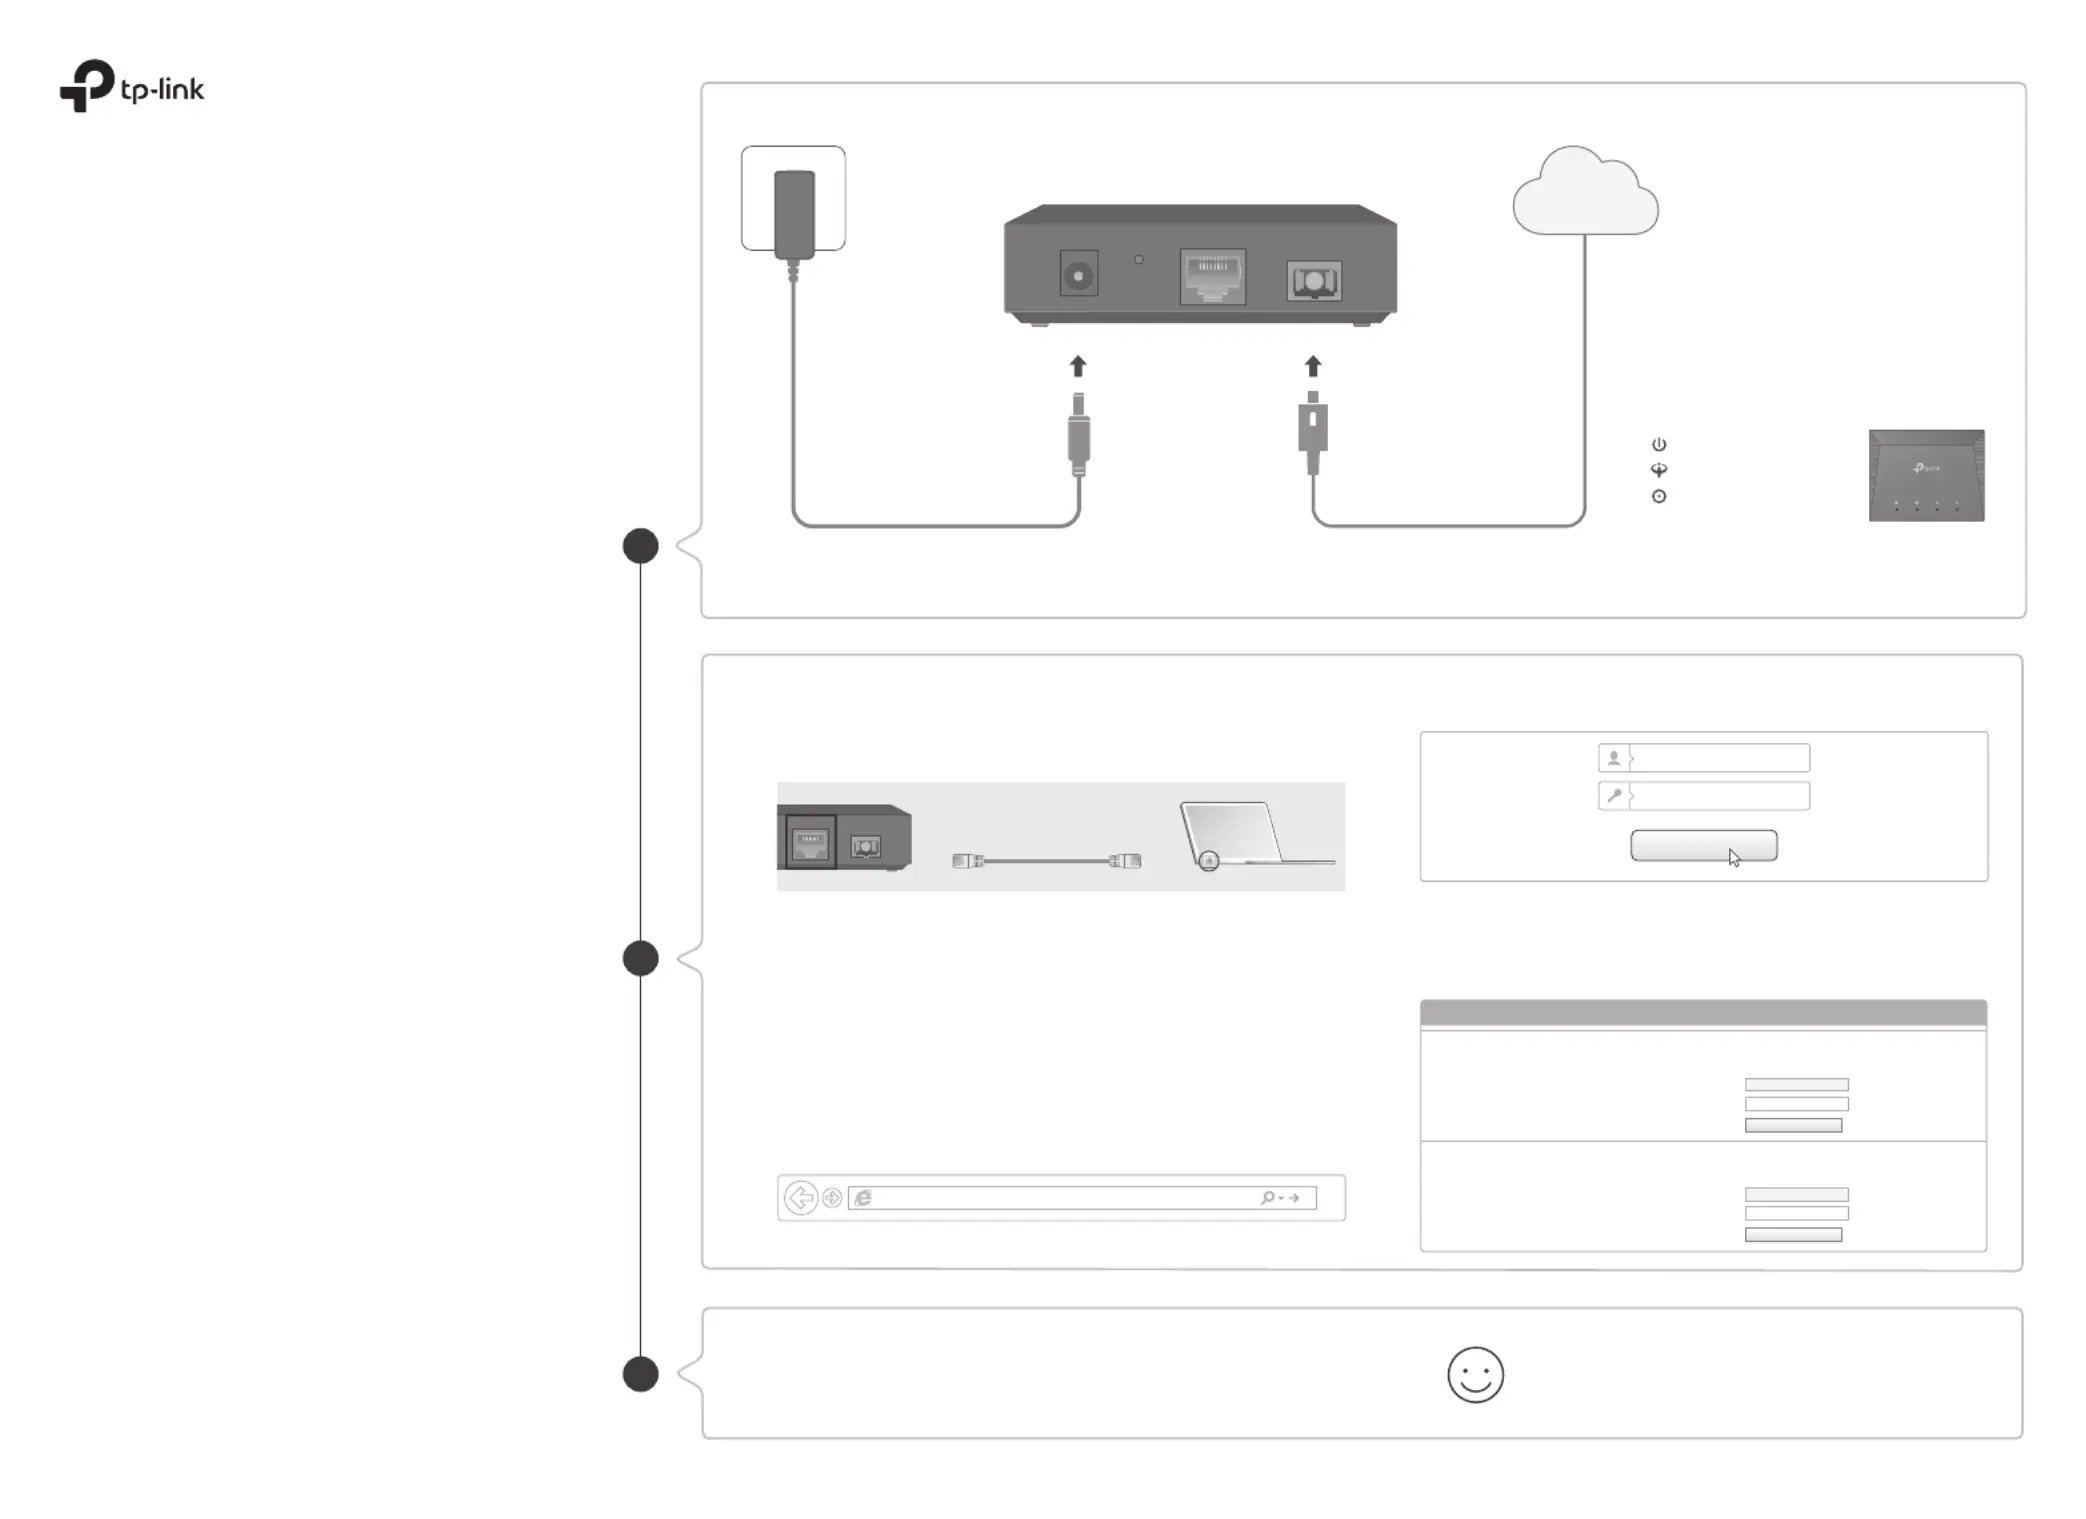
| Model: | XZ000-G3 |
| Bredde: | 95 mm |
| Dybde: | 75 mm |
| Højde: | 29.3 mm |
| Produktfarve: | Sort |
| Produkttype: | Optisk netværksterminal (ONT) |
| Opbevaringstemperatur (T-T): | -40 - 60 °C |
| Relativ luftfugtighed ved drift (H-H): | 10 - 90 % |
| Relativ luftfugtighed ved opbevaring (H-H): | 5 - 90 % |
| Ethernet LAN-porte (RJ-45): | 1 |
| Driftstemperatur (T-T): | 0 - 40 °C |
| Ethernet LAN-datahastigheder: | 10,100,1000 Mbit/s |
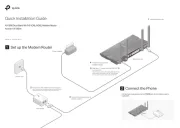
| Hurtig start guide: | Ja |
| Netværksstandarder: | IEEE 802.1Q, IEEE 802.1p, IEEE 802.3u |
| DC-in-stik: | Ja |
| Webbaseret administration: | Ja |
| Knap til nulstilling: | Ja |
| Servicekvalitet support (QoS): | Ja |
| LED-indikatorer: | Ja |
| Udgangsspænding: | 9 V |
| Udgangsstrøm: | 0.6 A |
| AC-adapter inkluderet: | Ja |
| Bæredygtighedscertifikater: | RoHS |
| Fiber optisk strømstik: | SC |
| Overholdelse af bæredygtighed: | Ja |
| Fiberkanal porte: | 1 |
| Transmissionsafstand (maks.): | 20 km |
| Upstream datahastighed: | 1244 Mbit/s |
| Downstream datahastighed: | 2488 Mbit/s |
| ITU standarder: | G.984.1, G.984.3, G.984.4 |
Har du brug for hjælp?
Hvis du har brug for hjælp til TP-Link XZ000-G3 stil et spørgsmål nedenfor, og andre brugere vil svare dig
Router TP-Link Manualer


Router Manualer
- Technicolor
- Evolution
- Asus
- AVMATRIX
- EnGenius
- Hitachi
- ZTE
- Acer
- Nest
- Dovado
- Hikoki
- Key Digital
- JUNG
- Black Box
- Milesight
Nyeste Router Manualer