V-TAC VT-8-40 Manual

V-TAC Lettelse VT-8-40

Læs gratis den danske manual til V-TAC VT-8-40 (8 sider) i kategorien Lettelse. Denne vejledning er vurderet som hjælpsom af 20 personer og har en gennemsnitlig bedømmelse på 5.0 stjerner ud af 10.5 anmeldelser. Har du et spørgsmål om V-TAC VT-8-40, eller vil du spørge andre brugere om produktet?

Side 1/8
INTRODUCTION & WARRANTY
Thank you for selecting and buying V-TAC product. V-TAC will serve you the best. Please read these instructions
carefully before starting the installation and keep this manual handy for future reference. If you have any another query,
please contact our dealer or local vendor from whom you have purchased the product. They are trained and ready to
serve you at the best. The warranty is valid for 5 years from the date of purchase. The warranty does not apply to
damage caused by incorrect installation or abnormal wear and tear. The company gives no warranty against damage
to any surface due to incorrect removal and installation of the product. The products are suitable for 10-12 Hours Daily
operation. Usage of product for 24 Hours a day would void the warranty. This product is warranted for manufacturing
defects only.
AC:220~240V, 50Hz
25,000 Hours
>15,000 Times
-20°C to +40°C
10%~95%
155±5g
21
21
21
21
21
75±1 300±2
600±2
1200±2
1500±2
1800±2
75±1
75±1
75±1
75±1
1000/1200 2050/2400 4300/4800 6000 7200
225±5g 365±5g 450±5g 525±5g
INPUT VOLTAGE
LIFE SPAN
ON/OFF CYCLE
OPERATING TEMPERATURE
OPERATING HUMIDITY
LUMENS
NET WEIGHT
D1(mm) D2(mm) L1(mm)DIMENSIONS
10W
20W
40W
50W
60W
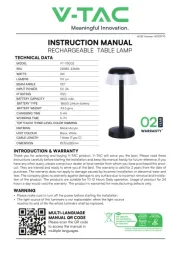
INSTRUCTION MANUAL
TECHNICAL DATA
MODEL VT-8-10 VT-8-20 VT-8-40 VT-8-50 VT-8-60
Plastic PlasticPlasticPlastic
10W
>0.5 >0.7 >0.9
>80
120°
>0.9 >0.9
20W 40W 50W 60W
Plastic
SKU
WATTS
BODY TYPE
DF
100 120 100 120 110 120 120 120
LUMINOUS EFFICIANCY
CRI
BEAM ANGLE
IP RATING IP20
20344
20345
20346
20347
20348
20349
20350
20351
20352
20354
20355
21671
21670
QUICK
CONNECTOR
SUPER BRIGHT
LM/WATT EFFICIENCY
120+
INSTALLATION INSTRUCTIONS
INSTALLATION DIAGRAM
1. Choose the right position, drill two hole and insert the screw (make sure the
distance between the holes is no less than50mm, Less than bracket length)
2. Shrapnel point it at the hole and then install the screws
3. Press the lamp body firmly into the mounting buckle to fix the lamp body, Slide the
lamp body along the mounting buckle to the desired position as needed.
4. Connect the wiring, use insulating tape, and waterproof tape for insulation and
waterproofing, turn the power ON and test.
WARNING!
1. Please make sure to turn o the power before starting the installation.
2. Installation must be performed by a qualified electrician.
3. The light source of this luminaire is not replaceable; when the light source
reaches its end of life the whole luminaire shall be replaced.
4. For Indoor use only
5. Before installation, you must carefully check the integrity of the product
and accessories
6. When installed, products and flammable materials to ensure that at least
0.2m distance, lighting cannot be installed in the zenith or heat wall, pay
attention to low voltage and high voltage electrical wiring separately.
7. To ensure that the power cord has enough length, do not kink cables.
Output cables should be laid separately and at a distance from other
cables.
Caution, risk of electric shock.
This marking indicates that this
product should not be disposed of
with other household wastes.
Note: Replace cable spec" HO3VVH2-F 2X0.75mm2", should be replaced by a qualified technician
Luminaires not suitable
for covering with
thermally insulating
material.


Produkt Specifikationer

Mærke: V-TAC
Kategori: Lettelse
Model: VT-8-40

Har du brug for hjælp?

Hvis du har brug for hjælp til V-TAC VT-8-40 stil et spørgsmål nedenfor, og andre brugere vil svare dig