ZTE Blade Spark Manual

ZTE Smartphones Blade Spark

Læs nedenfor 📖 manual på dansk for ZTE Blade Spark (73 sider) i kategorien Smartphones. Denne guide var nyttig for 51 personer og blev bedømt med 4.5 stjerner i gennemsnit af 2 brugere

Side 1/73
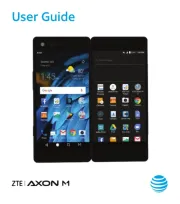
User Guide
Copyright © 2017 ZTE CORPORATION. All rights reserved. ZTE, Blade,
and the ZTE logos are trademarks of the ZTE Corporation. AT&T, the
AT&T logo and all other AT&T marks contained herein are trademarks
of AT&T Intellectual Property and/or AT&T.
No part of this publication may be excerpted, reproduced, translated or
utilized in any form or by any means, electronic or mechanical, including
photocopying and microlm, without the prior written permission of
ZTE Corporation.
The manual is published by ZTE Corporation. We reserve the right to
make modications on print errors or update specications without
prior notice.
microSDXC is a trademark of SD, 3C-LLC. The Bluetooth
® word mark
and logos are registered trademarks owned by Bluetooth SIG, Inc.
Manufactured under license from Dolby Laboratories. Dolby, Dolby
Audio, and the double-D symbol are trademarks of Dolby Laboratories.
Qualcomm and Snapdragon are trademarks of Qualcomm Incorporated,
registered in the United States and other countries. Used with permission.
Version No. : V1.0
Edition Time: June 2017
2 CONTENTS
Protecting Your Phone With Screen Pinning 22
................
Using Your Fingerprint 23
. . . . . . . . . . . . . . . . . . . . . . . . . . . . . . . . . . . . . .
Knowing the Basics
............................................
25
Monitoring the Phone Status 25
................................
Managing Notications . . . . . . . . . . . . . . . . . . . . . . . . . . . . . . . . . . . . . . 26
Managing Shortcuts and Widgets 30
...........................
Organizing With Folders
. . . . . . . . . . . . . . . . . . . . . . . . . . . . . . . . . . . . .
30
Rearranging the Primary Shortcuts
.........................
31
Entering Text
................................................
31
Editing Text 34 . . . . . . . . . . . . . . . . . . . . . . . . . . . . . . . . . . . . . . . . . . . . . . . . . .
Opening and Switching Apps 35
................................
Connecting to Networks and Devices
.........................
37
Connecting to Mobile Networks 37
.............................
Connecting to Wi-Fi®
. . . . . . . . . . . . . . . . . . . . . . . . . . . . . . . . . . . . . . . . . 38
Connecting to Bluetooth® Devices. . . . . . . . . . . . . . . . . . . . . . . . . . . 42
Connecting to Your Computer via USB 44 . . . . . . . . . . . . . . . . . . . . .
Using the microSDXC Card as Portable or
Internal Storage 46 . . . . . . . . . . . . . . . . . . . . . . . . . . . . . . . . . . . . . . . . . . . . .
Sharing Your Mobile Data Connection 49 . . . . . . . . . . . . . . . . . . . . . .
Connecting to Virtual Private Networks
.....................
51
Phone Calls
.....................................................
53
Placing and Ending Calls 53 . . . . . . . . . . . . . . . . . . . . . . . . . . . . . . . . . . . . .
Video Calling 54 . . . . . . . . . . . . . . . . . . . . . . . . . . . . . . . . . . . . . . . . . . . . . . . . .
Answering or Rejecting Calls 55
................................
Working With the Call History 56
...............................
4 CONTENTS
Messaging ......................................................80
Opening the Messaging Screen 80 . . . . . . . . . . . . . . . . . . . . . . . . . . . . .
Sending a Message 80 . . . . . . . . . . . . . . . . . . . . . . . . . . . . . . . . . . . . . . . . . .
Adding an Attachment 82
. . . . . . . . . . . . . . . . . . . . . . . . . . . . . . . . . . . . . .
Replying to a Message
. . . . . . . . . . . . . . . . . . . . . . . . . . . . . . . . . . . . . . .
83
Deleting Messages or Threads
..............................
83
Forwarding a Message. . . . . . . . . . . . . . . . . . . . . . . . . . . . . . . . . . . . . . . 84
Changing Message Settings 84 . . . . . . . . . . . . . . . . . . . . . . . . . . . . . . . . .
Calendar ........................................................ 85
Viewing Your Calendars and Events 85
.........................
Creating an Event 86 . . . . . . . . . . . . . . . . . . . . . . . . . . . . . . . . . . . . . . . . . . .
Editing, Deleting, or Sharing an Event 86 . . . . . . . . . . . . . . . . . . . . . . .
Changing Calendar Settings 87
.................................
Searching an Event 87
..........................................
Browser ........................................................88
Opening the Browser 88 . . . . . . . . . . . . . . . . . . . . . . . . . . . . . . . . . . . . . . . .
Using Multiple Browser Tabs 88 . . . . . . . . . . . . . . . . . . . . . . . . . . . . . . . .
Downloading Files 89
...........................................
Changing Browser Settings 89 . . . . . . . . . . . . . . . . . . . . . . . . . . . . . . . . .
Camera .........................................................90
Capturing a Photo 90 . . . . . . . . . . . . . . . . . . . . . . . . . . . . . . . . . . . . . . . . . . .
Using Manual Camera Mode 92 . . . . . . . . . . . . . . . . . . . . . . . . . . . . . . . . .
Using Other Camera Modes 92
.................................
Recording a Video 93
...........................................
Customizing Camera and Video Settings 94 . . . . . . . . . . . . . . . . . . .
6 CONTENTS
For Your Safety
...............................................
124
General Safety Information
................................
124
FCC RF Exposure Information (SAR) 125
........................
FCC Regulations 126
............................................
Hearing Aid Compatibility (HAC) Regulations
for Mobile Phones 127
..........................................
Distraction 129 . . . . . . . . . . . . . . . . . . . . . . . . . . . . . . . . . . . . . . . . . . . . . . . . . .
Product Handling 129
...........................................
Electrical Safety 133
............................................
CTIA Requirements 133 . . . . . . . . . . . . . . . . . . . . . . . . . . . . . . . . . . . . . . . . .
Radio Frequency Interference 135
..............................
Explosive Environments 136
....................................
Warranty
......................................................
137
Limited Warranty 138
...........................................
How to Get Warranty Service 139
..............................
Other Warranty Programs 139
..................................
Specications .................................................140
If the battery is low, there will be a pop-up message on the
screen. As you charge your phone, the screen will show you the
exact battery level on the Status Bar.
Warning! Use only ZTE-approved chargers and cables. The use of
unapproved accessories could damage your phone or cause the
battery to explode.
Caution: Do not attempt to change the built-in rechargeable
battery yourself. The battery can only be changed by ZTE or a
ZTE-authorized service provider.
Note: Use the USB Type-C™ charger that
comes in-box with your phone to charge
the battery.
1. Connect the adapter to the charging port.
2. Connect the charger to a standard AC wall
outlet. If the phone is on, you’ll see a charging
icon, such as or , appear in the Status Bar.
3. Disconnect the charger when the battery is
fully charged.
Note: If the battery is extremely low, you may be unable to power
on the phone even when it is being charged. In this case, try
again aer charging the phone for at least 20 minutes. Contact
customer service if you still cannot power on the phone aer
prolonged charging.
This device contains a nonremovable battery. Attempting
to remove will void your warranty and could cause serious
injury. Do not damage, alter, or try to remove the battery.
8 GETTING STARTED
Getting to Know Your Phone
12 GETTING STARTED
Back key
Charging/USB
Type-C port
Home key
Recent
apps key
Touch
screen
Nano-SIM/
microSDXC
card tray
Front camera
Volume key
Power key
Earpiece
Proximity and
light sensor
Getting to Know the Home Screen
The home screen is the starting point for your phone’s
applications, functions, and menus. You can customize your
home screen by adding shortcuts, folders, widgets, and more.
14 GETTING STARTED
Shortcut
Status and
notication bar
Primary shortcuts
Folder
Widgets
Wallpaper
16
Personalizing
Changing the System Language
1. From the home screen, tap Settings Languages &
input Languages.
2. To add a system language, tap and then the Add a language
language you need.
3. Press and hold a language and move it to the top to switch to
that language.
Setting the Date and Time
1. From the home screen, tap Settings Date & time.
2. Set the date, time, time zone, and time format.
To adjust the date and time automatically, tap to turn on
Automatic date & time.
To adjust the date and time manually, tap to turn o
Automatic date & time Set date / Set time and tap to
change the date and time.
To adjust the time zone automatically, tap to turn on
Automatic time zone.
To adjust the time zone manually, tap to turn oAutomatic
time zone Select time zone and tap to set the correct
time zone.
To adjust the time format, tap Use 24-hour format.
PERSONALIZING
18
Adjusting Volumes
1. From the home screen, tap Settings Sound.
2. Drag the sliders below Media volume Alarm volume, , Ring
volume, and Notication volume to adjust the volume for
each type of audio.
Note: You can adjust the media volume when a media application
is in use by pressing the Volume key. If no media application is
active, press the Volume key to adjust ringtone volume (or the
earpiece volume during a call).
Switching to Silent or Vibration Mode
You can set the phone to silent mode by using one of the
following methods:
Press the
Volume key when no media application is active to
show the volume management window. Drag the slider to
the le or press and hold the lower end of the Volume key
to switch the phone to vibration mode. Press down on the
Volume key again in vibration mode to switch the phone to
silent mode.
From the home screen, tap Settings Sound
Notication mode and select Vibrate Mute or to switch to
vibration or silent mode.
Note: Silent and vibration modes will not silence your
alarm sound.
PERSONALIZING
20 PERSONALIZING
Notes:
To turn o Do not disturb mode quickly, press the Volume key
and tap END NOW.
Do not disturb mode will not silence your alarms unless you
select Total silence.
To set exceptions based on apps, from the home screen, tap
Settings Notications. Select an app and tap to turn on
Override Do Not Disturb.
Applying New Wallpapers
You can set the wallpaper for the home screen and lock screen.
1. Press and hold an empty area of the home screen.
2. Tap Wallpapers.
3. Tap Lock screen or Home screen to select where the new
wallpaper will be applied.
4. Swipe le or right on the wallpaper panel to select a wallpaper,
or tap PHOTOS or LIVE WALLPAPER to choose the image or
animation you want to use.
Note: In addition, from the home screen, you can tap
Settings Display Wallpaper to pick an image from or Photos
Wallpapers or an animation from Live Wallpapers.
Setting the Theme
1. Press and hold an empty area of the home screen.
2. Tap Themes.
3. Tap a theme to select it.
22
Tap
Pattern to create a pattern that you must draw to
unlock the screen.
Tap PIN
or Password to set a numeric PIN or a password
that you must enter to unlock the screen.
3. For Pattern, PIN, or Password lock, select either Require
pattern/PIN/password to start device No thanks or .
Note: When this feature is enabled, your phone cannot
receive calls, messages, or notications, including alarms,
until it starts up.
4. For Pattern, PIN, or Password lock, select how you would like
notications and their contents to show when the phone is
locked, and then tap DONE.
Note: Remember the pattern, PIN, or password you set. Otherwise,
you will need to upgrade the phone soware to use the phone.
Protecting Your Phone With Screen Pinning
You can use the screen pinning feature to keep an app in view,
so others cannot switch to other apps or access your personal
information.
Turning On Screen Pinning
1. From the home screen, tap Settings Security
Screen pinning.
2. Tap the On/O switch.
3. If you want to be asked for the unlock pattern, PIN, or
password before unpinning the screen, switch on Ask for
unlock pattern / PIN / password before unpinning when the
screen lock has been set.
PERSONALIZING
24 PERSONALIZING
2. Enter the screen lock pattern, PIN, or password you set. If you
haven’t set a screen lock, follow the prompts to set it.
3. Tap REGISTER or Fingerprint Add ngerprint.
4. Follow the prompts to record the center and edges of a nger.
5. Tap OK.
Note: Tap an existing ngerprint record to change its name or
delete it.
Setting Fingerprint Actions
1. From the home screen, tap Settings Security
Fingerprint.
2. Enter the screen lock pattern, PIN, or password you set.
3. Tap the switches to adjust the following settings:
Wake up and unlock your phone: When a screen lock
(Pattern, PIN, or Password) is enabled, you can wake up the
phone and unlock it with a registered ngerprint.
Shortcut to a favorite app: When the screen is o or
locked, press the ngerprint sensor to open a selected app.
Take photo: When the Camera app is open, press the
ngerprint sensor to take a photo. No ngerprint
verication is needed.
Answer call:
Press the ngerprint sensor to answer
incoming calls. No ngerprint verication is needed.
26
Managing Notications
The Status Bar at the top of the home screen provides
notication icons on the le side. Below are some of the icons
you may see.
Indicator What it means
Upcoming event
Downloading data
Sending data
USB connected
USB tethering on
Wired headset
connected
Indicator What it means
New SMS
/ New Email
message(s)
/ New Gmail™
message(s)
Missed call
Call in progress
Call on hold
/ Song playing
KNOWING THE BASICS
28 KNOWING THE BASICS
Note: If you block notications for an app, you may miss its
important alerts and updates. The notications of some apps
cannot be blocked.
Using Quick Settings
The Quick Settings in the Notication Panel make it convenient
to view or change the most common settings for your phone.
Swipe down with two ngers from the top of the screen, or open
the Notication Panel and drag the panel downward to view the
following Quick Settings. Swipe le to view more options; tap
to add more.
Brightness: Uncheck and drag the brightness slider to AUTO
adjust the screen brightness.
Wi-Fi: Tap to turn Wi-Fi on or o. Press and hold to open
the Wi-Fi menu. (See Connecting to Networks and Devices –
Connecting to Wi-Fi.)
Bluetooth: Tap to turn Bluetooth on or o. Press and hold to
open the menu. (See Bluetooth Connecting to Networks and
Devices – Connecting to Bluetooth Devices.)
Sound / Vibrate / Silent: Tap to switch between sound,
vibration, and silent mode. (See Personalizing – Switching to
Silent or Vibration Mode.)
Location:
Tap to turn Location on or o. Press and hold to
open the Location menu. (See Settings – Personal – Location.)
Flashlight: Tap to turn the ashlight on or o.
Airplane mode: Tap to turn Airplane mode on or o. Press and
hold to access additional network settings.
30
Managing Shortcuts and Widgets
Adding Shortcuts and Widgets
1. From the home screen, tap to view apps.
Or, to view widgets, press and hold an empty area of the home
screen and select Widgets.
2. Swipe to browse the available apps or widgets.
3. Press and hold a widget or an app icon and drag it to a home
screen panel.
Note: You can drag a widget or an app icon to the right edge of
the screen to create a new home screen panel.
Moving Shortcuts and Widgets
1. Press and hold a shortcut or widget on the home screen.
2. Drag it to the place you need.
Removing Shortcuts and Widgets
1. Press and hold a shortcut or widget on the home screen.
2. Drag it to to remove it.
Adjusting Widget Size
1. Press and hold a widget on the home screen and then
release it.
2. An outline appears around the widget. Drag the outline to
resize the widget.
Note: Not all widgets can be resized.
Organizing With Folders
You can create folders on the home screen and add shortcuts to
KNOWING THE BASICS
32
Google Keyboard
The Google keyboard provides a layout similar to a desktop
computer keyboard. Turn the phone sideways and the keyboard
will change from portrait to landscape. The landscape keyboard
is not supported in all applications.
Tap the alphabetic keys to enter letters. Press and hold some
specic keys to enter associated accented letters or numbers.
For example, to enter È, press and hold , and the available
accented letters and number 3 appear. Then slide to choose È.
As you enter a word, candidates appear above the keyboard.
Tap to select the correct one.
Tap
to use uppercase. Double-tap to lock uppercase.
This key also changes to indicate the current case you are
using: for lowercase, for uppercase, and when locked
in uppercase.
Tap to delete the text before the cursor.
Tap
to select numbers and symbols. You can then tap
to nd more.
KNOWING THE BASICS
34
Notes:
Tap to type when you want to. If you want to enter a single
letter, simply tap the key once.
Li your nger at the end of the word. A space is added
automatically when you begin to trace the next word.
Google Voice Typing
Google voice typing uses the Google voice recognition service
to convert speech to text. You must have a data connection on a
mobile or Wi-Fi network to use it.
1. Tap to access the voice-typing feature when you are using
the Google keyboard.
2. When you see the microphone image, speak what you want to
type. Tap underlined words to select an alternative.
3. Tap to delete recently entered text.
Tip: Saycomma,” “period, “question mark,” “exclamation mark,
or “exclamation point” to enter punctuation.
Editing Text
Move the insertion point: Tap where you want to type. The
cursor blinks in the new position, and a tab appears below it.
Drag the tab to move the cursor.
Select text: Press and hold or double-tap within the text.
The nearest word highlights, with a tab at each end of the
selection. Drag the tabs to change the selection.
Cut or copy: Select the text you want to manipulate. Then tap
CUT or COPY.
KNOWING THE BASICS
36
2. Tap a thumbnail to open that app.
Note: You can swipe a thumbnail le or right or tap on the
corner of the thumbnail to remove it from the list. Tap Clear all to
remove all of the thumbnails.
Using Two Apps in Split-Screen Mode
You can work with two apps at the same time in split-screen mode.
Note: Not all apps support split-screen mode.
Method One:
1. Press the Recent apps key to view your recently used apps.
2. Press and hold the tab of the rst app you want to use, and
then drag it to Drag here to use split screen.
3. If the second app you want to use is in the recent apps list, tap
its tab. If not, from the home screen, tap to nd and open
the app you need.
Method Two:
1. Open the rst app you want to use, and then press and hold
the Recent apps key.
2. Find and open the second app you want to use, either by
pressing the Recent apps key and tapping a tab or by
tapping .
To turn o split-screen mode, drag to the top or bottom of
the screen.
KNOWING THE BASICS
38
Connecting to Wi-Fi
Wi-Fi is a wireless networking technology that can provide
Internet access at distances of up to 300 feet, depending on the
Wi-Fi router and your surroundings.
Turning Wi-Fi On and Connecting to a Wi-Fi Network
1. From the home screen, tap Settings Wi-Fi.
2. Slide the switch to the On position to turn on Wi-Fi.
3. Tap a network name to connect to it.
4. If the network is secured, enter the password and tap
CONNECT.
Note: Your phone automatically connects to previously used
Wi-Fi networks when they are in range.
Getting Notied of Open Networks
1. From the home screen, tap Settings Wi-Fi.
2. Slide the switch to the On position.
3. Tap .
4. Slide the Network notication switch to the On position.
When Wi-Fi is on, you receive notications in the Status Bar
when your phone detects an open Wi-Fi network. Slide the
Network notication switch to the O position to turn
o notications.
Adding a Wi-Fi Network
You can add a Wi-Fi network if the network does not broadcast
its name (SSID) or add a Wi-Fi network when you are out of range.
CONNECTING TO NETWORKS AND DEVICES
42
Sending data via Wi-Fi Direct:
1. Open the appropriate application and select the le or item
you want to share.
2. Select the option for sharing via Wi-Fi Direct. The method may
vary by application and data type.
3. Tap a device the phone has connected with.
Connecting to Bluetooth Devices
Bluetooth is a short-range wireless communication technology.
Phones or other devices with capabilities can exchange Bluetooth
information wirelessly within a distance of about 30 feet. The
Bluetooth devices must be paired before the communication
is performed.
Turning Bluetooth On/O
1. From the home screen, tap Settings Bluetooth.
2. Slide the switch to the or position.On O
When Bluetooth is on, the icon will appear in the status bar.
Your phone will be visible to nearby devices while Bluetooth
Settings is open.
Changing the Device Name
1. From the home screen, tap Settings Bluetooth.
2. Slide the switch to the position if On Bluetooth is o.
3. Tap
Rename this device.
4. Edit the name and tap RENAME.
CONNECTING TO NETWORKS AND DEVICES
44
Sending Data via Bluetooth
1. Open the appropriate application and select the le or item
you want to share.
2. Select the option for sharing via . The method may Bluetooth
vary by application and data type.
3. Tap a Bluetooth device the phone has paired with or wait for it
to search for new devices and tap one of them.
Receiving Data via Bluetooth
1. Turn Bluetooth on before trying to receive data via Bluetooth.
2. Tap ACCEPT when the le sharing prompt appears, or swipe
down on the status bar and tap ACCEPT.
Depending on whether a microSDXC card is installed, received
les are stored automatically in a dedicated folder (Bluetooth, for
instance) in the phone storage or microSDXC directory. You can
access them in the File Manager. Received contacts (vCard les)
are automatically imported to your contact list.
Connecting to Your Computer via USB
You can connect your phone to a computer with a USB cable and
transfer music, pictures, and other les in both directions. Your
phone stores these les in internal storage or on a removable
microSDXC card.
Connecting Your Phone to a Computer via USB
1. Connect your phone to the PC with a USB Type-C cable.
2. Choose one of the following options:
Charge only: Charge your phone via USB.
CONNECTING TO NETWORKS AND DEVICES
46
Using the microSDXC Card as Portable or
Internal Storage
You can use your microSDXC card as portable storage for photos,
media, and other les so that you don’t lose them, or you can
format the card for use as internal storage.
Setting Up the microSDXC Card as Portable Storage
When you install a microSDXC card that has not been used on
your phone before, the phone will mount the card as portable
storage by default.
Removing the microSDXC Card From Your Phone (Portable)
If you need to remove the microSDXC card used as portable
storage while the phone is on, you should unmount it rst.
1. From the home screen, tap Settings Storage.
2. Tap next to the card name in the Portable storage section.
3. When the screen prompts the card is safely ejected, you can
remove it from the phone.
Erasing and Formatting the microSDXC Card
1. From the home screen, tap Settings Storage.
2. Tap the card name in the Portable storage section.
3. Tap Format ERASE & FORMAT DONE.
Caution: The formatting procedure erases all the data on the
microSDXC card, aer which the les CANNOT be retrieved.
CONNECTING TO NETWORKS AND DEVICES
52
Adding a VPN
1. From the home screen, tap Settings More VPN.
2. Tap .
3. Enter the information provided by your network administrator.
4. Tap SAVE.
The VPN is added to the list on the VPN screen.
Connecting to a VPN
1. From the home screen, tap Settings More VPN.
2. Tap the VPN that you want to connect to.
3. When prompted, enter any requested credentials and
tap CONNECT.
Modifying a VPN
1. From the home screen, tap Settings More VPN.
2. Tap next to the VPN that you want to modify.
3. Edit the VPN settings and tap SAVE.
CONNECTING TO NETWORKS AND DEVICES
54 PHONE CALLS
Ending a Call
During a call, tap on the screen.
Video Calling
Your phone supports video calling. The Video call and Enhanced
LTE Services settings must be enabled before you can place or
receive video calls. (See Phone CallsAdjusting Your Call Settings
– Turning Video Call On or O and Settings – Wireless & Networks –
Enhanced LTE Services.)
Note: Not available in all calls. See carrier for details.
Placing a Video Call
1. From the home screen, tap .
2. Enter the phone number with the dialpad.
3. Tap to place the call.
Switching Between Voice and Video
1. While in a voice call, tap Voice Only; while in a video call, tap
Video; or wait to receive a prompt from the other caller.
2. Select an option (not all will be available for all calls):
Show Me: Switch to a one-way video call, in which the caller
sees you, but you dont see them.
Video Call: Switch to a two-way video call, in which you and
the other caller see one another.
Voice Only: Switch to a voice call without video.
Hide Me: Switch to a one-way video call, in which you see
the caller, but they don’t see you.
56
Working With the Call History
The call history is a list of all the calls you’ve placed, received, or
missed. It provides a convenient way to redial a number, return a
call, or add a number to your Contacts.
To open the call history, from the home screen, tap
RECENTS. (If the dialpad is visible, tap to close it.)
Placing a Call From the Call History
1. Open the call history.
2. Tap a listing, and then tap .
Note: You can tap to see more entries, and View full call history
then tap , or , to lter the records by call type.
Taking Other Actions on a Call History Entry
1. Open the call history and tap a listing.
Tap to place a video call to the number.
Tap
to create a new contact with the number.
Tap to add the number to an existing contact.
Tap to send a text message to the number.
Tap to view more call information.
Note: You can tap in View full call history Clear call history
the call history screen to select calls to delete.
Calling Your Contacts
1. From the home screen, tap CONTACTS.
2. Tap beside a contact to make a call.
PHONE CALLS
58
Tap to put the caller you are speaking to on hold, and switch
to another call that has been put on hold.
Tap to switch between the back camera and the front
camera (video calls).
Tap
to end the current call.
Note: During a video call, tap the screen to see options. Not all
options are available during all calls.
Warning! Because of higher volume levels, do not place the
phone near your ear during speakerphone use.
Managing Multi-party Calls
When the call waiting and three-way call features are available,
you can switch between two calls or set up a conference call.
Note: The call waiting and three-way call features need network
support and may result in additional charges. Please contact your
service provider for more information.
Switching Between Current Calls
When you’re on a call and another call comes in, your phone
screen informs you and displays the caller ID.
To respond to an incoming call while you’re on a call:
Tap
to answer the call. This places the rst caller
on hold and answers the second caller.
Tap
to answer the call. This ends the rst call
and answers the second call.
Tap
to reject the second call. PHONE CALLS
62
Forwarding Incoming Calls
Call forwarding allows you to forward your incoming calls to
another phone number.
1. From the home screen, tap Settings Call settings
Call forwarding.
2. Tap an available option (Call forwarding-Unconditional,
Call forwarding-Busy Call forwarding-No reply, , or
Call forwarding-Not reachable) to enable it.
Setting Call Waiting
This option allows you to get notied of incoming calls during a call.
1. From the home screen, tap Settings Call settings
Call waiting.
2. Check Call waiting to enable this feature.
Note: Please contact your service provider to check whether the
Call waiting feature is available.
Additional Settings
1. From the home screen, tap Settings Call settings
Additional settings.
2. Tap Caller ID to choose whether your number is displayed
when someone receives your outgoing call.
Note: Please contact your service provider to check whether the
Caller ID feature is available.
PHONE CALLS
64 PHONE CALLS
Setting Hearing Aid Compatibility
Your phone supports the Hearing Aid Compatibility (HAC)
function. If you use a hearing aid with a telecoil and turn on
hearing aid compatibility, it will help you to hear more clearly
during phone calls.
1. From the home screen, tap Settings Accessibility.
2. Check Hearing aids to turn on hearing aid compatibility.
CAUTION: Do not turn on the Hearing aids option unless you use
a hearing aid with a telecoil. Using this setting without a hearing
aid or with a hearing aid without a telecoil may be harmful to
your hearing.
Turning Video Call On or O
Your phone supports video calling. You can turn this feature on
or o.
1. From the home screen, tap Settings.
2. Tap the slider beside Video call to turn it on or o.
68
2. Tap a contact, and then tap at the top of the screen.
Removing a Contact From Favorites
1. From the home screen, tap FAVORITES.
2.
Tap a favorite contact, and then tap at the top of the screen.
Working With Groups
Viewing Your Contact Groups
1. From the home screen, tap GROUPS.
2. Scroll through the list to view the preset groups and any
groups you have created.
3. Tap a group to view its members.
Note: To send a message or an email to all or some of a group’s
members, you can tap beside the groups name in the list.
Setting Up a New Group
1. From the home screen, tap GROUPS.
2. Tap to create a new group.
3. If you have added contact accounts other than the phone, tap
to choose an account for the new group.
4. Tap Group’s name and enter a name.
5. Tap the eld below MEMBER and select the contacts you wish
to be the group members.
6. Tap .
7. If necessary, tap the eld below RINGTONE NOTIFICATION or
RINGTONE to set a special ringtone for incoming calls or
messages from the group members, and then tap OK.
8. Tap to save the group.
CONTACTS
72 ACCOUNTS
Accounts
Adding or Removing Accounts
You can add multiple Google accounts and Microso Exchange
ActiveSync® accounts. You may also add other kinds of accounts,
depending on the apps installed on your phone.
Adding an Account
1. From the home screen, tap Settings Accounts
Add account .
2. Tap the type of account you want to add.
3. Follow the on-screen steps to enter the information about the
account. Most accounts require a username and password,
but the details may vary. You may also need to obtain some
information from IT support or your system administrator.
When the account is successfully added, it is displayed in the
Accounts menu in Settings.
Removing an Account
Removing an account will delete it and all information associated
with it, such as emails and contacts, from your phone.
1. From the home screen, tap , and then Settings Accounts
tap the account type.
2. Tap the account you’d like to remove.
3. Tap Remove account REMOVE ACCOUNT.
74 ACCOUNTS
3. When auto-sync is enabled, tap items to turn syncing on or
o as you need. Items with syncing turned on will be kept in
sync automatically. When auto-sync is disabled, tap an item in
the list to sync that type of information between the phone
and the web.
76 EMAIL
Notes:
If you have more than one email account added on the phone,
tap the From eld to select the account you want to use to
send the message.
When adding multiple email addresses in the To eld, put a
comma aer each one to separate them.
In the To eld, you can tap to open the Cc and Bcc elds.
Checking Your Email
Your phone can automatically check for new emails at the
interval you set when setting up the account.
You can check for new emails manually by dragging down on the
message list. To load earlier emails, swipe up to go to the bottom
of the message list, and tap LOAD MORE.
Responding to an Email
You can reply to or forward a message that you receive. You can
also delete messages and manage them in other ways.
Replying to or Forwarding an Email
1. Open the email you want to reply to or forward from the Inbox.
2. Choose one of the following:
To reply to the sender, tap .
To reply to the sender and all recipients of the original
message, tap .
To forward the message, tap .
3. Edit your message and tap .
78 EMAIL
3. Tap Signature and enter the text.
4. Tap OK.
Adding, Editing, or Deleting an Email Account
Aer setting up your rst email account (see Email – Setting Up
the First Email Account), you can add more email accounts and
manage them separately.
Adding an Email Account
1. From the Email inbox, tap Settings Add account.
2. Follow the prompts to set up the account as you did with
the rst one.
Note: You can also add accounts from the Settings menu.
(See Accounts – Adding or Removing Accounts).
Editing an Email Account
1. From the Email inbox, tap Settings.
2. Tap the account you want to edit.
3. Make the changes you want, and press the Back key when
you’re nished.
Note: Options you can edit may vary depending on the
account type.
Deleting an Email Account
1. From the Email inbox, tap Settings.
2. Tap the account you want to delete.
3. Tap Remove account from this device OK.
80 MESSAGING
Messaging
You can use Messaging to exchange text messages (SMS) and
multimedia messages (MMS).
Opening the Messaging Screen
From the home screen, tap .
The Messaging screen opens, where you can create a new
message, search for messages, delete messages, or open an
ongoing message thread.
Tap to write a new text or multimedia message.
Tap to search for a message using keywords.
Tap an existing message thread to open the conversation.
Sending a Message
1. On the Messaging screen, tap
.
2. Add recipients:
Manually enter the recipient’s number or the contact name.
(You can tap to enter numbers with a dialpad.) If the
phone presents a few suggestions, tap the one you want
to add.
Select recipients from your contacts by tapping FREQUENTS
or ALL CONTACTS and tapping a name.
To add more recipients, enter another number or contact
name, or tap to select from your contacts.
82 MESSAGING
Adding an Attachment
Number Function
1 Tap to select a focus area.
2 Tap to start recording a video. Tap to stop
recording; the video will be attached instantly.
3Tap to open the mini camera viewscreen (shown) to
capture a new photo or video to attach.
4
Tap to select from photos you’ve already taken.
Tap a photo thumbnail to attach it to the message.
Swipe up and tap to select multiple photos.
5Tap to select another attachment option: Video,
Voice, Recorder, Files, Contacts, or Quick reply.
2
3
1
5
6
7
4
86 CALENDAR
To quickly switch to a specic date, tap Go to date, swipe
horizontally tond the month you want, and then tap a day OK.
Viewing Event Details
In Agenda, Day, or Week view, tap an event to view its details.
In Month view, tap a day to view events on that day, and then tap
an event to view its details.
Creating an Event
1. In any Calendar view, tap to open an event details screen
for a new event.
You can also tap a spot in Day or Week view twice to add an
event to that time slot.
2. Add details about the event.
Note: If you have more than one calendar, you can choose the
calendar to which to add the event by tapping the current
calendar above the Event name box. Dierent accounts may
present dierent event details elds for you to ll in.
3. Tap SAVE.
Editing, Deleting, or Sharing an Event
1. Find the event you want to edit, delete, or share.
2. Open its details screen (see Calendar – Viewing Your Calendars
and Events – Viewing Event Details).
3. Choose one of the following options:
To edit the event, tap . Tap SAVE to save your changes.
To delete the event, tap OK.
To share the event, tap and choose an option.
88 BROWSER
Browser
Use Browser to view web pages and search for information.
Opening the Browser
From the home screen, tap .
If Browser was recently used, the last web page you were viewing
is displayed. If you have not used Browser recently, your home
page opens.
Browser also opens when you tap a web link for example, in an
email or a text message.
1. From the home screen, tap .
2. Tap the address box at the top of the web page.
3. Enter the address (URL) of a web page, or enter terms you
want to search for.
4. Tap a URL or search suggestion, or tap on the keyboard to
open the web page or search results.
Using Multiple Browser Tabs
You can open several web pages at the same time (one page in
each tab) and switch between them freely.
Opening a New Browser Tab
1. Tap ADD.
- Or -
Tap New tab.
A new browser tab opens.
90 CAMERA
Camera
You can take photos and record videos. Photos and videos are
stored to the phone’s memory card or to the phone’s internal
storage. You can copy them to your computer or access them in
the Photos app.
Capturing a Photo
1. From the home screen, tap .
2. Aim the camera at the subject and make any necessary
adjustments. PHOTO (automatic camera) mode is used
by default.
3. Tap the area on the screen where you want the camera to
focus, or let the camera autofocus on the center of the image.
4. Tap . You can also press the Volume key to take a photo.
4
3
10
9
2
7
8
11
65
112


Produkt Specifikationer

Mærke: ZTE
Kategori: Smartphones
Model: Blade Spark

Har du brug for hjælp?

Hvis du har brug for hjælp til ZTE Blade Spark stil et spørgsmål nedenfor, og andre brugere vil svare dig


Smartphones ZTE Manualer
ZTE

ZTE Zephyr Manual

10 April 2025
ZTE

ZTE Axon 11 Manual

29 Maj 2024
ZTE

ZTE Blade V220 Manual

26 Maj 2024
ZTE

ZTE Blade Spark Manual

30 November 2022
ZTE

ZTE Blade V6 Manual

30 November 2022
ZTE

ZTE Blade X Manual

30 November 2022
ZTE

ZTE Blade Manual

30 November 2022

Smartphones Manualer

Nyeste Smartphones Manualer

Oppo

Oppo Reno 12F Manual

27 Februar 2025
LG

LG -H788 Manual

25 Februar 2025
LG

LG GU290f Manual

25 Februar 2025
POCO

POCO C65 Manual

25 Februar 2025
POCO

POCO M6 Manual

22 Februar 2025
POCO

POCO Pad Manual

22 Februar 2025
POCO

POCO M6 Pro Manual

22 Februar 2025