Advanced Network Devices IPSCM-RMe Manual


Læs gratis den danske manual til Advanced Network Devices IPSCM-RMe (2 sider) i kategorien Ikke kategoriseret. Denne vejledning er vurderet som hjælpsom af 7 personer og har en gennemsnitlig bedømmelse på 4.8 stjerner ud af 4 anmeldelser. Har du et spørgsmål om Advanced Network Devices IPSCM-RMe, eller vil du spørge andre brugere om produktet?

Side 1/2
Round Ceiling IP Speaker (Mic Enabled)
(IPS -RMe) Installation CM
Advanced Network Devices 3820 Ventura Dr. Arlington Hts. IL 60004
tech@anetd.com www.anetd.com/ - - 847 463 2237 •
1 v1.2
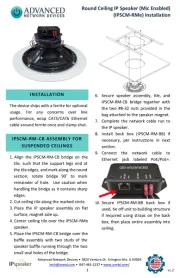
INSTALLATION
The device ships with a ferrite for optional
usage. For any concerns over line
cable around ferrite once and clamp shut.
IPSCM- - ASSEMBLY FOR RM CB
SUSPENDED CEILINGS
1. A gn the IPSCM-li RM-CB bridge on the
tile, such that the support legs end at
the tile edges, and mark along the round
section; rotate bridge 90˚ to mark
remainder of hole. Use caution when
handling the bridge as it contains sharp
edges.
2. Cut ceiling tile along the marked circle.
3. Place the IP speaker assembly on flat
surface, magnet side up.
4. Center ceiling tile over the IPSCM-RMe
speaker.
5. Place the IPSCM- -CB bridge over the RM
baffle assembly with two studs of the
speaker baffle running through the two
small oval holes of the bridge.
6. Secure speaker assembly, tile, and
IPSCM- -CB bridge together with RM
the two #8-32 nuts provided in the
bag attached to the speaker magnet.
7. Complete the network cable run to
the speaker. IP
8. Install back box (IPSCM- -BB) if RM
necessary, per instructions in next
section.
9. Connect the network cable to
Ethernet jack labeled PoE/PoE+.
10. Secure IPSCM-RM-BB back box if
used, tie off unit to building structure
if required using straps on the back
box, then place entire assembly into
ceiling.
Round Ceiling IP Speaker (Mic Enabled)
(IPS -RMe) Installation CM
Advanced Network Devices 3820 Ventura Dr. Arlington Hts. IL 60004
tech@anetd.com www.anetd.com/ - - 847 463 2237 •
2 v1.2
IPSCM- -BB ASSEMBLY RM
(OPTIONAL)
1. Remove knockout from desired
location in IPSCM- -BB backbox. RM
2. Bend up 4 horseshoe tabs on IPSCM-
RM-CB bridge until they are
perpendicular to bridge surface.
3. Run wiring, and conduit if necessary,
through the knockout and make
proper connections to the IP speaker.
4. Push snap-in tie off straps through
holes in rim of IPSCM- -BB backbox RM
(where required).
5. Secure IPSCM- -BB back box to RM
IPSCM- -CB bridge by inserting RM
horseshoe tabs through the
appropriate slots in the back box and
twist with pliers.
IPSCM- -DB ASSEMBLY FOR RM
SHEETROCK CEILINGS
1. Cut out an 8-1/2” diameter hole in
the ceiling where the speaker is to be
installed.
2. Remove the #8-32 nut from the
speaker stud nearest the speaker
terminals and the nut on the
opposite end of the speaker, and
then insert two IPSCM- -DB dry RM
wall clips onto those studs as shown.
Re-secure the clips to the baffle using
the two nuts.
3. Make proper connections to the IP
speaker per the IPSCM- -CB RM
instructions.
4. Holding a clip temporarily open, slide
one side of the unit into the ceiling
cavity, then slowly release the clip.
Open the second clip and slide the
remainder of the assembly into the
cavity and release the clip to secure
the assembly to the ceiling surface.
Use caution when handling and
opening the clips as they contain
sharp edges.
RESOURCES
User Support:
https://www.anetd.com/user-support/
Customer Portal:
https://www.anetd.com/portal/
Technical Resources:
https://www.anetd.com/user-
support/technical-resources/
AND Legal Disclaimer:
https://www.anetd.com/legal/


Produkt Specifikationer

Mærke: Advanced Network Devices
Kategori: Ikke kategoriseret
Model: IPSCM-RMe

Har du brug for hjælp?

Hvis du har brug for hjælp til Advanced Network Devices IPSCM-RMe stil et spørgsmål nedenfor, og andre brugere vil svare dig


Ikke kategoriseret Advanced Network Devices Manualer
Ikke kategoriseret Manualer

Nyeste Ikke kategoriseret Manualer