Asaklitt MF-H05 Manual

Asaklitt Lys MF-H05

Læs gratis den danske manual til Asaklitt MF-H05 (5 sider) i kategorien Lys. Denne vejledning er vurderet som hjælpsom af 8 personer og har en gennemsnitlig bedømmelse på 3.7 stjerner ud af 4.5 anmeldelser. Har du et spørgsmål om Asaklitt MF-H05, eller vil du spørge andre brugere om produktet?

Side 1/5
GREAT BRITAIN CUSTOMER SERVICE
tel: 020 8247 9300 e-mail: customerservice@clasohlson.co.uk internet: www.clasohlson.co.uk postal: 10 13 Market Place, Kingston Upon Thames, Surrey, KT1 1JZ
ENGLISH
1 2 3 2 5
6 7 8 9
4
10 11 1412 13
1516
Ver. 20171204
Art.no 36-6069 Model MF-H05
Please read theentire instruction manual before using theproduct and then
save it for future reference. We reserve theright for any errors in text or images
and any necessary changes made to technicaldata. If you have any questions
concerning technical problems please contact our Customer Services.
Safety
Do not point thelight beam into anyone’seyes.
Do not let children play with theproduct.
Never charge thetorch in flammable environments or on flammable
surfaces.
Only use therechargeable batteries provided with theproduct.
Only use theprovided charger cable, connected to aUSB port, for
charging thetorch.
Never use adefective chargercable.
Never expose thebatteries to fire or high temperatures.
Avoid contact with leaking batteries.
Product description
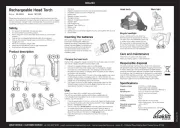
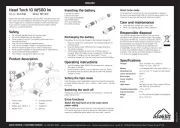
1. LEDlamp
2. Magnetic headband mounts (for LED lamp and battery pack)
3. Handlebar or pipe mount for worklightuse
4. Batterypack
5. Magnetic charger connection
6. Charging indicator
7. Magnetic charger lead connector
8. Chargercable
9. USBchargerplug
10. Batteries: Type18650 (2 ×)
11. Batterycover
12. Focusring
13. Battery pack and LED lamp magnetic mounts, used together with (2) or (3)
14. Powerswitch
Inserting the batteries
Head torch Work light
Bicycle headlight
Loosen and remove thelock knob (15).
Bendand open thering bracket so that you
can place it onto thehandlebars. Insert one
or several of therubber spacers (16) into
thering bracket to attain aperfect and tight
fit onto thehandlebars. Re-insert and tighten
thelocking knob, making sure thehandlebar
mount sits securely onto thehandlebars.
Care and maintenance
Clean thetorch using asoft, dampcloth.
Never use cleaning agents or other chemicals.
Responsible disposal
Remove thebattery cover (11) and insert
theincluded rechargeable 18650 type
batteries according to thebattery pack’s(4)
polarity markings. Thebatteries are Note:
connected in parallel and should all point
thesame direction when inserted into
thebattery holder. Pressthelid firmly onto
thebatterypack.
Charging the head torch
Thetorch has amagnetic charger connection for thechargercable. Thetorch
can only be charged using theincluded chargercable.
1. Connect thesupplied charger cable to aUSB charger.
2. Connect theother end of the charger cable to the magnetic charger
connection (5) on the battery pack. Thecharging indicator (6) shines
red while thetorch battery is charging. Whenthebattery is fully charged
theindicator will shinegreen.
3. Thebattery will need at least 10 hours to fully charge (applies when using
aUSB charger providing acharging current of 1A) thefirst time it is
charged. Charging using acomputer’s USB port will double thestandard
charge time as theamperage from it will belower.
4. Thecharge connection is held together magnetically, make sure that
thelead’s plug is positioned correctly. Charging time can vary Note:
depending on thetype of charge sourceused.
Use
Areas ofuse: Headtorch, worklight and bicycle headlight.
TheLED lamp and battery pack are held in place magnetically both
on theheadband and handlebar mount, or also on any ferrous metal
surfaces,e.g. ironandsteel.
1. Press thepower switch (14) to turn on thetorch. Select thedesired mode
by pressing thepower switch therequired number oftimes: high power
(350 lm) – (150 lm) – .low power off
2. Thetorch also has a for increasing light intensity (450lm). boost-mode
Toactivate boost-mode: Holdthepower switch down for about 4
seconds until light intensity powerfully increases. Boost-mode lasts for
about 60 seconds and then returns to mode.high-power
3. Adjust thelight beam by moving thefocus ring (12) forwards or
backwards.
This symbol indicates that this product should not be disposed of
with general household waste. This applies throughout theentire EU.
In order to prevent any harm to theenvironment or health hazards
caused by incorrect waste disposal, theproduct must be handed in
for recycling so that thematerial can be disposed of in aresponsible
manner. When recycling your product, take it to your local collection
facility or contact theplace of purchase. They will ensure that
theproduct is disposed of in anenvironmentally sound manner.
Specifications
Charging voltage 5 V DC from aUSB charger
(USB charger sold separately)
Battery Li-ion-battery 2800 mAh (type 18650) (2 ×)
Operating time Up to 3.5 hours (on high power),
up to 6 hours (on low power)
Colour temperature 6000K
Colour rendition Ra 70
Power 10 W
Lumens 450 lm (60 sec in boost-mode),
350 lm (high power), 150 lm (low power)
Operating temperature −20 to +50ºC
Protection class IPX4
and headband)


Produkt Specifikationer

Mærke: Asaklitt
Kategori: Lys
Model: MF-H05

Har du brug for hjælp?

Hvis du har brug for hjælp til Asaklitt MF-H05 stil et spørgsmål nedenfor, og andre brugere vil svare dig


Lys Asaklitt Manualer
Asaklitt

Asaklitt MF-H03 Manual

9 August 2025
Asaklitt

Asaklitt MF-H05 Manual

9 August 2025
Asaklitt

Asaklitt MF-H09 Manual

9 August 2025

Lys Manualer

Nyeste Lys Manualer

Antari

Antari F-7 SMAZE Manual

11 November 2025
Sagitter

Sagitter Club DOT Manual

11 November 2025
XCell

XCell Worklight Flip Manual

11 November 2025
KAWOTI

KAWOTI 21334 Manual

11 November 2025
SDJ

SDJ Smart Wash Plus Manual

11 November 2025
SDJ

SDJ J-Beam 150 Manual

11 November 2025
XCell

XCell Worklight Base Manual

11 November 2025
Sagitter

Sagitter Club Spot V2 Manual

11 November 2025
Lucide

Lucide Trigono Manual

11 November 2025