Axxess AXBUCS-NI246V Manual

Axxess Ikke kategoriseret AXBUCS-NI246V

Læs gratis den danske manual til Axxess AXBUCS-NI246V (4 sider) i kategorien Ikke kategoriseret. Denne vejledning er vurderet som hjælpsom af 2 personer og har en gennemsnitlig bedømmelse på 4.5 stjerner ud af 1.5 anmeldelser. Har du et spørgsmål om Axxess AXBUCS-NI246V, eller vil du spørge andre brugere om produktet?

Side 1/4
© COPYRIGHT 2025 METRA ELECTRONICS CORPORATION
REV. 6/19/25
REV. 6/19/25
REV. 6/19/25
REV. 6/19/25
axxessinterfaces.com metraonline.com
axxessinterfaces.com • metraonline.com
axxessinterfaces.com metraonline.com
Axxess Integrate
Axxess Integrate
Axxess Integrate
Axxess Integrate
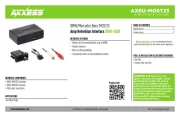
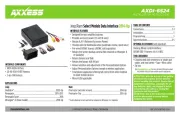
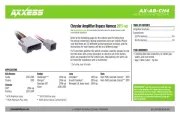
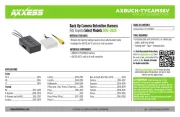
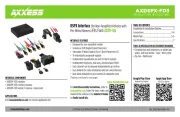
Installation Instructions for AXBUCS-NI246V
INTERFACE FEATURES
• Pre-wired AXSWC harness (AXSWC sold separately)
• Retains the factory AUX-IN jack
• Retains the factory backup camera to an aftermarket radio*
• Includes the AXCSD-6V 12-volt to 6-volt converter
* Will not work with models equipped with an "All Around Camera" system
AXBUCS-NI246V
Nissan (with NAV) 2011-2022
INTERFACE COMPONENTS
AXBUCS-NI246V harness • AXCSD-6V 12-volt to 6-volt converter
Wire cutter • Crimping tool • Solder gun • Tape
• Connectors (example: butt connectors, bell caps, etc.)
TOOLS REQUIRED
CAUTION!
All accessories, switches, climate controls panels, and especially air bag indicator lights
must be connected before cycling the ignition. Also, do not remove the factory radio with the key in the
on position, or while the vehicle is running.
CHEVROLET
City Express 2013-2018
NISSAN
Altima 2013-2017
Cube 2011-2014*
Frontier 2013-2021*
Juke 2011-2014*
NV 2012-2017*
NV200 2012-2017*
Rogue (w/ Bose)
2012-2013*
Sentra 2011-2019*
Titan 2013-2015*
Versa 2013-2022*
Xterra 2013-2015*
CHEVROLET
City Express 2013-2018
NISSAN
Altima 2013-2017
Cube 2011-2014*
Frontier 2013-2021*
Juke 2011-2014*
NV 2012-2017*
NV200 2012-2017*
Rogue (w/ Bose)
2012-2013*
Sentra 2011-2019*
Titan 2013-2015*
Versa 2013-2022*
Xterra 2013-2015*
CHEVROLET
City Express 2013-2018
NISSAN
Altima 2013-2017
Cube 2011-2014*
Frontier 2013-2021*
Juke 2011-2014*
NV 2012-2017*
NV200 2012-2017*
Rogue (w/ Bose)
2012-2013*
Sentra 2011-2019*
Titan 2013-2015*
Versa 2013-2022*
Xterra 2013-2015*
CHEVROLET
City Express 2013-2018
NISSAN
Altima 2013-2017
Cube 2011-2014*
Frontier 2013-2021*
Juke 2011-2014*
NV 2012-2017*
NV200 2012-2017*
Rogue (w/ Bose)
2012-2013*
Sentra 2011-2019*
Titan 2013-2015*
Versa 2013-2022*
Xterra 2013-2015*
APPLICATIONS
APPLICATIONS
APPLICATIONS
APPLICATIONS
* For use when retaining the OE backup camera only
INTERFACE FEATURES
• Pre-wired AXSWC harness (AXSWC sold separately)
• Retains the factory AUX-IN jack
• Retains the factory backup camera to an aftermarket radio*
• Includes the AXCSD-6V 12-volt to 6-volt converter
* Will not work with models equipped with an "All Around Camera" system
AXBUCS-NI246V
Nissan (with NAV) 2011-2022
INTERFACE COMPONENTS
AXBUCS-NI246V harness • AXCSD-6V 12-volt to 6-volt converter
Wire cutter • Crimping tool • Solder gun • Tape
• Connectors (example: butt connectors, bell caps, etc.)
TOOLS REQUIRED
CAUTION!
All accessories, switches, climate controls panels, and especially air bag indicator lights
must be connected before cycling the ignition. Also, do not remove the factory radio with the key in the
on position, or while the vehicle is running.
Instrucciones de instalación para AXBUCS-NI246V
¡PRECAUCIÓN!
Todos los accesorios, interruptores, paneles de controles de clima y especialmente
las luces del indicador de las bolsas de aire deben estar conectados antes ciclar la ignición. Además, no
quite el radio de fábrica con la llave en la posición o de encendido ni con el vehículo funcionando.
CARACTERÍSTICAS DE LA INTERFASE
Arnés AXSWC precableado (el AXSWC se vende por separado)
• Retiene el conector de de la fábrica AUX-IN
• Retiene la cámara de reversa de fábrica de mercado secundario*
• Incluye el AXCSD-6V 12 voltios al convertidor de 6 voltios
* No funciona con los modelos equipados con un sistema de "todo alrededor
de la cámara"
AXBUCS-NI246V
Nissan (con NAV) 2011-2022
COMPONENTES DE LA INTERFASE
• Arnés AXBUCS-NI246VAXCSD-6V 12 voltios al convertidor de 6 voltios
• Cortacables • Ponchadora • Pistola soldadora • Cinta
• Conectores (ejemplo: conectores de extremo, de campana, etc.)
HERRAMIENTAS REQUERIDAS
* Para usar cuando la cámara de OE se va a retener
Instrucciones de instalación para AXBUCS-NI246V
¡PRECAUCIÓN!
Todos los accesorios, interruptores, paneles de controles de clima y especialmente
las luces del indicador de las bolsas de aire deben estar conectados antes ciclar la ignición. Además, no
quite el radio de fábrica con la llave en la posición o de encendido ni con el vehículo funcionando.
CARACTERÍSTICAS DE LA INTERFASE
Arnés AXSWC precableado (el AXSWC se vende por separado)
• Retiene el conector de de la fábrica AUX-IN
• Retiene la cámara de reversa de fábrica de mercado secundario*
• Incluye el AXCSD-6V 12 voltios al convertidor de 6 voltios
* No funciona con los modelos equipados con un sistema de "todo alrededor
de la cámara"
AXBUCS-NI246V
Nissan (con NAV) 2011-2022
COMPONENTES DE LA INTERFASE
• Arnés AXBUCS-NI246VAXCSD-6V 12 voltios al convertidor de 6 voltios
• Cortacables • Ponchadora • Pistola soldadora • Cinta
• Conectores (ejemplo: conectores de extremo, de campana, etc.)
HERRAMIENTAS REQUERIDAS
© COPYRIGHT 2025 METRA ELECTRONICS CORPORATION
REV. 6/19/25
REV. 6/19/25
REV. 6/19/25
REV. 6/19/25
axxessinterfaces.com • metraonline.com
axxessinterfaces.com metraonline.com
Axxess Integrate
Axxess Integrate
Axxess Integrate
Axxess Integrate
Installation Instructions for AXBUCS-NI246V
Metra recommends MECP
certified technicians
Metra recommends MECP
certified technicians
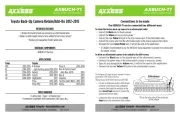
Connections to be made
Connect the Black wire with a ring terminal to chassis ground.
Connect the Black wire of the AXCSD-6V wire to chassis ground.
Connect the Red wire labeled "Camera Power 6V" to the Blue/Red wire
of the AXCSD-6V.
Connect the Green/Purple wire to the reverse wire of the aftermarket radio,
and also to the Blue/White wire of the AXCSD-6V.
For all models except the Cube / Rogue, if retaining the factory AUX-IN jack,
connect the Red & White RCA jacks to the AUX input.
Connect the Yellow RCA jack to the rear camera input of the aftermarket radio
.
12-pin pre-wired AXSWC harness:
This harness is to be used along with the optional AXSWC (not included) to
retain steering wheel audio controls. Please refer to the AXSWC instructions
for radio connections and programming.
Note: Disregard the harness that comes with the AXSWC.
• Connect the unlabeled Red wire to the accessory wire.
Instrucciones de instalación para AXBUCS-NI246V
Metra recomienda técnicos
con certificación del Programa
de Certificación en Electrónica
Móvil (Mobile Electronics
Certification Program, MECP).
Conexiones que se deben hacer
Conecte el cable negro con una terminal de aro al tierra del chasís.
Conecte el cable negro del AXCSD-6V a tierra del chasís.
Conecte el cable rojo marcado con "Cámara de alimentación de 6V" a
el cable azul/rojo del AXCSD-6V.
Conecte el cable
verde/púrpura
al cable de reversa del radio de mercado
secundario y también para el cable
azul/blanco
de la AXCSD-6V.
Para todos los modelos excepto el Cubo / Rogue, si retener el enchufe AUX-
IN de fábrica, conecte los conectores RCA rojo y blanco al entrada AUX.
Conecte el conector RCA amarillo RCA en la entrada de la cámara de reversa del
radio de mercado secundario
.
Arnés AXSWC precableado de 12 pins:
Este arnés se debe usar junto con el AXSWC opcional (no incluido) para
retener los controles de audio en el volante. Consulte las instrucciones de
AXSWC para las conexiones del radio y la programación.
Nota: Ignore el arnés que viene con el AXSWC.
• Conectar el cable rojo marcado con el cable accesorio.


Produkt Specifikationer

Mærke: Axxess
Kategori: Ikke kategoriseret
Model: AXBUCS-NI246V

Har du brug for hjælp?

Hvis du har brug for hjælp til Axxess AXBUCS-NI246V stil et spørgsmål nedenfor, og andre brugere vil svare dig


Ikke kategoriseret Axxess Manualer

Axxess

Axxess AXFD-USB3 Manual

2 Oktober 2025
Axxess

Axxess AXTO-VW1 Manual

2 Oktober 2025
Axxess

Axxess AX-PS Manual

2 Oktober 2025
Axxess

Axxess AXTC-HN1 Manual

2 Oktober 2025
Axxess

Axxess AXDIS-PO52 Manual

2 Oktober 2025
Axxess

Axxess AXSUB-GM1 Manual

1 Oktober 2025
Axxess

Axxess AXDI-GM4 Manual

1 Oktober 2025
Axxess

Axxess AXTC-FD3 Manual

1 Oktober 2025
Axxess

Axxess AXDSPH-MI1 Manual

1 Oktober 2025
Axxess

Axxess ANC-CHH2 Manual

1 Oktober 2025

Ikke kategoriseret Manualer

Nyeste Ikke kategoriseret Manualer