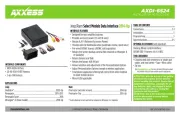
Axxess AXDIS-HK3 Manual


Læs gratis den danske manual til Axxess AXDIS-HK3 (8 sider) i kategorien Ikke kategoriseret. Denne vejledning er vurderet som hjælpsom af 3 personer og har en gennemsnitlig bedømmelse på 4.8 stjerner ud af 2 anmeldelser. Har du et spørgsmål om Axxess AXDIS-HK3, eller vil du spørge andre brugere om produktet?

Side 1/8
AXDIS-HK3
INSTALLATION INSTRUCTIONS
AxxessInterfaces.com © COPYRIGHT 2024 METRA ELECTRONICS CORPORATION REV. 11/22/24 INSTAXDIS-HK3
INTERFACE FEATURES
INTERFACE COMPONENTS
OPTIONAL ACCESSORIES
(sold separately)
TOOLS REQUIRED
• Crimping tool and connectors, or solder gun, solder, and heat shrink
• Tape • Wire cutter • Zip ties • Small flat-blade screwdriver
TABLE OF CONTENTS
Applications ...........................................................2
Connections ........................................................ 2-3
Installation .............................................................4
Programming .........................................................4
Audio Level Adjustment .......................................4
Steering Wheel Control (SWC) Settings
LED feedback ........................................................ 5
Changing radio type ............................................ 5
Remapping the SWC buttons .........................5-6
Dual assignment instructions .........................
7-8
Troubleshooting.....................................................8
Hyundai/Kia Data Interface with SWC
2017-2022
Designed for amplified* and
non-amplified models
Provides accessory power (12-
volt 10-amp)
Provides NAV outputs (park
brake, reverse, speed sense)
Retains audio controls on the
steering wheel
Retains the factory AUX-IN jack
Retains the factory backup camera
Includes an AXCSD-6V 12-to-6V
step-down for the factory
camera
Retains balance and fade**
Micro-B USB updatable
• AXDIS-HK3 interface • AXDIS-HK3 harness
• AXCSD-6V • 16-pin harness with stripped leads
• Female 3.5mm connector with stripped leads
SPDIF Interface: AXSP-HK interface
Visit AxxessInterfaces.com for more detailed information
about the product and up-to-date vehicle specific applications
*Requires the AXSP-HK (sold separately) **Non-amplified models only
APPLICATIONS
See next page
MetraOnline.com may be used
to assist with dash assembly
instructions. Simply enter
your Year, Make, Model
vehicle into the vehicle fit
guide and look for the Dash
Kit Installation Instructions.
Product Info
www.MetraOnline.com
ATTENTION: With the key out of the
ignition, disconnect the negative battery
terminal before installing this product. Ensure
that all installation connections, especially the
air bag indicator lights, are plugged in before
reconnecting the battery or cycling the ignition
to test this product.
NOTE: Refer also to the instructions included
with the aftermarket radio.
2
CONNECTIONSAPPLICATIONS
From the 16-pin harness with stripped leads to the aftermarket radio:
Connect the Red wire to the accessory wire.
If the vehicle comes equipped with a factory amplifier, connect the Blue/White wire to the
amp turn-on wire.
Connect the Gray wire to the right front positive speaker output.
Connect the Gray/Black wire to the right front negative speaker output.
Connect the White wire to the left front positive speaker output.
Connect the White/Black wire to the left front negative speaker output.
Connect the Green/Purple wire to the reverse wire, and also to the Blue/White wire from
the AXCSD-6V.
The following (1) wire is only for a multimedia/navigation radio that requires this wire.
Connect the Light Green wire to the parking brake wire.
Tape off and disregard the following (8) wires, they will not be used in this application:
Blue/Pink, Blue/White*, Brown, Green, Green/Black, Orange/White, Purple, Purple/Black
* Non-amplified models only
From the AXDIS-HK3 harness to the aftermarket radio:
Connect the Black wire, the Black wire labeled “Camera Ground”, and also the Black wire
from the AXCSD-6V, to the ground wire.
Connect the Red wire labeled “Camera Power 6V”, to the Blue/Red wire from the AXCSD-6V
.
Connect the Yellow wire to the battery wire.
Connect the Blue wire to the power antenna wire.
If the aftermarket radio has an illumination wire, connect the Orange wire to it.
Hyundai
Accent (7” Touchscreen) ......................................................................................................2018-2019
Elantra (7” Touchscreen) .....................................................................................................2019-2020
Elantra (7” Touchscreen Non-NAV) ..................................................................................... 2017-2018
Elantra GT ....................................................................................................................................... 2018
Ioniq (Non-NAV) ................................................................................................................... 2018-2019
Kona .......................................................................................................................................2018-2022
Santa Fe/Sport ............................................................................................................................... 2019
Sonata (w/NAV) ............................................................................................................................. 2018
Sonata (7” Touchscreen Non-NAV) ...............................................................................................2017
Veloster (Non-NAV) ........................................................................................................................2017
Kia
Forte ................................................................................................................................................ 2019
Forte / Forte 5 (7” Touchscreen Non-NAV) ......................................................................... 2017-2018
Optima (Non-NAV Manual Climate Screen) ................................................................................ 2019
Rio / Rio 5 (7” Touchscreen) ......................................................................................................... 2018
Sedona (7” Touchscreen Non-NAV) .................................................................................... 2017-2018
Seltos .............................................................................................................................................. 2021
Sorento (7” Touchscreen Non-NAV) ............................................................................................ 2019
Continued on the next page


Produkt Specifikationer

Mærke: Axxess
Kategori: Ikke kategoriseret
Model: AXDIS-HK3

Har du brug for hjælp?

Hvis du har brug for hjælp til Axxess AXDIS-HK3 stil et spørgsmål nedenfor, og andre brugere vil svare dig


Ikke kategoriseret Axxess Manualer

Axxess

Axxess AXFD-USB3 Manual

2 Oktober 2025
Axxess

Axxess AXTO-VW1 Manual

2 Oktober 2025
Axxess

Axxess AX-PS Manual

2 Oktober 2025
Axxess

Axxess AXTC-HN1 Manual

2 Oktober 2025
Axxess

Axxess AXDIS-PO52 Manual

2 Oktober 2025
Axxess

Axxess AXSUB-GM1 Manual

1 Oktober 2025
Axxess

Axxess AXDI-GM4 Manual

1 Oktober 2025
Axxess

Axxess AXTC-FD3 Manual

1 Oktober 2025
Axxess

Axxess AXDSPH-MI1 Manual

1 Oktober 2025
Axxess

Axxess ANC-CHH2 Manual

1 Oktober 2025

Ikke kategoriseret Manualer

Nyeste Ikke kategoriseret Manualer