Brightwell DrainWatch DWB/U9 Manual

Brightwell Pumpe DrainWatch DWB/U9

Læs gratis den danske manual til Brightwell DrainWatch DWB/U9 (2 sider) i kategorien Pumpe. Denne vejledning er vurderet som hjælpsom af 3 personer og har en gennemsnitlig bedømmelse på 4.3 stjerner ud af 2 anmeldelser. Har du et spørgsmål om Brightwell DrainWatch DWB/U9, eller vil du spørge andre brugere om produktet?

Side 1/2
M00018-EN-17/12/2019-V2.0
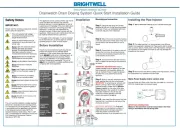
Drainwatch Drain Dosing System Quick Start Installation Guide
Safety Notes
IMPORTANT:
Please read the following precautions carefully
before using this equipment.
This appliance can be used by children age from 8
years and above and persons with reduced
physical, sensory or mental capabilities or lack of
experience and knowledge if they have been given
supervision or instruction concerning use of the
appliance in a safe way and understand the
hazards involved. Children shall not play with the
appliance. Cleaning and user maintenance shall not
be made by children without supervision.
If the supply cord is damaged, it must be replaced
by the manufacturer, its service agent or similarly
qualified persons in order to avoid hazard.
Before Installation
Ensure you have checked all parts required are
present and inspect for any damage before
installation. In the unlikely event your items are
faulty, DO NOT install faulty or damaged parts as
this unsafe and will void any warranty. Please
return to your distributor in the original delivery
condition including any packaging. This unit is
ONLY to be installed by a suitably qualified person
complying with local regulations.
Peristaltic tubing
5mm Silicone
inc:Compression
fit connectors
× 1 Silicone Grease
5ml (for peristaltic
tubing)
Ceramic Weight
and foot filter
× 1
Pipe Injector
× 1
Polyethylene
Tubing
3000mm × 2
Fixings Pack:
Screws × 4 Wall
plugs ×4
Installation
Mounting and connection
Step 1: Using the wall plugs and screws
specified for this unit, fix the mounting bracket
to the wall. There is an embedded spirit level
to aid with this part of the installation.
Step 2: Mount the unit to the wall by hooking
it onto the wall bracket. Press down firmly and
you will hear a click sound when the unit is
secure.
Step 3: Ensure there is no power to the unit,
remove the front cover by turning removing
the screw anti-clockwise and pulling the front
cover towards you as shown.
Step 4: Insert one end of the tube ensuring
that it is slotted into the body of the enclosure
as shown.
IMPORTANT INFORMATION: Silicone
grease provided must be applied to the tube
and the pump & rotor assembly before the
tube is inserted. Failure to apply the grease
will affect the pump performance during
operation.
Step 5: Now by manually rotating the pump
head, feed the tube into the unit as shown.
IMPORTANT to aid prolonging tube life and
efficent running of both mains and battery
powered models. Please use the Silicone
Grease (supplied) on the outer of the tube.
Spread liberally to the outside of the tube to
help ease installation, this will also aid
continuous smooth operation and help
prevent any potential snagging.
Step 6: Now insert the other end of the tube
ensuring that it is slotted into the body of the
enclosure as shown.
IMPORTANT INFORMATION: Brightwell
Dispensers Ltd (manufacturer) accepts no
responsibility and/or damages caused to
either the product or premises if the
installation process is not complied with in full.
Installing the Pipe Injector
Step 1: Drill a 14mm hole in the top of your intended waste pipe.
Step 2: For added security it is recommended to use Silicone
Sealant (not-supplied) in-between the Pipe Injector and the drilled
hole (as shown above). Slowly wind in the Pipe Injector until tight, it is
not necessary to over tighten with tools as this may damage the
threading on the injector.
Step 3: Now connect the delivery tubing to the Pipe Injector, turning
the compression nut clockwise until hand tight.
Mains Power Supply (mains version only)
Connect Brown and Blue cores of the two core cable to a maximum
240V AC single phase mains power supply.
IMPORTANT INFORMATION:
Means for disconnection must be incorporated in the fixed
wiring in accordance with the wiring rules.
This unit contains high voltage
circuits that may expose you to the
danger of electric shock.
Means for disconnection must be
incorporated in accordance with the
wiring rules.
Do not open the enclosure without
isolating the signal and supply
sources. Ensure that these sources
have been isolated for at least 5
minutes before entering the enclosure.
Do not power the unit outside of the
values stated on the rating label.
Do not use damaged or frayed cables.
Do not dismantle or modify this
equipment.
Never insert fingers into mechanisms
without turning the power supply off
first.
Do not mount the unit to unstable,
irregular or non-vertical surfaces.
Do not place heavy objects on top of the
unit.
Do not attempt to place items (such as
screwdrivers) into the moving parts of
the pump head.
Always ensure that care is taken when
handling chemicals.
Do not discard of the manual, this
must be retained.
This unit must be installed by suitably qualified
personnel in accordance with local regulations,
or in the absence of local regulations, installed
in accordance with the applicable requirements
in the National Electrical Code, NFPA 70,
Canadian Electrical Code (CEC), Part 1, CSA
C22.1, and Standard for Ventilation Control and
Fire Protection of Commercial Cooking
Operations, NFPA 96.
M00018-EN-17/12/2019-V2.0
Connecting Chemicals
Programing Modes
Adjusting Date, Time and Password
Step 1: Ensure there is no power to the
unit; connect the suction tube from the
chemical container to (A). Now connect
the delivery tube from (B) to the drain or
injection point.
Step 1: Set your language by
pressing the up or down buttons,
and then press the right arrow to
confirm your selection (a). Now
confirm if you would like to set a PIN
(b). If ‘N’ go straight to Step 3.
Step 1: (a) Enter the menu
system by holding down the right
button. (b) Once in the menu
press and hold the left button for 2
seconds.
Flowrate: 100ml/min (3.38fl.oz/min)
Note: Flowrate measured with water and
a suction length of 2 metres.
Step 2: If you selected ‘Y=Yes’
set a unique 4 digit PIN to enable
unwanted access (a). Now confirm
the pin entered with Y/N? (If ‘N=No’
is selected you will need to repeat
steps 1&2).
Step 3: Set the day of reference i.e
Wed=Wednesday and the current
time.
Step 4: (a) Input your first dosing
Event by choosing Y=ON, N=OFF
using the up and down arrows
(please note N will return you to the
main menu). Entering the day
MTWTSS notice that a dash (-) = no
event programed for that day i.e M-
W-F-S means no program for
Tues,Thurs,Sat. Now set the time for
dosing to commence and its duration
i.e 01:30=1min 30secs and press the
right button to confirm. The event is
now stored (b). Press the right arrow
again to repeat this process and
store another event.
TIP: You can check all your
entered events by selecting the
event number (this will begin to
flash), you can now scroll and
check through all events entered.
Remember that the ‘Y’ or ‘N’ next
to the event number indicates ON
or OFF for each event.
Priming the pumps: Hold down
the up /\ arrow until the chemical
reaches the injection point.
Step 2: (a) Adjust the access
code by select Y or N to keep
current code (b) Press right to
access the time and date settings.
Adjust accordingly and press right
to get back to the main menu.
DrainWatch Battery
Step 1: Remove the 4 screws on the enclosure and remove the lid by
pulling it towards you. Now remove the battery holder to gain access to the
batteries. Note that the holder is attached to the main unit so only pull out far
enough to gain access to the batteries.
Useful Information
The Drainwatch pump has a maximum run time of 3 minutes per event. The pump
cannot be programed to run longer than this per event.
Warranty
Your product comes as standard with a 1 year warranty from the date of
manufacture, against manufacturing fault or defects and mechanical or electrical
breakdown. Please visit our website for full terms and conditions.
www.brightwell.co.uk
Step 2: Replace the p2-x4 D Cell batteries with a high quality alkaline batteries
for optimum performance and longevity. Now replace the battery holder in its
enclosure and re-secure the lid.
WEEE Directive
Please remember to respect the local regulations:
hand in the non-working electrical equipment’s to an
appropriate waste disposal centre. The packaging
material is recyclable. Dispose of the packaging in
an environmentally friendly manner and make it
available for the recyclable material collection-service.
Event 01
Stored
E:01 Y M-W-F-S
T:02:30 D:01:30
E:01 Y M-W-F-S
T:02:30 D:1:30
E:02 N MT-T--S
T:09:30 D:01:30
A
B
a)
b)
a)
b)
a)
b)
a)
b)
a)
b)


Produkt Specifikationer

Mærke: Brightwell
Kategori: Pumpe
Model: DrainWatch DWB/U9

Har du brug for hjælp?

Hvis du har brug for hjælp til Brightwell DrainWatch DWB/U9 stil et spørgsmål nedenfor, og andre brugere vil svare dig


Pumpe Brightwell Manualer
Pumpe Manualer

Nyeste Pumpe Manualer

Flex

Flex CI 11 18.0 Manual

17 September 2025
Liberty Pumps

Liberty Pumps D3684 Manual

16 September 2025
Liberty Pumps

Liberty Pumps X8 Manual

16 September 2025
Guede

Guede GTT 900.1 Manual

15 September 2025
Guede

Guede GMP 7.21 Manual

15 September 2025
Ubbink

Ubbink Xtra Manual

12 September 2025
Hilti

Hilti NUN 10K-22 Manual

12 September 2025
T.I.P.

T.I.P. Dio 85/10 Flex Manual

9 September 2025
T.I.P.

T.I.P. GP 6000 INOX Manual

8 September 2025