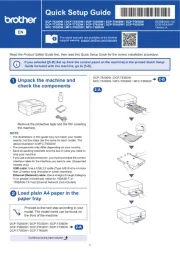
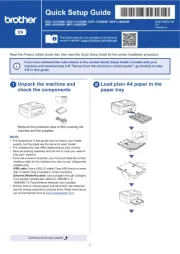
Brother MFC-L8390CDW Manual
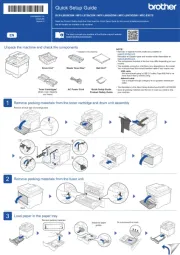
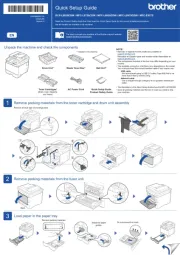
Læs gratis den danske manual til Brother MFC-L8390CDW (2 sider) i kategorien Printer. Denne vejledning er vurderet som hjælpsom af 23 personer og har en gennemsnitlig bedømmelse på 5.0 stjerner ud af 12 anmeldelser.
Har du et spørgsmål om Brother MFC-L8390CDW, eller vil du spørge andre brugere om produktet?

Produkt Specifikationer
| Mærke: | Brother |
| Kategori: | Printer |
| Model: | MFC-L8390CDW |
| Vekselstrømsindgangsspænding: | 220 - 240 V |
| Vekselstrømsindgangsfrekvens: | 50/60 Hz |
| Bredde: | 410 mm |
| Dybde: | 462 mm |
| Højde: | 401 mm |
| Vægt: | 17600 g |
| Produktfarve: | Hvid |
| Kontroltype: | Berøring |
| Indbygget skærm: | Ja |
| Pakkevægt: | 25200 g |
| Pakkedybde: | 583 mm |
| Pakkebredde: | 497 mm |
| Pakkehøjde: | 533 mm |
| Skærm diagonal: | 3.5 " |
| Wi-Fi: | Ja |
| USB-port: | Ja |
| Antal USB 2.0-porte: | 1 |
| Ethernet LAN: | Ja |
| Wi-Fi-standarder: | 802.11a, 802.11b, 802.11g, Wi-Fi 4 (802.11n) |
| Udskrivningsteknologi: | LED |
| Maksimal opløsning: | 600 x 2400 dpi |
| Udskrivningshastighed (sort, normal kvalitet, A4/amerikansk papirformat): | 30 sider pr. minut |
| Udskrivning: | Farveudskrivning |
| Medietyper til papirbakke: | Bond paper, Envelopes, Labels, Plain paper, Recycled paper, Thick paper, Thin paper |
| Maksimal ISO A-serie papirstørrelse: | A4 |
| ISO A-serie, størrelser (A0...A9): | A4, A5, A6 |
| ISO B-serie, størrelser (B0...B9): | B5 |
| Ikke-ISO udskriftsmedier størrelse: | Folio (media size), Legal (media size), Letter (media size) |
| Kuverter størrelser: | C5, Com-10, DL, Monarch |
| Medievægt på papirbakke: | 60 - 163 g/m² |
| Samlet antal inputbakker: | 1 |
| Samlet inputkapacitet: | 250 ark |
| Samlet outputkapacitet: | 150 ark |
| Scanner type: | Flatbed & ADF scanner |
| Scanningsteknologi: | D-CIS |
| Optisk scanningsopløsning: | 600 x 600 dpi |
| Input farvedybde: | 48 Bit |
| Output farvedybde: | 24 Bit |
| Scanning: | Farvescanning |
| Kopiering: | Farvekopiering |
| Maksimal kopiopløsning: | 600 x 600 dpi |
| Maksimalt antal kopier: | 999 Kopier |
| Ethernet LAN-datahastigheder: | 10, 100 Mbit/s |
| Sikkerhedsalgoritmer: | WPA2-AES, 64-bit WEP, WPA2-PSK, 128-bit WEP, WPA2-TKIP, WPA3-SAE, WPA-AES, WPA-PSK, WPA-TKIP |
| Mobile udskrivningsteknologier: | Apple AirPrint, Mopria Print Service |
| Skærm: | LCD |
| Markedspositionering: | Hjemmekontor |
| Direkte udskrivning: | Ja |
| Strømforbrug (slukket): | 0.04 W |
| Strømforbrug (kopiering): | 620 W |
| Maksimal driftscyklus: | - sider pr. måned |
| Udskrivning af farver: | Black, Cyan, Magenta, Yellow |
| Fax: | Farvefax |
| Intern hukommelse: | 512 MB |
| Understøttede billedformater: | JPG |
| Near Field Communication (NFC): | Ja |
| Modemhastighed: | 33.6 Kbit/s |
| Fax-hukommelse: | 500 Sider |
| Strømforbrug (maks.): | 960 W |
| Kabelteknologi: | 10/100/1000Base-T(X) |
| Duplex udskrivning: | Ja |
| Duplex udskrivningstilstand: | Automatisk |
| Brugerdefineret mediebredde: | 76.2 - 215.9 mm |
| Brugerdefineret medielængde: | 127 - 355.6 mm |
| Duplex-funktioner: | Udskriv |
| Wi-Fi Direct: | Ja |
| Hurtigopkald: | Ja |
| Strømforbrug (udskrivning): | 620 W |
| Understøttede Windows-operativsystemer: | Windows 10, Windows 11 |
| Udskrivningshastighed (farve, normal kvalitet, A4/amerikansk papirformat): | 30 sider pr. minut |
| Farveskærm: | Ja |
| Tid til første side (sort, normal): | 12.5 sek./side |
| Ændre størrelse på kopimaskine: | 25 - 400 % |
| Kopieringshastighed (sort, normal kvalitet, A4): | 30 Kopier pr minut |
| Kopihastighed (normal kvalitet, farve, A4): | 30 Kopier pr minut |
| Duplekskopiering: | Ja |
| Understøttede dokumentformater: | |
| Dupleksfax: | Ja |
| Sidebeskrivelsessprog: | BR-Script 3, PCL 5c, PCL 5e, PCL 6, PDF 1.7 |
| Anbefalet arbejdscyklus: | 300 - 4000 sider pr. måned |
| Strømforbrug (dvale): | 10 W |
| Sikker udskrivning: | Ja |
| Universal-magasin kapacitet: | 30 ark |
| Multifunktionsbakke: | Ja |
| Energy Star-typisk elektricitetsforbrug (TEC): | 0.48 kWh/uge |
| Understøttede operativsystemer til servere: | Windows Server 2016, Windows Server 2012, Windows Server 2019, Windows Server 2022, Windows Server 2012 R2 |
| Understøttede netværksprotokoller (IPv4): | ARP, RARP, BOOTP, DHCP, APIPA(Auto IP), WINS/ NetBIOS name resolution, DNS Resolver, mDNS, LLMNR responder, LPR/LPD, Custom Raw Port/ Port9100, POP3, SMTP Client, IPP/IPPS, FTP Client and Server, CIFS Client, TELNET Server, SNMPv1/v2c/ v3, HTTP/HTTPS server, TFTP client and server, ICMP, Web Services (Print/Scan), SNTP Client, LDAP, IMAP4, Syslog |
| Understøttede netværksprotokoller (IPv6): | NDP, RA, DNS resolver, mDNS, LLMNR responder, LPR/LPD, Custom Raw Port/Port9100, IPP/IPPS, POP3, SMTP Client, FTP Client and Server, CIFS Client, TELNET Server, SNMPv1/v2c/v3, HTTP/HTTPS server, TFTP client and server, ICMPv6, SNTP Client, LDAP, Web Services (Print/Scan), IMAP4, Syslog |
| Patron(er) inkluderet: | Ja |
| Scan til: | Cloud, E-mail Server, FTP, File, Network folder, OCR, USB |
| N-i-1 kopifunktion: | Ja |
| N-i-1 kopifunktion (N =): | 2, 4 |
| Automatisk dokumentføder (ADF) indgangskapacitet: | 50 ark |
| Fejlkorrektionstilstand (ECM): | Ja |
| Strømforbrug (klar): | 70 W |
| JIS B-seriens størrelser (B0…B9): | B5, B6 |
| Automatisk reduktion: | Ja |
| Automatisk dokumentføder (ADF): | Ja |
Har du brug for hjælp?
Hvis du har brug for hjælp til Brother MFC-L8390CDW stil et spørgsmål nedenfor, og andre brugere vil svare dig
Printer Brother Manualer
Printer Manualer
- Roland
- Seiko
- Posiflex
- Approx
- Olympus
- TSC
- JVC
- Nisca
- Unitech
- LG
- Edikio
- StarTech.com
- Epson
- Citizen
- Lexmark
Nyeste Printer Manualer

