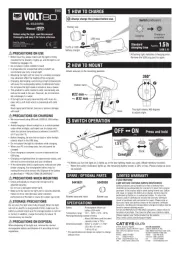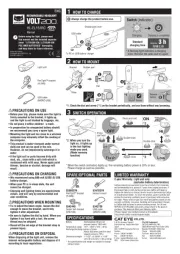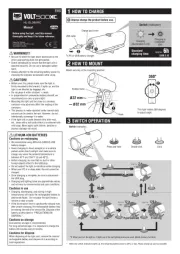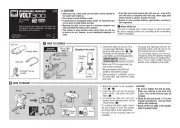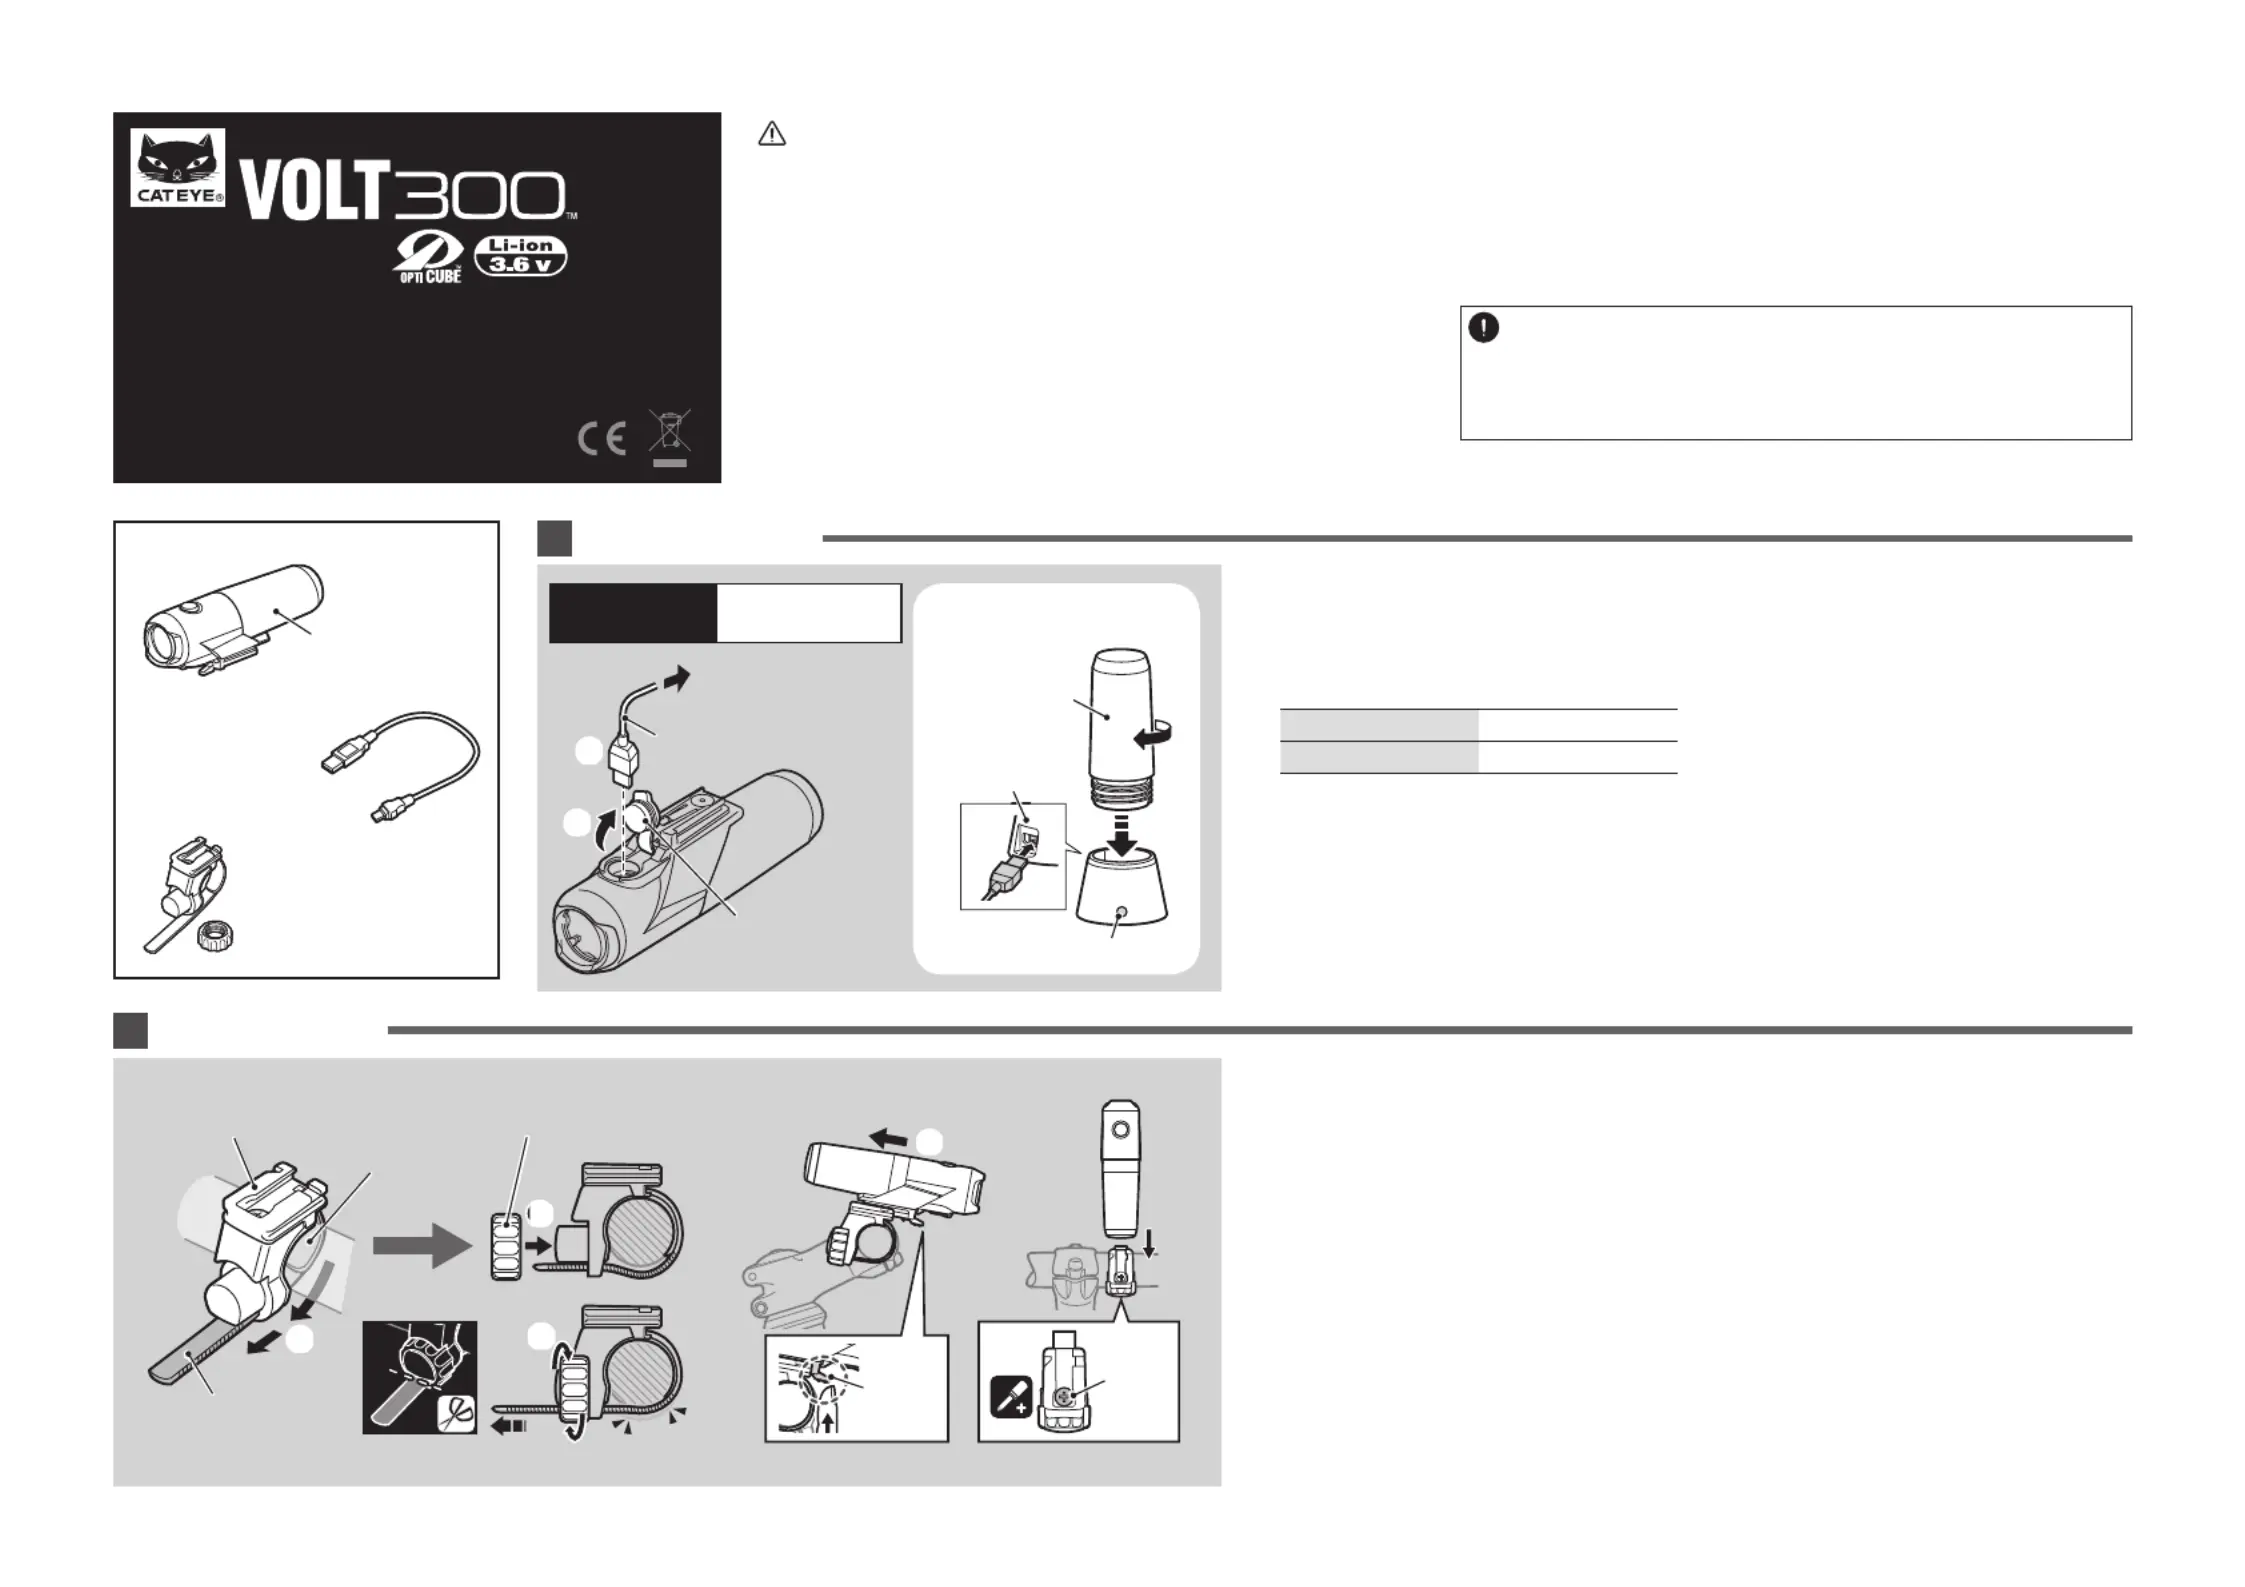
1. Connect the light unit to your PC or
a commercial USB battery charger
using the USB cable. (Fig 1
The switch or the indicator on the
cradle lights up, and charging starts.
Indicator light: On Charging
* When your PC is in sleep state, the
* We recommend using 500+mA
(USB2.0) USB battery charger.
2. After charging is completed, remove
the USB cable, and install the charge
* Charging and lighting times are ap-
proximate values, and will vary by en-
vironmental and user conditions.
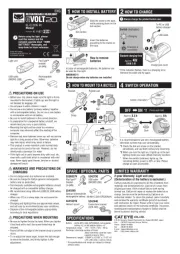
* The cartridge battery can be fast-
charged by using the optional charging
cradle (about 3 hours of charging time).
Use a 1A or higher USB charging
adapter when charging by the cradle.
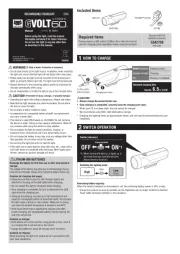
Before using the light, please read this manual and
the attached “Lithium-ion Batteries” thoroughly, and
keep them for future reference.
• Before your trip, please make sure the light is fi rmly mounted to
the bracket and it lights up.
• Do not place it within children’s reach.
• In preparation for unexpected battery shutoff, we recommend you
carry a spare cartridge battery and light.
• Mounting the light unit too close to a wireless computer may
adversely affect the reading of the computer.
• This product is water-resistant under normal daily use and can
be used in the rain. However, do not intentionally submerge it in
• If the light unit or parts become dirty with mud, etc., clean with a
soft cloth which is moistened with mild soap. Never apply paint
thinner, benzine or alcohol; damage will result.
• Dispose of used cartridge batteries appropriately according to
This unit is shipped with a small charge to check the light.
Be sure to charge it before use, according to the instructions
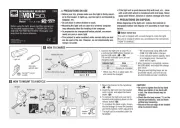
1. Mount the bracket to the handlebar.
2. Insert the light unit into the bracket
until it clicks, and adjust the beam
3. To remove the light unit, pull out it
forward while pressing down on the
* To re-adjust the beam angle, loosen
the dial enough to move the bracket,
and fi rmly tighten it after adjustment.
* The light can be mounted under the
• Be sure to tighten the dial by hand.
When you tighten it too hard with
a tool, the screw thread may be
• Check the dial and screw (*1) on the
bracket periodically, and use them
• Round off the cut edge of the bracket
Copyright© 2013 CATEYE Co., Ltd.