Cotech 50053 Manual


Læs gratis den danske manual til Cotech 50053 (6 sider) i kategorien Ikke kategoriseret. Denne vejledning er vurderet som hjælpsom af 20 personer og har en gennemsnitlig bedømmelse på 5.0 stjerner ud af 10.5 anmeldelser. Har du et spørgsmål om Cotech 50053, eller vil du spørge andre brugere om produktet?

Side 1/6
GREAT BRITAIN • CUSTOMER SERVICE tel. 020 8247 9300 e-mail customerservice@clasohlson.co.uk internet www.clasohlson.co.uk
Ver. 20151125
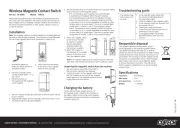
Wireless Magnetic Contact Switch
Art.no 36-6048 Model 50053
Please read theentire instruction manual before using theproduct and
then save it for future reference. We reserve theright for any errors in
text or images and any necessary changes made to technicaldata. In
theevent of technical problems or other queries, please contact our
Customer Services.
Installation
Note: Themagnetic switch is primarily intended for controlling lights but
can also be used for other purposes. Thisinstruction manual describes
theuse of themagnetic switch when connected in alight circuit.
1. Activate thebattery by
pulling theplastic tab out of
thebattery holder.
2. Check that thetimer setting
on theback of themagnetic
switch is set to zero ( ).0
3. Place themagnetic switch
and thereceiver within 1m of
eachother.
4. Place thesurface of
themagnet and themagnetic
switch together.
8. Set theactivation time of thepaired receiver by turning thesetting
knob on theback of themagnetic switch.
- : If, for example adoor is opened, theconnected light 0
is switched on immediately. Whenthedoor is closed,
theconnected light is switched off immediately. Nodelay.
- : If, for example adoor is opened, thelight is switched 2m
on and stays on for 2 minutes regardless of whether thedoor
remains open or is closedagain. If the door is opened again
during these 2 minutes, anew 2-minute period is begun.
- : If, for example adoor is opened, thelight is switched 4m
on and stays on for 4 minutes regardless of whether thedoor
remains open or is closedagain. If the door is opened again
during these 4 minutes, anew 4-minute period is begun.
Changing the battery
Pull thebattery holder straight down out of
themagnetic switch. Observe themarkings on
thebattery holder to ensure thecorrect polarity.
Thepositive terminal of thebattery (+) should be
upwards, facingyou.
9. Attach themagnetic switch
to theframe of thedoor
or window in question.
Useanappropriate
fastening method for
thesurface in question.
10. Attach themagnet to
thedoor leaf or thewindow
sash no further than 5mm
from themagnetic switch.
Note:Themagnetic switch and themagnet must be in line with
eachother. Usetheline and thearrows on theunits as aguide.
Unpairing the magnetic switch from the receiver
1. Set your receiver to learning mode (refer to
theinstruction manual of your receiver).
2. Hold in thebutton on themagnetic switch until
theLED indicator on thefront of themagnetic
switch goesout. Themagnetic switch is now no
longer paired with thereceiver.
Troubleshooting guide
Thewireless mag-
netic switch is not
working.
Is themagnetic switch paired with
thereceiver as describedabove?
Trypairing themagain.
Check thebattery in themagnetic switch.
Is themagnetic switch too far away from
thereceiver (25m)?
Check that thelight is properly
connected to thereceiver and that it is
switched on and not faulty.
Try plugging thelight into another
electrical outlet to make sure that
itworks.
Responsible disposal
5. Set your receiver to learning mode (refer to theinstruction manual
of your receiver).
6. Separate themagnet and themagnetic switch (morethan5mm).
7. Thedevices will now be paired together.
This symbol indicates that this product should
notbe disposed of with general householdwaste.
Thisapplies throughout theentire EU. Inorder to
prevent any harm to theenvironment or health hazards
caused by incorrect waste disposal, theproduct must
be handed in for recycling so that thematerial can be
disposed of in aresponsible manner. Whenrecycling
your product, take it to your local collection facility
or contact theplace of purchase. Theywill ensure
that theproduct is disposed of in anenvironmentally
soundmanner.
Specifications
Frequency 433.92 MHz
Maxrange 25m
Activationtime 0–20min
Battery 1×CR2032
SVERIGE • KUNDTJÄNST tel: 0247/445 00 fax: 0247/445 09 e-post: kundservice@clasohlson.se internet: www.clasohlson.se
Trådlös magnetkontakt
Art.nr 36-6048 Modell 50053
Läs igenom hela bruksanvisningen före användning och spara den
sedan för framtidabruk. Vireserverar oss förev. text- och bildfel samt
ändringar av tekniskadata. Vidtekniska problem eller andra frågor,
kontakta vår kundtjänst.
Installation
Obs! Magnetkontakten är iförsta hand avsedd för att kontrollera
belysning men kan också användas till andra produkter. Iden här
bruksanvisningen beskrivs magnetkontaktakten med ansluten belysning.
1. Aktivera batteriet genom
att dra ut plastiken från
batterihållaren.
2. Kontrollera att
timerinställningen på
magnetkontaktens baksida står
mot noll ( ).0
3. Placera magnetkontakt och
mottagare max 1 m från
varandra.
4. Placera magnet och
magnetkontakt mot varandra.
8. Ställ in hur lång tid ansluten mottagare ska vara påslagen genom
att vrida inställningsvredet på magnetkontaktens baksida.
- : Omt.ex. dörren öppnas tänds ansluten belysning. 0
Närdörren stängs släcks ansluten belysning. Ingenfördröjning
- : Omt.ex. dörren öppnas tänds ansluten belysning 2m
och lyser i2 min oavsett om dörren är öppen eller stängd.
Omdörren öppnas igen under dessa 2 min påbörjas en ny
2min-period.
- : Omt.ex. dörren öppnas tänds ansluten belysning och 4m
lyser i4 min oavsett om dörren är öppen eller stängd,o.s.v.
Omdörren öppnas igen under dessa 4 min påbörjas en ny
4min-period.
Batteribyte
Dra batterihållaren rakt ner från
magnetkontakten. Semärkningen på
batterihållaren så att du vänder det nya batteriets
plussida (+)rätt. Batteriets plussida ska vara
vänd motdig.
9. Montera magnet kontakten
på aktuell dörr- eller
fönsterkarm. Använd
för underlaget lämplig
fästmetod.
10. Montera magneten
på dörrbladet eller
fönsterbågen på max
5 mm avstånd från
magnetkontakten.
Obs! Magnetkontakten och magneten måste sitta helt ilinje med
varandra. Använd linjen och pilarna på enheterna som riktmärke.
Koppla bort magnetkontakten från mottagaren
1. Sätt din mottagare iinlärningsläge
(sebruksanvisningen till din mottagare).
2. Håll in knappen på magnetkontakten tills LED-
indikatorn på magnetkontaktens framsida
släcks. Magnetkontakten är nu bortkopplad
från mottagaren.
Felsökningsschema
Den trådlösa
magnet kontakten
fungerarinte.
Är magnetkontakten ansluten till
mottagaren enligt beskrivningenovan?
Provaatt göra om anslutningen.
Kontrollera magnetkontaktens batteri.
Är magnetkontakten placerad för långt
från mottagaren, max 25m?
Kontrollera att ansluten belysning är
ordentligt ansluten till mottagaren, att
den är påslagen och felfri.
Provaatt ansluta belysningen till
ettannat vägguttag för att försäkra dig
om att den fungerar.
Avfallshantering
5. Sätt din mottagare iinlärningsläge (se bruksanvisningen till
dinmottagare).
6. Flytta isär magnet och magnetkontakt (mer än 5 mm).
7. Enheterna har nu kopplats samman.
Denna symbol innebär att produkten inte får kastas
tillsammans med annat hushållsavfall. Dettagäller inom
hela EU. Föratt förebygga eventuell skada på miljö
och hälsa, orsakad av felaktig avfallshantering,ska
produkten lämnas till återvinning så att materialet
kan tas omhand på ettansvarsfulltsätt. Närdu
lämnar produkten till återvinning, använd dig av de
returhanteringssystem som finns där du befinner dig
eller kontakta inköpsstället. Dekan se till att produkten
tas om hand på ettför miljön tillfredställandesätt.
Specifikationer
Frekvens 433,92 MHz
Max räckvidd 25m
Tidsinställning 0–20min
Batteri 1×CR2032


Produkt Specifikationer

Mærke: Cotech
Kategori: Ikke kategoriseret
Model: 50053

Har du brug for hjælp?

Hvis du har brug for hjælp til Cotech 50053 stil et spørgsmål nedenfor, og andre brugere vil svare dig


Ikke kategoriseret Cotech Manualer

Cotech

Cotech HT7715 Manual

18 September 2024
Cotech

Cotech K-CPL-LS4W-IR-S3 Manual

16 September 2024
Cotech

Cotech J1x-JF2-210/20 Manual

14 September 2024
Cotech

Cotech TD9511-3 Manual

12 September 2024
Cotech

Cotech S1J-AJ8-10 Manual

31 August 2024
Cotech

Cotech J5218D Manual

27 August 2024
Cotech

Cotech 50053 Manual

27 August 2024
Cotech

Cotech 51097X23 Manual

27 August 2024
Cotech

Cotech 36-6286 Manual

27 August 2024

Ikke kategoriseret Manualer

Nyeste Ikke kategoriseret Manualer