Cotech SP-03LS3M-RGBPMD-01B Manual

Cotech Ikke kategoriseret SP-03LS3M-RGBPMD-01B

Læs gratis den danske manual til Cotech SP-03LS3M-RGBPMD-01B (4 sider) i kategorien Ikke kategoriseret. Denne vejledning er vurderet som hjælpsom af 24 personer og har en gennemsnitlig bedømmelse på 4.4 stjerner ud af 12.5 anmeldelser. Har du et spørgsmål om Cotech SP-03LS3M-RGBPMD-01B, eller vil du spørge andre brugere om produktet?

Side 1/4
UNITED KINGDOM www.clasohlson.co.uk
Auto
FlashC3
CS
IC Set
W/WW
JumpC7
MetersC16
7
6
10
8
9
4
5
32
1
Ver. 20220613
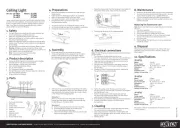
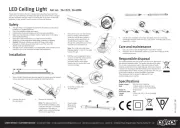
LED Strip Light with Light Effects
Art.no 36-8068 Model SP-03LS3M-RGBPMD-01B
Read theentire instruction manual before use and save it for future reference.
We apologise for any text and picture errors and any changes of technical data.
If you have any questions concerning technical problems please contact our
Customer Services.
Safety
Warning:
Neither theproduct nor its mains adapter may be dismantled or modified in any way.
Never use theproduct or themains adapter if it is in any way damaged or
malfunctioning. Unplug theproduct immediately if it is damaged.
Do not use theproduct in explosive atmospheres or in thepresence of
flammable liquids or gases.
The product must only be connected to theincluded mains adapter.
Never connect several or other types of devices to themains adapter.
The product must not be installed on awet or electrically conductive surface.
Make sure that thecables are not damaged whilst theproduct is being installed.
Always unplug themains adapter from thewall socket when theproduct is
not in use.
Do not carry theproduct using themains lead and do not use it for other
unsuitable purposes.
Never let children play with theproduct.
The product may be used by persons with reduced physical, sensory or
mental capabilities or persons with alack of experience or knowledge which
could jeopardise their safety, provided they have been instructed in thesafe
operation of theproduct and understand thehazards involved.
Important:
The LEDs cannot be replaced. When theLEDs have reached theend of their
service life, theentire product must be discarded.
This product is intended only for private use.
Risk of eye damage. Do not look directly at thelight source.
The product is not suitable for illuminating aroom.
The product is intended for indoor use only.
Class II mains adapter.
Class III strip light
Installation
Information
The LED strip light can be mounted using thedouble-sided adhesive tape.
For best adhesion, ensure that thesurface is clean, dry and free of grease.
If necessary, thelength of theLED strip can be adjusted by cutting it at one of
themarkings (every 10cm along thelength of thestrip). If thestrip light is Note:
shortened so that it has fewer than 48 LEDs remaining, theIC Set function will
not work.
1. Strip light: Remove theprotective film from thetape on theback of thelight
strip and attach it to aclean, grease-free surface. The strip light may also be
screwed on with plastic clips.
2. Connectors. Connect thestrip light and thecontrol box together.
Note: Make sure thestrip light is connected in theright way. Otherwise
thestrip light will not shine.
3. IR Receiver. Make sure there are no obstacles between theIR receiver Note:
on theLED control unit and theremote control.
4. Connect theconnecting cable to theLED control unit.
5. Plug themains adapter into asuitable wall socket.
Remote control
Remove theplastic battery tab.
10. Select aspecific direction for thedifferent colours:
: The strip light shines fully and then gradually turns off theLED lights
from themiddle of thestrip and out to thesides.
: The LED lights turn on from thesides and move towards themiddle.
: A group of 21 LED lights that move from one side to theother.
: 12 LED lights that move from one side to theother.
: The LED strip light lights up from one side to theother until
thewhole strip light is lit. The lights go off and thenext cycle starts.
: A group of 21 LED lights turn on and move from one side to
theother where thelights are gradually dimmed and then turn off.
Care and maintenance
Unplug themains lead from thewall socket before cleaning.
The product should be cleaned using adry cloth or vacuum cleaner.
Responsible disposal
This symbol indicates that theproduct should not be disposed of
with general household waste. This applies throughout theentire EU.
In order to prevent any harm to theenvironment or health hazards
caused by incorrect waste disposal, theproduct must be handed in
for recycling so that thematerial can be disposed of in aresponsible
manner. When recycling your product, take it to your local collection
facility or contact theplace of purchase. They will ensure that
theproduct is disposed of in anenvironmentally sound manner.
Specifications
Mains adapter
Power supply 230 V AC, 50 Hz
Output 12 V, 2 A DC
Light strip
Dimensions 3000×10 mm
Light source 90×LED
Rated voltage 12 V DC
Rated power 19 W
Remote control
Range Max 5 m
Battery 1×CR2025 (included)
6. Choose between single or multiple colours:
CS: 1 colour
C3: 3 colours (R,G, B)
C7: 7 colours
C16: 16 colours
7. Press [ IC Set ] and use [ ] and [ ] to
gradually turn off or turn on 6 LED lights at
atime (You can never have fewer than 48
active LEDs). Select acolour with thecolour
selection buttons (6) and adjust thebrightness
with [ ] and [ ].
8. : Change from warm white to cool white W / WW
: On/off
9. Auto: Switches between all colours and programmes
: A group of 15 LED lights in different colours moves from one side to
theother where thelights are gradually dimmed.
After afew cycles thedirection changes and theLED lights move in theother direction.
Flash: The whole strip lightashes. You decide if you want it to flash in
asingle colour or multiple colours using thecolour selection buttons (6).
Jump: The whole strip light shines at themaximum brightness and changes
between on and off. If you have selected multiple colours, thestrip light does
not turn off but switches between theselected colours.
Meteor: A group of 21 LED lights turn on at thestart and move from one
side to theother where thelights are gradually dimmed and then turn off.
21 LED lights turn on again and go in theopposite direction.
SVERIGE • KUNDTJÄNST tel 0247/445 00 e-post kundservice@clasohlson.se
internet www.clasohlson.se brev Clas Ohlson AB, 793 85 INSJÖN
Auto
FlashC3
CS
IC Set
W/WW
JumpC7
MetersC16
7
6
10
8
9
4
5
32
1
LED-list med ljuseffekter
Art.nr 36-8068 Modell SP-03LS3M-RGBPMD-01B
s igenom hela bruksanvisningen före användning och spara den sedan för
framtida bruk.Vi reserverar oss för ev. text- och bildfel samt ändringar av tekniska
data. Vid tekniska problem eller andra frågor, kontakta vår kundtnst.
Säkerhet
Varning!
Produkten eller nätadaptern får inte modifieras eller demonteras på något sätt.
Använd aldrig produkten om den eller nätadaptern pågottt är skadade
eller inte fungerar normalt. Dra omedelbart ur stickproppen vid skador.
Använd inte produkten iexplosiva utrymmen eller inärheten av antändliga
vätskor eller gaser.
Produkten får endast anslutas till medföljande nätadapter.
Anslut aldrig flera eller andra typer av produkter till nätadaptern.
Installera inte produkten på enfuktig eller elektriskt ledande yta.
Se till att kablarna inte skadas när produkten installeras.
När produkten inte används ska nätadaptern alltid vara utdragen ur vägguttaget.
Lyft inte produkten ikabeln och använd inte kabeln till oförenliga ändamål.
t aldrig barn leka med produkten.
Produkten får användas av personer med någon form av funktionsnedsättning,
brist erfarenhet eller kunskap som skulle kunna äventyra säkerheten, om
de har fått instruktioner om hur produkten på ettsäkert sätt ska användas
och förstår faror och risker som kan uppkomma.
Viktigt:
Ljuskällorna är inte utbytbara. När ljuskällan har passerat sin livslängd ska
hela produkten kasseras.
Produkten är endast avsedd för privat bruk.
Risk för ögonskador! Titta aldrig direkt in iljuskällan.
Produkten lämpar sig inte som rumsbelysning.
Produkten är endast avsedd för inomhusbruk.
Klass II nätadapter.
Klass III-ljusslinga.
Montering
Information
Ljuslisten monteras med dubbelhäftande tejp (monterad). För bästa vidhäftning,
se till att underlaget är rent, torrt och fritt fn fett.
Anpassa vid behov ljuslistens längd genom att klippa av den vid gon av markeringarna
(var 10:e cm längs ljuslistens längd). Om ljuslisten kortas ner att färre än Obs!
48 LED-ljuskällor återstår kommer inte IC Set-funktionen att fungera.
1. Ljuslist: Ta bort skyddsfilmen från tejpen på ljuslistens baksida och tryck
fast listen enren fettfri yta. Alternativt kan ljuslisten skruvas fast med
plastklämmor.
2. Kontaktstycken. Koppla samman ljuslist och kontrollbox. Obs! Se till att
ljuslisten kopplas in åt rätt håll. Annars kommer inte ljuslisten att lysa.
3. IR-mottagare. kerställ att det inte finns några hinder mellan LED- Obs!
kontrollens IR-mottagare och fjärrkontrollen.
4. Anslut anslutningskabeln till LED-kontrollboxen.
5. Ansluttadaptern iettlämpligtgguttag.
Fjärrkontroll
Dra ur plastremsan som sticker ut vid batterifacket!
10. Välj specifik riktning för ljuset av olika slag:
: Ljuslisten lyser upp helt och släcker successivt LED-ljusen från listens
mitt och ut mot sidorna.
: LED-ljusen tänds från sidorna och rör sig mot mitten.
: 21 LED-ljus som rör sig från den ena sidan till den andra.
: 12 LED-ljus som rör sig från den ena sidan till den andra.
: Led-ljusen tänds upp från den ena sidan till den andra tills hela
ljusslingan är tänd. Ljusslingan släcks ochsta cykel börjar.
: En grupp på 21 ledljus tänds och rör sig sedan från den ena sidan
till den andra där ljusen successivt dimmas ned och släcks.
Skötsel och underhåll
Dra ut tadaptern urgguttaget innan rengöring.
Torka av produkten med entorr trasa eller dammsug den vid behov.
Avfallshantering
Denna symbol innebär att produkten inte r kastas tillsammans
med annat hushållsavfall. Detta gäller inom hela EU. För att
förebygga eventuell skada miljö och hälsa, orsakad av felaktig
avfallshantering,ska produkten lämnas till återvinning att
materialet kan tas omhand ettansvarsfullttt. När du lämnar
produkten till återvinning, använd dig av de returhanteringssystem
som finns där du befinner dig eller kontakta inköpsstället. De kan se
till att produkten tas om hand på ettför miljön tillfredställande sätt.
Specifikationer
Nätenhet
Anslutning 230 V AC, 50 Hz
Utgång 12 V, 2 A DC
Ljuslist
Mått 3000×10 mm
Ljuskälla 90×LED
Märkspänning 12 V DC
Märkeffekt 19 W
Fjärrkontroll
Räckvidd Max 5 m
Batteri 1×CR2025 (medföljer)
6. lj mellan eneller flerarger:
CS: 1 färg
C3: 3 färger (R, G, B)
C7: 7 färger
C16: 16 färger
7. Tryck [ IC Set ] och använd sedan [ ] och
[ ] för att stegvis släcka eller tända 6 ledljus
itaget. (Du kan aldrig p2-harre än 48 LED-
ljuskällor aktiva.) Du kan sedan väljarg med
färgvalsknapparna (6) och justera ljusstyrkan
med [ ] och [ ].
8. : Ändra från varmvit till kallvit W / WW
: På/av
9. Auto: Växlar mellan alla färger och program
: En grupp med 15 ledljus iolikarger rör sig från den ena sidan till den
andrar den successivt dimmas ned.
Efter några cykler vänds riktiningen och ledljusen rör sig åt andrallet.
Flash: Hela ljuslisten blinkar. Du kan välja om den ska blinka ien färg eller
flera medrgvalsknapparna (6).
Jump: Hela ljuslisten lyser upp med maximal ljusstyrka och växlar sedan
mellan av och. Om du har valt flera rger släcks inte ljuslisten utan den
växlar istället mellan de valdargalternativen.
Meteor: En grupp på 21 ledljus tänds ibörjan och rör sig sedan från den ena
sidan till den andrar ljusen successivt dimmas ned och släcks. 21 ledljus
nds sedan igen ochr åt motsatt ll.


Produkt Specifikationer

Mærke: Cotech
Kategori: Ikke kategoriseret
Model: SP-03LS3M-RGBPMD-01B

Har du brug for hjælp?

Hvis du har brug for hjælp til Cotech SP-03LS3M-RGBPMD-01B stil et spørgsmål nedenfor, og andre brugere vil svare dig


Ikke kategoriseret Cotech Manualer

Cotech

Cotech HT7715 Manual

18 September 2024
Cotech

Cotech K-CPL-LS4W-IR-S3 Manual

16 September 2024
Cotech

Cotech J1x-JF2-210/20 Manual

14 September 2024
Cotech

Cotech TD9511-3 Manual

12 September 2024
Cotech

Cotech S1J-AJ8-10 Manual

31 August 2024
Cotech

Cotech J5218D Manual

27 August 2024
Cotech

Cotech 50053 Manual

27 August 2024
Cotech

Cotech 51097X23 Manual

27 August 2024
Cotech

Cotech 36-6286 Manual

27 August 2024

Ikke kategoriseret Manualer

Nyeste Ikke kategoriseret Manualer