Extron DA2 HD 8K AE Manual

Extron Modtager DA2 HD 8K AE

Læs gratis den danske manual til Extron DA2 HD 8K AE (4 sider) i kategorien Modtager. Denne vejledning er vurderet som hjælpsom af 2 personer og har en gennemsnitlig bedømmelse på 4.8 stjerner ud af 1.5 anmeldelser. Har du et spørgsmål om Extron DA2 HD 8K AE, eller vil du spørge andre brugere om produktet?

Side 1/4
1
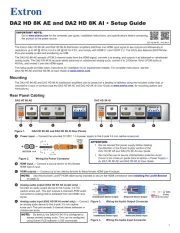
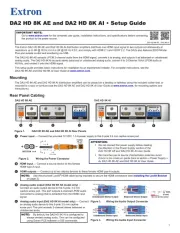
DA2 HD 8K AE and DA2 HD 8K AI Setup Guide
IMPORTANT NOTE:
Go to www.extron.com for the complete user guide, installation instructions, and specications before connecting
the product to the power source.
DA2 HD 8K AE / DA2 8K AI
The Extron DA2 HD 8K AE and DA2 HD 8K AI distribution ampliers distribute one HDMI input signal to two outputs simultaneously at
resolutions up to 8K @ 30 Hz 4:4:4 or 8K @ 60 Hz 4:2:0, and comply with HDMI 2.1 and HDCP 2.2. The DA2s also features EDID Minder
Plus and remote control and monitoring via USB.
analog audio. The DA2 HD 8K AI accepts stereo balanced or unbalanced analog audio, convert it to 2-Channel 16-bit LPCM audio at
48 KHz, and embed it onto the HDMI signal.
This setup guide provides basic instructions for installation by an experienced installer. For complete instructions, see the
DA2 HD AI User Guide 8K AE and DA2 HD 8K at www.extron.com.
Mounting
The DA2 HD 8K AE and DA2 HD 8K AI distribution ampliers can be placed on a desktop or tabletop using the included rubber feet, or
mounted to a rack or furniture (see the DA2 HD AI User Guide 8K AE and DA2 HD 8K at www.extron.com, for mounting options and
instructions).
Rear Panel Cabling
DA2 HD 8K AE DA2 HD 8K AI
--A MAX
12V
+
+
+
+
+
_
_
_
_
_
POWER
INPUT OUTPUTS AUDIO
ANALOG OUT
L R
1 2
A
A
A
A
A
A B
B
B
B
B
B D
D
D
D
D
DC
C
C
C
CC
--A MAX
12V
+
+
+
+
+
_
_
_
_
_
POWER
INPUT OUTPUTS AUDIO
ANALOG IN
L R
1 2
A
A
A
A
AA B
B
B
B
BB C
C
C
C
CC E
E
E
E
EE
Figure 1. DA2 HD 8K AE and DA2 HD 8K AI Rear Panels
A
Power input — Connect the provided 12 VDC, 1.5 A power supply to this 2-pole 3.5 mm captive screw port.
SECTION A–A
Ridges
Smooth
A
A
3/16"
(5 mm) Max.
POWER
12V
--A MAX
Figure 2. Wiring the Power Connector
B
HDMI input — Connect a source device to this female
HDMI type A input.
ATTENTION:
Do not connect the power supply before reading
the Attention in the Power Supply section of the
DA2 HD AI User Guide 8K AE and DA2 HD 8K .
Ne branchez pas la source d’alimentation externes avant
d’avoir lu les mises en garde dans la section « Power Supply »
du DA2 HD 8K .DA2 HD 8K AE and AI User Guide
C
HDMI outputs — Connect up to two display devices to these female HDMI type A outputs.
NOTE: Use the provided LockIt
®
HDMI cable lacing brackets to secure the HDMI connectors (see Installing the LockIt Bracket
on page 2).
D
Analog audio output (DA2 HD 8K AE model only)
Connect an audio output device to this 5-pole, 3.5 mm
captive screw port. This port outputs 2-channel LPCM audio
(converted to analog) that is extracted from the HDMI input
signal.
E
Analog audio input (DA2 HD 8K AI model only) — Connect
an analog audio device to this 5-pole 3.5 mm captive
screw port. This port accepts 2-channel stereo balanced or
unbalanced audio.
NOTE: By default, the DA2 HD 8K AI is congured to
always embed analog audio. This can be congured
using Extron PCS software or SIS commands.
Unbalanced Stereo Output Balanced Stereo Output
Do not tin the wires!
Tip
No Ground Here
No Ground Here
Tip
L R
Slee sve
Tip
Ring
Tip
Ring
L R
Slee sve
Figure 3. Wiring the Audio Output Connector
Unbalanced Stereo Input
Balanced Stereo Input
Tip
Ring
Tip
Ring
L R
Slee sve
Tip
Sleeve
Sleeve
Tip
L R
Figure 4. Wiring the Audio Input Connector
2
DA2 HD 8K AE and DA2 HD 8K AI Setup Guide (Continued)
ATTENTION:
Connect the sleeve to the ground (Gnd) terminal. Connecting the sleeve to a negative (-) terminal will damage the audio
output circuits.
Connectez le manchon à la terminaison terre (Gnd). Connecter le manchon à une terminaison négative (-) endommagera les
circuits de la sortie audio.
Installing the LockIt Bracket
Follow these instructions to secure the input and output HDMI connectors to the unit with the LockIt
HDMI lacing brackets provided:
1. Plug the HDMI cable into the rear panel connection (
1
).
2. Loosen the HDMI connection mounting screw from the rear panel enough to allow the LockIt
lacing bracket to be placed over it (
2
). The screw does not have to be removed.
3. Place the LockIt lacing bracket on the screw and against the HDMI connector, then tighten the
screw to secure the bracket (
3
).
ATTENTION:
Do not overtighten the HDMI connection mounting screw. The shield it fastens to is
very thin and can easily be stripped.
Ne serrez pas trop la vis de montage du connecteur HDMI. Le blindage auquel elle
est attachée est très fin et peut facilement être dénudé.
4. Loosely place the included tie wrap around the HDMI connector and the LockIt lacing bracket as
shown (
4
).
5. While holding the connector securely against the lacing bracket, tighten the tie wrap, then
remove any excess length.
1
1
1
1
11
2
2
2
2
22
3
3
3
3
33
4
4
4
4
44
Figure 5. LockIt Diagram
Front Panel
NOTE: The front panel for the DA2 HD 8K AE and DA2 HD 8K AI are the same.
A
Lights when power is applied to the unit.Power status LED
B
USB C Config port — Connect a PC to this port to configure
and monitor the device via SIS or PCS.
C
Input and Outputs LEDs
Input LEDs
Signal — Lights when a TMDS signal is detected on the
HDMI input. If the source requires HDCP encryption, lights
only when HDCP is authenticated.
DA2 HD 8K AE
CONFIG
IN
1
SIGNAL
HDCP
e
2
OUTPUTS
2-CH LPCM
BITSTREAM
OTHER
STORE
AUDIO IN
EDID
0
1
2
3
4
5
6
7
8
9
A
B
C
D
E
F
A
A
A
A
A
A B
B
B
B
BB
E
E
E
E
E
E
C
C
C
C
C
C F
F
F
F
FF
D
D
D
D
DD
Figure 6. DA2 HD 8K AE Front Panel
HDCP — Lights when the source requires HDCP encryption and it has been authenticated with the HDMI input.
Outputs LEDs
Signal — Light when HPD is detected from the corresponding sink device and a TMDS signal is detected at the input.
HDCP — Light when HDCP is authenticated between a DA output and the corresponding sink device.
D
Audio In LEDs — These three LEDs provide the status of the various audio input functions:
2-CH LPCM — Lights when the incoming embedded audio signal is a 2-channel Digital LPCM audio format.
Bitstream — Lights when the incoming embedded audio signal is a Dolby Digital or DTS audio format.
Other — Lights to indicates Audio Input other than 2-CH LPCM or AC-3/DTS Bit Stream.
E
When pushed in, the EDID STORE button and LED STORE button initiates both reading and storing the EDID from the connected
display. The LED blinks when reading and storing and lights steady when storing is complete. Press the button to read the EDID STORE
of the connected device and store it to a user slot selected by the rotary switch. Up to four EDID files (switch positions C through ) can F
be stored.
Reset To reset the DA, use the .STORE button according to the directions in (see page 4)Reset modes
F
EDID rotary switch – Use the 16-position rotary switch to select from 12 factory EDID files and 4 store slots. When a position is
selected, the corresponding slot in the EDID table (see page 3) is assigned to the input, and an unsolicited SIS response is sent.
The default position is .5
NOTE: The DA2 HD 8K AE and DA2 HD 8K AI store the EDID from output 1 only.


Produkt Specifikationer

Mærke: Extron
Kategori: Modtager
Model: DA2 HD 8K AE

Har du brug for hjælp?

Hvis du har brug for hjælp til Extron DA2 HD 8K AE stil et spørgsmål nedenfor, og andre brugere vil svare dig