Before using your new product, please read these instructions to prevent any damage.
SETTING UP YOUR LIGHTSTRIP
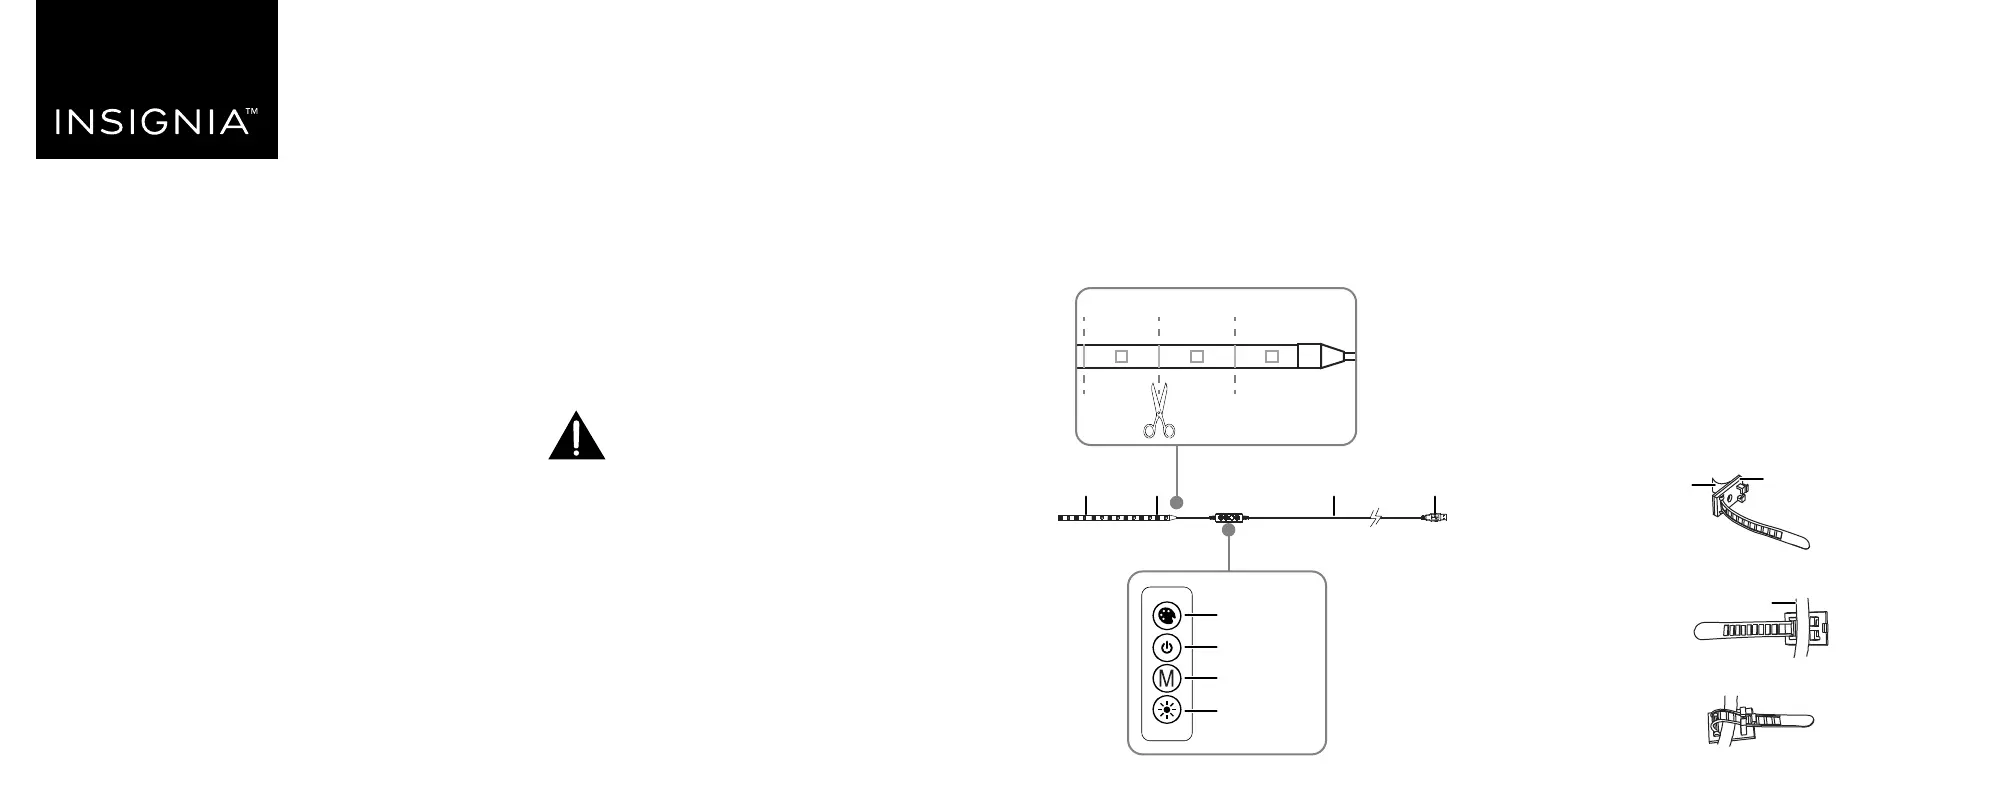
Shortening your lightstrip
1 Decide how long you need your lightstrip to be. When
measuring, make sure that you start from the side of the
tape that has the controller box connected to it. The part of
the tape that you cut o will no longer light up.
2 Locate the nearest cut line, and cut with a pair of scissors.
Cut lines are about 1.3 in. (3.3 cm) apart.
WARNING: Do not cut the silver solder markings. Only cut in the
center of the copper-colored pads, as shown.
PACKAGE CONTENTS
• LED lightstrip
• USB power supply
• Cable clips (2)
• Quick Setup Guide
FEATURES
• 16 selectable colors provide accent or ambient lighting
• 8 ft. LED lightstrip can be cut to your ideal length
• Self-adhesive back attaches to TVs, cabinets, or other locations
for custom lighting
• Multi-step dimmer adjusts to the brightness level you want
• Strobe and color fade modes create fun lighting eects from
any USB port
QUICK SETUP GUIDE
8 ft. RGB
LED Lightstrip
NS-LED8CT22
USB
connectorWire
LED
lightstrip
M
COLOR
BRIGHT
Cut
line
Cut line
Attaching your lights
Adhesive backing
Note: You can secure your lightstrip in place with its adhesive
backing or cable clips.
CAUTION: To avoid damage to the lightstrip, do not sharply twist or
bend the lightstrip 90° or more.
1 Peel the adhesive backing o the lights, then attach the
lights where you want them.
2 Optional: Attach the double-sided tape (not included) to the
back of the light control, then attach it where you want it.
Notes:
• Make sure that the lightstrip is unrolled, otherwise it can
damage the lightstrip or cause a re.
• Every surface is dierent, and additional adhesive may be used
if the LED tape detaches from the surface. Small pieces of clear
tape can be used.
Cable clips
1 Make sure that your mounting location is clean, dry, and
free of oils.
2 Remove the adhesive backing on a cable clip, and push it
rmly where you want to mount your lightstrip.
3 Align the lightstrip with the cable clip.
4 Slide the cable clip through the buckle and pull to tighten.
5 Repeat steps 1-4 to attach the second cable clip.
WARNING: Unroll before use. Never plug in the LED
lights when rolled up, as this can result in product
damage or a re.
COLOR
BRIGHT
Light controls
Change color
Turn on/o
Change mode
Adjust
brightness/speed
Cable clip
Adhesive back
Wire