Klein Tools ESF150LL Manual


Læs gratis den danske manual til Klein Tools ESF150LL (6 sider) i kategorien Ikke kategoriseret. Denne vejledning er vurderet som hjælpsom af 38 personer og har en gennemsnitlig bedømmelse på 4.4 stjerner ud af 19.5 anmeldelser. Har du et spørgsmål om Klein Tools ESF150LL, eller vil du spørge andre brugere om produktet?

Side 1/6
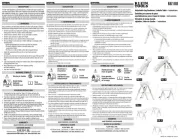
The ESF150LL Electronic Stud Finder with Crossline
Lasers detects wood and metal studs behind walls with
an auto-deep scan reaching 1-1/2" (38 mm). LEDs clearly
indicate stud location, accompanied with audible alerts that
can be muted. Vertical and horizontal crossline lasers ensure
accurate markings. Its handheld grip, along with the hold
mode for continuous scanning without trigger depression,
offers comfortable operation. Felt pads protect walls.
GENERAL SPECIFICATIONS
Environment: Indoor: Do not expose to moisture, rain or snow.
Operating Altitude: 6562 ft. (2000m)
Operating Temperature: 3F to 122°F (C to 5C)
Storage Temperature: -4°F to 140°F (-20°C to 6C)
Relative Humidity: <90% non-condensing
Scanning Depth: up to 1.5" (38 mm)
Stud Detection: Metal & wood, full-width & center
Visual Indication: LEDs ×7 (Green)
Audible Indication: Buzzer, ≥50dB
Stud Finder Auto Power-Off: 3 seconds after trigger is released
Laser Type: Class 3R,5mW, Red
Laser Wavelength: 650 ± 10 nm
Laser Accuracy: ± 0.5" per 16.4' (± 12 mm per 5 m)
Laser Auto Power-Off: After 5 minutes of inactivity
Battery Type: 2× AA (1.5V)
Runtime: Up to 30 hours stud finding only,
up to 8 hours stud finding with all lasers on
Dimensions: 4.5" × 2.75" × 7.63" (114 × 70 × 194 mm)
Weight: 16.7 oz. (473 g) including batteries
Drop Protection: 6.6 ft. (2m)
Standards:
IEC 60825-1:2014.
Complies with 21 CFR 1040.10 and 1040.11
except for conformance with IEC 60825-1 Ed. 3,
as described in Laser Notice No. 56, dated May 8, 2019.
Specifications subject to change.
Do not place equipment
and its accessories in the trash. Items must be properly
disposed of in accordance with local regulations. See www.
epa.gov/recycle for additional information.
WARNINGS
To ensure safe operation and service of the stud nder, follow
these instructions. Failure to observe these warnings can result
in serious personal injury, re, or electrical shock. Retain these
instructions for future reference.
WARNING: LASER RADIATION. DO NOT STARE INTO BEAM.
Class 3 Laser.
Exposing eyes to laser radiation can result in severe and
permanent eye injuries. look directly into the laser beam NEVER
emitted by this instrument.
Do not use the instrument if it appears to be damaged.
Do not modify the instrument in any way, as to do so could result
in emission of hazardous laser radiation than could result in
severe eye injuries .
Do not use optical equipment such as lenses, prisms, optical
scopes, etc. to transmit, retransmit, or view the laser beam as
this could result in severe eye injuries.
This product should not be used by untrained operators
or operators who have not read and fully understood the
instructions.
This product should not be used in any location that could
result in somebody looking at or having their eyes inadvertently
irradiated by the laser beam as this could result in severe eye
injuries.
The instrument should be powered off following use to minimize
the risks of inadvertently exposure to hazardous laser radiation
that could result in severe eye injuries.
Do not remove warning labels from this instrument as this
could result in serious personal injury and increases the risk of
exposure to hazardous laser irradiation.
The instrument should be securely located in a tidy work
environment prior to operation as unexpected drops or
movement of the instrument may result in damage to the
instrument and increases the risk of inadvertent exposure to laser
radiation that could result in severe eye injuries.
The stud finder may detect electrical wiring or pipes in the same
manner as studs. ALWAYS use caution when nailing, cutting, or
drilling into surfaces which may contain these items. Turn off all
gas, water, and electric power before penetrating a surface.
NOT insulated. Avoid contact with areas where energized
conductive elements may be present.
Always wear eye protection.
The stud finder is designed to detect inconsistencies to suggest
the location of hidden objects, but not specifically what the hidden
objects are. Objects behind surfaces may not be detected. The
stud finder may also detect unintended hidden objects. For this
reason, the stud finder alone should not be relied upon exclusively
for confirming the location of hidden objects. Use other
information to help locate items before penetrating a surface.
Studs and joists are normally spaced 16 or 24" (40 or 60 cm)
apart, are normally 1-12" (38 mm) wide, and may be separated
by firestops. Anything closer together, or of a different width, may
not be a stud or joist.
There are no user serviceable parts in this instrument.
SYMBOLS ON INSTRUMENT
Warning or Caution Read instructions
LASER
3R
Laser Class 3R Avoid direct eye exposure
Hazardous
laser radiation Laser Aperture
WEEE – Electronics
disposal
CLEANING
Be sure instrument is turned off and wipe with a clean, dry
lint-free cloth.
Do not use abrasive cleaners or solvents.
STORAGE
Remove batteries when not in use for a prolonged period
of time. Do not expose to high temperatures or humidity.
After a period of storage in extreme conditions exceeding the
limits mentioned in the General Specifications section, allow
instrument to return to normal operating conditions before
using.
WARRANTY
www.kleintools.com/warranty
FCC & IC COMPLIANCE
See this products page at www.kleintools.com
for FCC compliance information.
Canada ICES-003 (B) / NMB-003 (B)
DISPOSAL / RECYCLE
Do not place equipment and its accessories in
the trash. Items must be properly disposed of in
accordance with local regulations. See www.epa.
gov/recycle for additional information.
ENGLISH
OPERATING INSTRUCTIONS:
SEE NEXT PAGE
Warning Labels on Instrument
BASED ON 1390776 Rev 06/24 A
ESF150LL
Electronic Stud Finder with Crossline Lasers- Instructions
CUSTOMER SERVICE
KLEIN TOOLS, INC.
450 Bond Street, Lincolnshire, IL 60069
1-800-553-4676
customerservice@kleintools.com
www.kleintools.com
FEATURE DETAILS (FIG. A, FIG. B)
1. Stud Finder Trigger
2. Felt Pads
3. Sensor Plate
4. Indicator LEDs
5. Stud Center V-Notch Marker
6. Stud Edge V-Notch Markers
7. Bubble Vial Level
8. Battery Cover
9.
Mute Switch
10. Laser On/Off Button
11. Vertical Laser Apertures (×2)
12. Horizontal Laser Apertures (×2)
OPERATING INSTRUCTIONS
INSTALLING BATTERIES
Prior to first use, batteries must be installed:
1. Loosen screw on battery cover
8
and press inward on
both sides to remove.
2. Install two AA batteries (included), noting proper polarity.
3. Replace battery cover
8
and secure with screw, taking
care not to overtighten.
CALIBRATION
The ESF150LL must be calibrated prior to each use:
Calibrate into Normal Mode:
1. Hold the Sensor Plate
3
flat to the surface.
2. Depress and hold the Stud Finder Trigger
1
.
3. Upon successful calibration (about 2 seconds), the buzzer
will beep once, and the Indicator LEDs
4
will illuminate
one by one from left to right.
Calibrate into Hold Mode:
Hold Mode is essentially an electronic "trigger lock", allowing
the user to continuously scan without having to keep the
trigger depressed. To enter Hold Mode upon calibration:
1. Hold the Sensor Plate
3
flat to the surface.
2. Depress the Stud Finder Trigger
1
three times.
3. Upon successful calibration (about 2 seconds), the buzzer
will beep once, and the Indicator LEDs
4
will illuminate
one by one from left to right.
To exit Hold Mode, depress the Stud Finder Trigger
1
three
more times.
NOTE: Hold Mode must be activated each time the
ESF150LL is Powered ON.
NOTE: If the ESF150LL is out of calibration or is not held flat
to a surface for more than ten consecutive seconds, the unit
will automatically power OFF.
NOTE: If an error indication occurs (see INDICATOR
BEHAVIOR table) after successful calibration while still held
flat to a surface, wait 2 to 3 seconds while the ESF150LL
attempts to recalibrate. If the ESF150LL cannot recalibrate
and still shows the error indication, release the trigger (or
exit Hold Mode) and repeat the steps above from your
current location on the surface, making sure that the Sensor
Plate
3
is flat to the surface.
OPERATING INSTRUCTIONS
MUTING AUDIBLE INDICATORS
By default, the ESF150LL provides both visual and audible
indicators. To mute the audible indicators:
1. Loosen screw on battery cover
8
and press inward on
both sides to remove.
2. Move the Mute Switch
9
into the mute position.
3. Replace battery cover and secure with screw, taking care
not to overtighten.
SCANNING FOR STUDS
Upon successful calibration, the ESF150LL is ready for
use. With the Sensor Plate
3
flat to the surface, move
the ESF150LL across the surface to detect objects. See
INDICATOR BEHAVIOR table for indicator status.
NOTE: Touching the unit around the Sensor Plate
3
while scanning can interfere with the Indicator LEDs
4
. For the most accurate results while scanning for studs,
avoid touching the Sensor Plate
3
and the area directly
surrounding it.
CROSS-LASER FUNCTIONALITY
The ESF150LL features integrated Vertical
11
and Horizontal
12
laser lines that can be used individually or together. Use the
Laser On/Off Button
10
will cycle through the laser modes:
1. only The first short-press will activate the Vertical Laser
11
.
2. only The second short-press will activate the Horizontal Laser
12
.
3. The third short-press will activate both the Vertical
11
and
Horizontal
12
lasers.
4. Subsequent short-presses will repeat the above cycle.
5. To turn lasers off, press and hold the Laser On/Off Button
10
.
NOTE: Lasers will automatically power-OFF after 5 minutes of
inactivity.
ENGLISH
FIG. A
1
35
2
7
10
4
6
12
11
8
FIG. B
98
INDICATOR BEHAVIOR
CONDITION
LED INDICATORS BUZZER
Successful
Calibration
Illuminate one by one
from left to right Single beep
Error/Out of
Calibration
All continuously blinking Two beeps
Stud Center
Located
All illuminated* Continuous tone
Low Battery
Center LED blinks 3 times Three beeps
BATTERY REPLACEMENT (FIG. B)
When Low Battery indication occurs (see INDICATOR
BEHAVIOR table), the batteries must be replaced:
1. Loosen screw on battery cover
8
and press inward on
both sides to remove.
2. Remove and recycle exhausted betteries.
3. Install two new AA batteries, noting proper polarity.
4. Replace battery cover
8
and secure with screw, taking
care not to overtighten.
*NOTE: If the width of a detected stud is narrower than average
(1.5" / 38mm), only the 5 centermost
Indicator LEDs
4
may
illuminate to indicate center.


Produkt Specifikationer

Mærke: Klein Tools
Kategori: Ikke kategoriseret
Model: ESF150LL

Har du brug for hjælp?

Hvis du har brug for hjælp til Klein Tools ESF150LL stil et spørgsmål nedenfor, og andre brugere vil svare dig