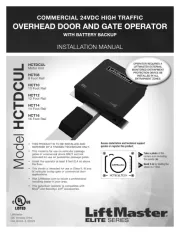
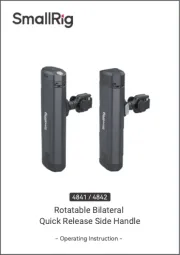
LiftMaster CPS-OPEN4 Manual


Læs gratis den danske manual til LiftMaster CPS-OPEN4 (8 sider) i kategorien Ikke kategoriseret. Denne vejledning er vurderet som hjælpsom af 33 personer og har en gennemsnitlig bedømmelse på 4.4 stjerner ud af 17 anmeldelser. Har du et spørgsmål om LiftMaster CPS-OPEN4, eller vil du spørge andre brugere om produktet?

Side 1/8
1
LIFTMASTER® PROTECTOR SYSTEM
MODEL CPS-OPEN4
APPLICATION
LiftMaster® Protector System model CPS-OPEN4 is a monitored entrapment protection device for use with sectional and rolling doors. This device is
compatible with LiftMaster Heavy, Standard, and Medium Duty Logic (post 2010), FDC, FCL, FDOA, FDOB, and Egress Commercial Door operators. This
device may be installed in areas exposed to rain or moisture. These images in this document are for reference only and your product may look different.
SPECIFICATIONS
Power Consumption: Max. 50mA
Supply Voltage: 6 to 40 Vdc
Operating Temperature: -13°F to 165°F (-25°C to 73°C)
NEMA4 rating
CARTON INVENTORY
Photoelectric sensors (transmitter and receiver), mounting brackets (2), hardware, and instructions
LIFTMASTER® PROTECTOR SYSTEM
IMPORTANT INFORMATION ABOUT THE PHOTOELECTRIC SENSOR
Be sure power to the operator is disconnected.
When properly connected and aligned, the photoelectric sensor will detect an obstruction in the path of its beam. If an obstruction breaks the beam while
the door is closing, the operator will stop and typically reverse to the full open position.
The transmitter must be installed so that it faces the receiver across the entrapment zone, no more than 6" (15 cm) above the fl oor for a door. Minimum
installation width of 3 feet (.91 m) and maximum width of 45 feet (13.7 m).
The brackets must be securely fastened to a solid surface such as the wall framing. If installing in masonry construction, add a piece of wood at each
location to avoid drilling extra holes in masonry if repositioning is necessary.
The invisible light beam path must be unobstructed. No part of the door (or door tracks, springs, hinges, rollers or other hardware) may interrupt the
beam while the door is closing.
ENTRAPMENT ZONES
Make sure the brackets are aligned so the photoelectric sensors will face each other across the entrapment zone as illustrated.
ENTRAPMENT ZONE FOR COMMERCIAL DOOR APPLICATION
To prevent possible SERIOUS INJURY or DEATH from a closing door:
• Be sure to DISCONNECT POWER to the operator BEFORE installing the photoelectric sensor.
• The door MUST be in the fully opened or closed position BEFORE installing the LiftMaster
® Monitored Entrapment Protection device.
• Correctly connect and align the photoelectric sensor.
• Install the photoelectric sensor beam NO HIGHER than 6" (15 cm) above the fl oor.
LiftMaster® Monitored Entrapment Protection devices are for use with LiftMaster
® Commercial Door. Use with ANY other product voids the
warranty.
• Entrapment protection devices MUST be installed per the operator owner's manual for each Entrapment Zone.
Photoelectric
Sensor
Entrapment Zone Invisible Light Beam
Protection Area
Photoelectric
Sensor
6" (15 cm) max. above the
floor and away from the door
6" (15 cm) max. above the
floor and away from the door
Facing the door from inside the building
(Installation procedures are the same for all door types)
2
GARAGE DOOR
Secondary protection ONLY
Primary Monitored Entrapment
18" (46 cm) min.
48" (122 cm) min.
R S
S R
R S
S R
R S
S R
DOOR #1 DOOR #2 DOOR #3
R S = Receiving Sensor = Sending Sensor
24" (61 cm) min.
Secondary protection ONLY
Primary Monitored Entrapment
Secondary protection ONLY
Primary Monitored Entrapment
Secondary protection ONLY
Primary Monitored Entrapment
R
S
S R
6" (15 cm) max. above the
floor and away from the door
6" (15 cm) max. above the
floor and away from the door
6" (15 cm) max. above the
floor and away from the door
Wing
Nut
Mounting Bracket
Mounting
Bracket
6" (15 cm)
Max. above
the floor and away
from the door.
INSTALLATION
1. Attach the mounting brackets to a solid surface on each side of the door with hardware (provided) no more than 6" (15 cm) above the oor.
Track mount is not recommended.NOTE:
2. Loosen the wing nut and slide the mounting bracket to adjust the photoelectric sensor.
SECONDARY PROTECTION AND ADJACENT DOOR INSTALLATIONS
Recommended installation for adjacent doors and more than one set of photoelectric sensors. NOTE: Secondary protection requires a CPS3 card.
Recommendations for optimizing operation of high volume vehicle traffi c with two sets of monitored photoelectric sensors.


Produkt Specifikationer

Mærke: LiftMaster
Kategori: Ikke kategoriseret
Model: CPS-OPEN4

Har du brug for hjælp?

Hvis du har brug for hjælp til LiftMaster CPS-OPEN4 stil et spørgsmål nedenfor, og andre brugere vil svare dig


Ikke kategoriseret LiftMaster Manualer

Ikke kategoriseret Manualer

Nyeste Ikke kategoriseret Manualer