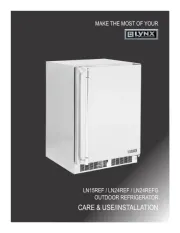
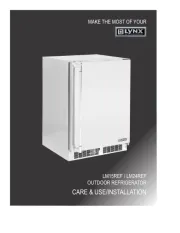
Lynx LM15REFL Manual
Læs gratis den danske manual til Lynx LM15REFL (60 sider) i kategorien Køleskab. Denne vejledning er vurderet som hjælpsom af 26 personer og har en gennemsnitlig bedømmelse på 4.4 stjerner ud af 13.5 anmeldelser. Har du et spørgsmål om Lynx LM15REFL, eller vil du spørge andre brugere om produktet?
Side 1/60

MAKE THE MOST OF YOUR
CARE & USE/INSTALLATION
LM15REF / LM24REF
OUTDOOR REFRIGERATOR

2CARE AND USE/INSTALLATION
NOTE
!CAUTION
CONTENTS AND SAFETY INSTRUCTIONS
Safety information ...............................................................2
Unpacking your appliance ..................................................3
Warranty registration .....................................................3
Installing your appliance ......................................................4
Cabinet clearances .........................................................4
Leveling the appliance ....................................................4
Electrical connection ......................................................5
Installing the anti-tip device .................................................6
Product Dimensions ...........................................................8
Using your Electronic control ............................................10
Starting your appliance ..................................................10
Turning your appliance "ON" or "OFF" ..........................10
Adjusting the temperature .............................................10
Refrigerator operation ...................................................10
Alarms ............................................................................10
Door ajar ...................................................................10
Temperature sensor fault ..........................................10
High and Low temperature .......................................10
Alarm mute ..................................................................11
Shelving congurations .....................................................11
Care and cleaning .............................................................13
Long term storage / winterization ................................ 14
Stainless steel maintenance ............................................15
Energy saving tips ............................................................16
Obtaining service .............................................................16
Troubleshooting ................................................................17
The Lynx story ...................................................................18
!WARNING
State of California Proposition 65 Warning:
This product contains one or more chemicals known
to the State of California to cause cancer.
!WARNING
State of California Proposition 65 Warning:
This product contains one or more chemicals known
to the State of California to cause birth defects or
other reproductive harm..
Important Safety Instructions
Contents
Warnings and safety instructions appearing in this guide
are not meant to cover all possible conditions and situa-
tions that may occur. Common sense, caution, and care
must be exercised when installing, maintaining, or operat-
ing this appliance.
Recognize Safety Symbols,
Words, and Labels.
!WARNING
WARNING-You can be killed or seriously injured if
you do not follow these instructions.
CAUTION-Hazards or unsafe practices which could re-
sult in personal injury or property / product damage.
NOTE-Important information to help assure a problem
free installation and operation.

4CARE AND USE/INSTALLATION
!CAUTION
Leveling Legs
Select Location
Cabinet Clearance
Front Grille
The proper location will ensure peak performance of your
appliance. We recommend a location where the unit will
be out of direct sunlight and away from heat sources. To
ensure your product performs to specications, the recom-
mended installation location temperature range is from 55
to 115°F (13 to 46°C).
Ventilation is required from the bottom front of the appli-
ance. Keep this area open and clear of any obstructions.
Adjacent cabinets and counter top can be installed around
the appliance as long as the front grille remains unobstruct-
ed.
Do not obstruct the front grille. The openings within the
front grille allow air to ow through the condenser heat ex-
changer. Restrictions to this air ow will result in increased
energy usage and loss of cooling capacity. For this reason
it is important this area not be obstructed and the grille
openings kept clean. Lynx Grills does not recommend the
use of a custom made grille as air ow may be restricted.
(See Figure 2).
Front Leveling
Legs
Figure 2
Rear
Leveling
Legs
Front Grille,
keep this area
open.
INSTALLING YOUR APPLIANCE
Adjustable legs at the front and rear corners of the appli-
ance should be set so the unit is rmly positioned on the
oor and level from side to side and front to back. The over-
all height of your Lynx appliance may be adjusted between
the minimum, 333⁄4" (85.7 cm), by turning the leveling leg in
(CW ) and the maximum, 34↷3⁄4" (88.3 cm) by turning the
leveling leg out (CCW .↶)
To adjust the leveling legs, place the appliance on a solid
surface and protect the oor beneath the legs to avoid
scratching the oor. With the assistance of another person,
lean the appliance back to access the front leveling legs.
Raise or lower the legs to the required dimension by turning
the legs. Repeat this process for the rear by tilting the appli-
ance forward using caution. On a level surface check the
appliance for levelness and adjust accordingly.
The front grille screws may be loosened and the grille ad-
justed to the desired height. When adjustment is complete
tighten the two front grille screws. (See Figure 5).

5
CARE AND USE/INSTALLATION
NOTE
Figure 6
Electrical Connection
Electrical Shock Hazard
• Do not use an extension cord with this appliance.
They can be hazardous and can degrade product
performance.
• This appliance should not, under any circumstanc-
es, be installed to an un-grounded electrical supply.
• Do not remove the grounding prong from the power
cord. (See Figure 3).
• Do not use an adapter. (See Figure 4).
• Do not splash or spray water from a hose on the
appliance. Doing so may cause an electrical shock,
which may result in severe injury or death.
!WARNING
A grounded 115 volt, 15 amp dedicated circuit is required.
This product is factory equipped with a power supply
cord that has a three-pronged, grounded plug. It must be
plugged into a mating grounding type receptacle in accor-
dance with the National Electrical Code and applicable lo-
cal codes and ordinances (see Figure 6). If the circuit does
not have a grounding type receptacle, it is the responsibility
and obligation of the customer to provide the proper power
supply. The third ground prong should not, under any cir-
cumstances, be cut or removed.
Ground Fault Circuit Interrupters (GFCI) are prone to nui-
sance tripping which will cause the appliance to shut down.
GFCI’s are generally not used on circuits with power equip-
ment that must run unattended for long periods of time, un-
less required to meet local building codes and ordinances.
Front grille screw
Front grille
Figure 5
INSTALLING YOUR APPLIANCE
Figure 3
Figure 4
Do not remove
ground prong

7
CARE AND USE/INSTALLATION
INSTALLING THE ANTI TIP DEVICE (FREESTANDING INSTALLATIONS)
211⁄2"
(54.6 cm)
"V" notches
in bracket
"V" notches
in bracket
Side of cabinet line
Figure 8
Front of cabinet line
Rear of cabinet line
Rear Leveling leg
Screw
Figure 8a
NOTE
When the oor mounted anti-tip bracket is used the mini-
mum adjusted height of the cabinet is increased by
3⁄8" (9 mm).

8CARE AND USE/INSTALLATION
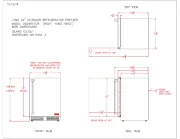
MODEL
ROUGH-IN OPENING DIMENSIONS CABINET DIMENSIONS
"A" "B" "C" "D" "E" "F" "G" "H" "J"
LM15REF 15"
(38.1 cm)
**34" to 35"
(86.4 to 88.9 cm) *147⁄8"
(37.8 cm)
333⁄4" to 343⁄4"
(85.7 to 88.3 cm)
2323⁄32"
(60.2 cm)
263⁄4"
(67.9 cm)
3713⁄32"
(95 cm)
173⁄4"
(45.1 cm)
LM24REF 24"
(61 cm)
**34" to 35"
(86.4 to 88.9 cm) *237⁄8"
(60.7 cm)
333⁄4" to 343⁄4"
(85.7 to 88.3 cm)
2323⁄32"
(60.2 cm)
263⁄4"
(67.9 cm)
4613⁄32"
(117.9 cm)
263⁄4"
(67.9 cm)
"A"
"B"
"C"
"D"
"E"
If necessary to gain clearance inside the rough-in
opening a hole can be cut through the adjacent cabi-
net and the power cord routed through this hole to a
power outlet. Another way to increase the available
opening depth is to recess the power outlet into the
rear wall to gain the thickness of the power cord plug.
Not all recessed outlet boxes will work for this applica-
tion as they are too narrow, but a recessed outlet box
equivalent to Arlington #DVFR1W is recommended for
this application, (see Figure 10).
PRODUCT DIMENSIONS
Figure 9
Figure 9a
Figure 10

9
CARE AND USE/INSTALLATION
"F"
211⁄2"
(54.6 cm)
* Depth dimension of rough-in opening may vary depend-
ing on each individual installation. To recess entire door "F"
dimension plus 1" (2.5 cm) for thickness of power cord plug
is required.
** Minimum rough-in opening required is to be larger than
the adjusted height of the cabinet.
# A grounded 15 amp dedicated circuit is required. Follow
all local building codes when installing electrical and appli-
ance.
MODEL
PRODUCT DATA
ELECTRICAL
REQUIREMENTS #
PRODUCT
WEIGHT
LM15REF 115V/60Hz/15A 105 lbs
(47.7 kg)
LM24REF 115V/60Hz/15A 140 lbs
(63.6 kg)
"D"
"E"
"H"
"J"
"G"
PRODUCT DIMENSIONS
Figure 11
!WARNING Floor mount Anti-tip Bracket must be installed for freestand-
ing applications. Not required for built in applications.

10 CARE AND USE/INSTALLATION
USING YOUR ELECTRONIC CONTROL
Set Colder Warmer ON/OFF
Press and Hold Press and Hold
Alarm
F
Figure 12
close-up of
control
• Temperature Sensor Fault: If the control-
ler detects that the temperature sensor is
not properly functioning, a temperature
sensor alarm will sound in one (1) second intervals. "E1"
will ash on the display panel and the Alarm LED located at
the top left of the display below the word "Alarm" will be il-
luminated. Please call Lynx Grills Customer Service or your
dealer if this error code is displayed.
• High and Low Temperature Alarm: If the
storage compartment temperature deviates
excessively from the set-point temperature, the
alarm will sound in (1) second intervals. The
display panel will ash either "Hi" or "Lo" de-
pending upon the condition and the Alarm LED
light at the top left of the display below the word
"Alarm" will be illuminated. The alarm will remain active
until the condition is corrected.
Your electronic control will monitor refrigerator function and
alert you with a series of audible and visual alarms.
• If the door has been leftDoor Ajar Alarm:
open for over ve (5) minutes, the alarm
will sound in one (1) second intervals. The
display panel will ash "do" and the Alarm LED located at
the top left of the display below the word "Alarm" will be il-
luminated. This will stop as soon as the door is closed.
Figure 13
LM15REF shown
Starting Your Refrigerator
Turning Your Refrigerator ON or OFF
Set temperature
Refrigerator Operation
Alarms
Plug the refrigerator power cord into a wall outlet. Your
refrigerator will begin cooling after power is applied.
If your refrigerator does not start, check that the refrigerator
is turned on and the set temperature is cold enough.
If the refrigerator is on, the refrigerator temperature will be
shown on the display. To turn the refrigerator off, press and
hold the "ON/OFF" button for three (3) seconds. "OFF" will
appear on the display.
If the refrigerator is not on, "OFF" will be shown on the
display. To turn the refrigerator on, press and hold the "ON/
OFF" button for three (3) seconds. The refrigerator tem-
perature will be shown on the display.
To set the refrigerator temperature, press and hold the
"SET" button. When the "SET" button is pressed, the
display will show the set temperature. While holding the
"SET" button, press the "WARMER" or "COLDER" buttons
to adjust set temperature.
The available temperature range of the refrigerator is 34° to
42°F (1° to 6° C).
It may take up to 24 hours for your refrigerator to reach
desired temperature. This will depend on amount of content
loaded and number of door opening and closings.
For best results allow refrigerator to "pull down" to desired
set temperature before loading. Once contents are loaded,
allow at least 48 hours for temperature to stabilize before
making any adjustments to the set temperature.

12 CARE AND USE/INSTALLATION
Remove stored product from the shelf. Do not try to remove
a loaded shelf from the appliance. Grasp the shelf front with
both hands, rotate the front upward and lift out. (See Figure
19). To install a shelf insert the shelf in the appliance and
insert the top hooks into the shelf support slots and drop
the shelf down so the hooks drop over the bottom of the
slots.
Rear tang
(hook) on
shelf
Shelf support
slot
Installed shelf
tang
Make sure your cantilever shelf is secure on the shelf sup-
ports by pressing down on the shelf before loading.
!CAUTION
Grasp the shelf by the front with
both hands and rotate the front
of the shelf up, then lift the shelf
up and remove the shelf from the
shelf ladders.
!CAUTION
Never try to move a loaded shelf, remove everything from
the shelf before moving. Use both hands when moving the
shelf.
SHELVING CONFIGURATIONS
Figure 19a
Figure 19
To Add or Remove a Shelf

13
CARE AND USE/INSTALLATION
CARE AND CLEANING
!CAUTION
• Never attempt to repair or perform maintenance on
the appliance until the main electrical power has been
disconnected. Turning the appliance control "OFF"
does not remove electrical power from the unit's wiring.
• Replace all parts and panels before operating.
!WARNING
Electrocution Hazard
Front Grille
Cabinet
Interior
Care of Appliance
In the Event of a Power Failure
Light Assembly Replacement
Be sure that nothing obstructs the required air ow open-
ings in front of the cabinet. At least once or twice a year,
brush or vacuum lint and dirt from the front grille area (see
page 4).
SHOCK HAZARD: Disconnect electrical power from the
appliance before cleaning with soap and water.
The stainless steel cabinet can be washed with either a
mild soap and water and thoroughly rinsed with clear water.
See "Stainless Steel Maintenance" on page 15.
Wash interior compartment with mild soap and water. Do
NOT use an abrasive cleaner, solvent, polish cleaner or
undiluted detergent.
1. Avoid leaning on the door, you may bend the door
hinges or tip the appliance.
2. Exercise caution when sweeping, vacuuming or mop-
ping near the front of the appliance. Damage to the
grille can occur.
3. Periodically clean the interior of the appliance as
needed.
If a power failure occurs, try to correct it as soon as pos-
sible. Minimize the number of door openings while the
power is off so as not to adversely affect the appliance's
temperature.
All models use LED lamps to illuminate the interior of the
appliance. This component is very reliable, but should one
fail, contact a qualied service technician for replacement
of the LED.

15
CARE AND USE/INSTALLATION
STAINLESS STEEL MAINTENANCE
NOTE
Background
Care and Cleaning
Choosing a Cleaning Product
Stainless steel does not stain, corrode, or rust as easily as
ordinary steel, but it is not stain or corrosion proof. Stain-
less steels can discolor or corrode if not maintained prop-
erly.
Stainless steels differ from ordinary carbon steels by the
amount of chromium present. It is this chromium that
provides an invisible protective lm on the surface called
chrome-oxide. This protective chrome-oxide lm on the
surface can be damaged or contaminated, which may
result in discoloration, staining, or corrosion of the base
metal.
Routine cleaning of the stainless steel surfaces will serve to
greatly extend the life of your product by removing contami-
nants. This is especially important in coastal areas which
can expose the stainless to severe contaminants such as
halide salts, (sodium chloride).
It is strongly recommended to periodically inspect and thor-
oughly clean crevices, weld points, under gaskets, rivets,
bolt heads, and any locations where small amounts of liquid
could collect, become stagnant, and concentrate contami-
nates. Additionally, any mounting hardware that is showing
signs of corrosion should be replaced.
Frequency of cleaning will depend upon the installation
location, environmental, and usage conditions.
The choice of a proper cleaning product is ultimately that
of the consumer, and there are many products from which
to choose. Depending upon the type of cleaning and the
degree of contamination, some products are better than
others.
Typically the most effective and efcient means for routine
cleaning of most stainless steel products is to give the sur-
faces a brisk rubbing with a soft cloth soaked in warm water
and a gentle detergent, or mild mixture of ammonia. Rub-
bing should, to the extent possible, follow the polish lines of
the steel, and always insure thorough rinsing after cleaning.
Although some products are called "stainless steel clean-
ers," some may contain abrasives which could scratch the
surface, (compromising the protective chrome-oxide lm),
and some many contain chlorine bleach which will dull,
tarnish or discolor the surface if not completely removed.
After the stainless surfaces have been thoroughly cleaned,
a good quality car wax may be applied to help maintain the
nish.
Stainless steel products should never be installed, or stored
in close proximity to chlorine chemicals.
Whichever cleaning product you chose, it should be used
in strict accordance with the instructions of the cleaner
manufacturer.

19
CARE AND USE/INSTALLATION

PROFITEZ AU MAXIMUM DE VOTRE
ENTRETIEN ET UTILISATION / INSTALLATION
LM15REF / LM24REF
RÉFRIGÉRATEURS D'EXTÉRIEUR

3
ENTRETIEN ET UTILISATION / INSTALLATION
DÉBALLAGE DE VOTRE APPAREIL
Enregistrement de la garantie
XXXXXXXXXXXXXX
XXXXXXXXXXXXXX
XXXXXXXXXXXX
Figure 1
AVERTISSEMENT - Contribuez à éviter des tragédies
L’emprisonnement d’enfants et leur asphyxie ne sont pas
des problèmes du passé. Des épaves de réfrigérateurs
abandonnés continuent de présenter un danger - même
en restant dehors pour «juste quelques heures».
Si vous devez vous débarrasser de votre vieil appareil
de refroidissement, veuillez suivre ces instructions pour
aider à éviter des accidents possibles.
Avant de jeter votre vieux réfrigérateur ou congélateur :
• Démontez ses portes ou enlevez ses tiroirs.
• Laissez les étagères en place de façon à ce que des
enfants ne puissent pas facilement monter dedans.
!AVERTISSEMENT
Il est important que vous postiez votre carte de garantie
immédiatement après avoir pris livraison de votre réfrigérateur.
Les informations suivantes seront nécessaires au moment de
l’enregistrement de votre appareil :
Numéro de service/modèle
Numéro de série
Date d’achat
Nom et adresse du revendeur
Le numéro de service/modèle et le numéro de série se trou-
vent sur la plaque signalétique qui est située à l’intérieur de
l’armoire, du côté gauche près du haut (Voyez la ).Figure 1
Enlèvement de l’emballage intérieur
!AVERTISSEMENT
AVERTISSEMENT
RISQUE DE POIDS EXCESSIF
Utilisez deux personnes ou plus pour déplacer le produit.
Sinon vous pourriez vous blesser.
!ATTENTION
REMARQUE
Votre réfrigérateur a été emballé pour l’expédition avec toutes les
pièces pouvant être endommagées par le mouvement solidement
attachées. Enlevez les matériaux d’emballage intérieur et toute
bande maintenant des composants intérieurs en place. Le manuel
de l’utilisateur est envoyé à l’intérieur de l’appareil dans un sac en
plastique, accompagné de la carte d’enregistrement de la garan-
tie, et d’autres articles accessoires.
Important
Conservez votre carton d’emballage jusqu'à ce que votre réfri-
gérateur ait été complètement inspecté et trouvé en bon état.
S’il présentait des dommages, cet emballage serait nécessaire
comme preuve qu’ils sont survenus durant le transit. Ensuite
veuillez mettre tous ces matériaux d’emballage au rebut d’une
façon responsable.
Note pour le client
Cette marchandise a été soigneusement et complètement inspec-
tée avant de quitter notre usine. La responsabilité pour sa livrai-
son sûre a été assumée par le revendeur à l’acceptation de cette
expédition. Les réclamations pour perte ou dommages survenus
durant le transit sont à adresser au revendeur.
NE RENVOYEZ PAS DE MARCHANDISE ENDOMMA-
GÉE AU FABRICANT – DÉPOSEZ UNE RÉCLAMATION
AUPRÈS DU REVENDEUR.
Si l’appareil a été livré, manipulé ou entreposé dans une posi-
tion autre que debout, pendant une durée quelconque, laissez-le
reposer debout pendant au moins 24 heures avant de la brancher
électriquement. Cela assurera le retour de l’huile au compresseur.
Un branchement immédiat de l’appareil pourrait endommager des
parties internes.
AVERTISSEMENT - Jetez bien les sacs en plastique qui
représentent un risque de suffocation.
!AVERTISSEMENT

6ENTRETIEN ET UTILISATION / INSTALLATION
INSTALLATION DU DISPOSITIF ANTI-BASCULEMENT
Figure 7
Dispositif anti-basculement
Installation avec montage au sol
Instructions pas à pas
• TOUS LES APPAREILS PEU-
VENT BASCULER. IL PEUT EN
RÉSULTER DES BLESSURES
• INSTALLER LE DISPOSITIF ANTI-
BASCULEMENT LIVRÉ AVEC
L'APPAREIL
• SUIVEZ LES INSTRUCTIONS CI-
DESSOUS
!AVERTISSEMENT
La ferrure anti-basculement doit être placée sur le sol à
l’angle de droite ou de gauche de l’arrière du réfrigérateur,
comme c’est montré en Figure 7.
!ATTENTION
REMARQUE
Toute nition de sol doit être protégée avec une matière
appropriée pour éviter de l’endommager en bougeant
l’appareil.
Si votre réfrigérateur n’est pas placé sous un plan de travail
(autonome), vous devez utiliser un dispositif anti-bascule-
ment placé selon les instructions qui suivent. S’il est bougé
de sa position pour une quelconque raison, assurez-vous
que ce dispositif est correctement engagé quand vous
remettez l’appareil à sa place d’origine. Si le dispositif n’est
pas convenablement engagé, il y a un risque que le réfri-
gérateur bascule avec la possibilité de dégâts matériels ou
de blessures corporelles.
!AVERTISSEMENT
En cas d’installation sur un sol en béton, des chevilles pour
béton sont nécessaires (non fournies avec le kit anti-bas-
culement).
pour dénir la position de la ferrure :
1) Décidez de l’endroit où vous désirez placer le réfrigérateur.
Glissez-le en place, en faisant attention de ne pas endommager
le sol, en laissant 1 po (2,5 cm) de dégagement depuis le mur ar-
rière pour laisser de la place pour la ferrure anti-basculement.
2) Soulevez les pieds de mise à niveau arrière d’environ 1⁄4 po (6
mm) pour permettre l’engagement dans la ferrure anti-bascule-
ment. Mettez de niveau l’ensemble en ajustant les pieds de mise
à niveau selon le besoin. Le fait de tourner ces pieds en sens
antihoraire soulève l’appareil, et l’abaisse en les tournant en sens
horaire.
3) Assurez-vous que le réfrigérateur est bien à la place voulue,
puis marquez sa position sur le sol correspondant à l’arrière et
l’angle de côté du meuble où la ferrure anti-basculement sera
installée. Si l’installation ne permet pas le marquage à l’angle ar-
rière du meuble, tracez des lignes temporaires au sol en repérant
l’endroit de l’angle avant du meuble, sans tenir compte de la
porte. Glissez le réfrigérateur hors de cet emplacement. Depuis la
ligne temporaire prolongez la ligne de côté vers l’arrière de 211⁄2
po (54,6 cm) comme c’est montré en Figure 8.
4) Alignez la ferrure anti-basculement avec les marquages au
sol de façon à ce que son bord soit aligné avec la ligne de côté
du meuble, et que ses encoches en «V» soient alignées avec la
n de la ligne tracée de 21
1⁄2 po (54,6 cm) (Ligne à l’arrière de
l'armoire).
5) Fixez la ferrure anti-basculement au sol en utilisant la vis four-
nie (Voyez la Figure 8).
6) Glissez le meuble pour le remettre en place, en vous assurant
que le pieds de mise à niveau se glisse sous la ferrure anti-bas-
culement en engageant la fente.
211⁄2 po
(54,6 cm) Vue de dessous du
réfrigérateur
Dispositif
anti-basculement Pied de mise à niveau
Devant du
meuble

7
ENTRETIEN ET UTILISATION / INSTALLATION
INSTALLATION DU DISPOSITIF ANTI-BASCULEMENT
Quand la ferrure anti-basculement xée au sol est utilisée, la hau-
teur minimale ajustée de l’armoire est augmentée de
3⁄8 po
(9 mm).
REMARQUE
Figure 8
Figure 8a
211⁄2 po
(54,6 cm)
Encoches
en V dans la
ferrure
Encoches
en V dans la
ferrure
Ligne de côté du meuble
Ligne devant le meuble
Ligne derrière
le meuble
Pied de mise à
niveau arrière
Vis
Produkt Specifikationer
Mærke: | Lynx |
Kategori: | Køleskab |
Model: | LM15REFL |
Har du brug for hjælp?
Hvis du har brug for hjælp til Lynx LM15REFL stil et spørgsmål nedenfor, og andre brugere vil svare dig
Køleskab Lynx Manualer
3 April 2025
30 August 2024
30 August 2024
30 August 2024
30 August 2024
30 August 2024
30 August 2024
30 August 2024
30 August 2024
30 August 2024
Køleskab Manualer
- Avallon
- Triomph
- Vedette
- Foster
- Matrix
- Crosley
- Curtis
- Artusi
- Vinotemp
- Frigidaire
- La Sommelière
- Consul
- Nemco
- Nabo
- Salora
Nyeste Køleskab Manualer
25 Juli 2025
25 Juli 2025
25 Juli 2025
25 Juli 2025
25 Juli 2025
25 Juli 2025
25 Juli 2025
25 Juli 2025
25 Juli 2025
25 Juli 2025