Mikrotik Audience LTE6 kit Manual
Læs gratis den danske manual til Mikrotik Audience LTE6 kit (6 sider) i kategorien Adgangspunkt. Denne vejledning er vurderet som hjælpsom af 64 personer og har en gennemsnitlig bedømmelse på 5.0 stjerner ud af 32.5 anmeldelser.
Har du et spørgsmål om Mikrotik Audience LTE6 kit, eller vil du spørge andre brugere om produktet?
Produkt Specifikationer
| Mærke: | Mikrotik |
| Kategori: | Adgangspunkt |
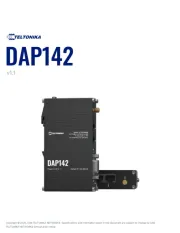
| Model: | Audience LTE6 kit |
| Vekselstrømsindgangsspænding: | 12 - 57 V |
| Bredde: | 251 mm |
| Dybde: | 129 mm |
| Højde: | 39 mm |
| Produktfarve: | Hvid |
| Ethernet LAN-porte (RJ-45): | 2 |
| Driftstemperatur (T-T): | -40 - 60 °C |
| Ethernet LAN-datahastigheder: | 10,100,1000 Mbit/s |
| Intern hukommelse: | 256 MB |
| Kabler inkluderet: | LAN (RJ-45) |
| Operativsystem installeret: | RouterOS |
| Strømforbrug (maks.): | 30 W |
| Placering: | Bord |
| Netværksstandarder: | IEEE 802.11a, IEEE 802.11ac, IEEE 802.11n |
| DC-in-stik: | Ja |
| AC-adapter inkluderet: | Ja |
| Harmoniseret systemkode (HS): | 85176990 |
| Processorfrekvens: | 716 MHz |
| Maksimal dataoverførselshastighed: | 1733 Mbit/s |
| Antenne type: | Intern |
| Flashhukommelse: | 128 MB |
| Strøm over Ethernet (PoE): | Ja |
| Indbygget processer: | Ja |
| 2.4 GHz: | Ja |
| 5 GHz: | Ja |
| Niveau for antennestyrke (maks.): | 4.5 dBi |
| Maksimal dataoverførselshastighed (5 GHz): | 1733 Mbit/s |
| Maksimal dataoverførselshastighed (2,4 GHz): | 300 Mbit/s |
Har du brug for hjælp?
Hvis du har brug for hjælp til Mikrotik Audience LTE6 kit stil et spørgsmål nedenfor, og andre brugere vil svare dig
Adgangspunkt Mikrotik Manualer


Adgangspunkt Manualer
- D-Link
- Conceptronic
- FlyingVoice
- Cambium Networks
- WatchGuard
- Teltonika
- Zebra
- ICC
- Bintec-elmeg
- Mercku
- IP-COM
- Luxul
- Bobcat
- Lindy
- Eminent
Nyeste Adgangspunkt Manualer