Bayco Products Inc. (BPI)
640 South Sanden Blvd. • Wylie, TX 75098 • USA
1-800-233-2155 • 1-469-326-9400
www.nightstick.com
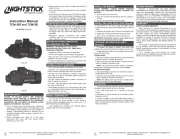
Instruction Manual
INTEGRITAS™ XPR-5582
US PATENT 9,713,217
EN
WARNINGS - INTRINSICALLY SAFE
y Warning: To prevent ignition of a hazardous atmosphere, do not locate
the charger for this product in the hazardous environment. The charger for
this product must be located in an area known to be non-hazardous ONLY.
y Warning: To prevent ignition of a hazardous atmosphere, do not attempt
to charge this product in the hazardous environment. This task must ONLY
be performed in an area known to be non-hazardous.
y Warning: Lithium-ion batteries must be used and charged properly.
Improper use can result in serious injury, re, or death.
y Warning: Use only the included and approved 5582-BATT rechargeable battery
pack from Bayco Products.
y Warning: Do NOT attempt to use any other rechargeable or non-
rechargeable batteries with this light.
y Warning: To prevent ignition of a hazardous atmosphere, do not open
the lens bezel in the hazardous environment. This task must ONLY be
performed in an area known to be non-hazardous.
y Warning: When exchanging the rechargeable battery pack, use only the
approved 5582-BATT rechargeable battery pack from Bayco Products.
y Warning: To prevent ignition of a hazardous atmosphere, the
rechargeable battery pack must only be exchanged in an area known to be
non-hazardous.
y Warning: Do not expose the rechargeable battery pack to water or salt
water, or allow the battery pack to get wet.
y Warning: Do not store the rechargeable battery pack with metallic objects
that may cause a short circuit.
y Warning: Substitution of components may impair intrinsic safety.
SPECIAL INSTRUCTIONS FOR INTRINSIC SAFETY
For personal safety, always conrm the rating of any known hazardous or
potentially hazardous location where the light is to be used.
INITIAL USE
Warning: To prevent ignition of a hazardous atmosphere, do not attempt to
charge this product in the hazardous environment. This task must ONLY be
performed in an area known to be non-hazardous.
Fully charge the XPR-5582 before the rst use, or if the battery is new or
has been unused for several months. The maximum charge time required is
approximately 6 hours.
DAILY USE
WARNING: TO PREVENT IGNITION OF A HAZARDOUS ATMOSPHERE,
DO NOT ATTEMPT TO CHARGE THIS PRODUCT IN THE HAZARDOUS
ENVIRONMENT. THIS TASK MUST ONLY BE PERFORMED IN AN AREA
KNOWN TO BE NON-HAZARDOUS.
y Use only the supplied Nightstick charger, 5582-BATT rechargeable
battery pack and AC or DC adapter. For best performance, charge the 5582
when the ashlight beam starts to dim.
y Connect the AC power adapter to the charger. The LED indicator will not
be illuminated at this point.
y With the ashlight facing forward, slide the 5582 into the charger until the
contacts snap into place.
y The LED indicator changes to constant red indicating the 5582 is properly
inserted into the charger and is charging. The LED indicator remains red until
the battery is fully charged. At full charge, the LED indicator turns green.
y The total time to fully charge the 5582 varies depending on the remaining
charge in the battery pack.
y To conrm a full charge, keep the 5582 in the charger and turn it on. The LED
indicator will change to red. Turn off the 5582. If the 5582 is fully charged, the
LED indicator will turn green. If not, it remains red until the charge is completed
and the LED indicator turns green. The 5582 will now be fully charged.
INS-XPR-5582-DL-26_120325
REPLACING LITHIUM-ION RECHARGEABLE BATTERY
WARNING: WHEN EXCHANGING THE RECHARGEABLE BATTERY PACK,
USE ONLY THE APPROVED 5582-BATT RECHARGEABLE BATTERY
PACK FROM BAYCO PRODUCTS.
WARNING: TO PREVENT IGNITION OF A HAZARDOUS ATMOSPHERE,
THE RECHARGEABLE BATTERY PACK MUST ONLY BE EXCHANGED IN
AN AREA KNOWN TO BE NON-HAZARDOUS.
y Loosen the screws located on the bottom of the light and remove the plate to
expose the battery pack.
y The battery is connected to the light with a wire that has a snap
connector. Remove the battery pack from the light by rst disconnecting the
wires that snap together.
y Using only the approved replacement 5582-BATT rechargeable battery
pack from Bayco Products, place the new battery pack into the housing and
reconnect the wires.
y Replace the base plate and tighten all the screws. CAUTION: Do NOT
overtighten the screws. Doing so may damage the threads and impact the
light’s intrinsic safety.
DIRECT WIRING CHARGER BASE INTO A VEHICLE
WARNING: CHARGER INPUT: 12 VDC MAX. MODIFYING A CIGARETTE
LIGHTER PLUG-IN DC ADAPTER CORD WILL VOID YOUR PRODUCT
WARRANTY.
12V PASSENGER VEHICLE / LIGHT TRUCK INSTALLATION
Parts needed: 12-Volt Direct Wire Kit (Part # NS-DW12 included)
IMPORTANT: Before attempting to modify your vehicle’s wiring, remove
the negative battery clamp and secure it.
y Connect red positive wire (labeled +) of 12-Volt Direct Wire Kit to a
positive power source (12VDC), either directly to the battery for constant
charging, or fuse panel for ignition switch-operated power.
y Connect black wire of 12-Volt Direct Wire Kit (labeled -) to a ground wire
or chassis ground.
Note: Direct battery connection will provide constant charging for your light
but should only be used in combination with a supplemental vehicle trickle
charger / shore power connection. Failure to provide this supplemental vehicle
charging source could result in draining the main vehicle battery.
12V+ COMMERCIAL VEHICLE / APPARATUS INSTALLATION
For commercial vehicles or re apparatus that produce more than 12VDC,
the 12-36 Volt
Regulator/Direct Wire Kit is required (Part #NS-DW1236 sold separately).
IMPORTANT: Before attempting to modify your vehicle’s wiring, remove
the negative battery clamp and secure it.
y Connect red wire of 12-36 Volt direct-wire adapter to a positive power
source (12-36VDC), either directly to the battery for constant charging, or
fuse panel for ignition switch-operated power.
y Connect black wire to a ground wire or chassis ground.
Note: Direct battery connection will provide constant charging for your
light but should only be used in combination with a supplemental vehicle
trickle charger / shore power connection. Failure to provide this supplemental
charging source could result in draining the main vehicle battery.
OPERATION
Turn Light On/Off:
Press and release the ashlight switch. The light will turn on in high
brightness mode. Press and release to turn off.
Select Brightness Level:
Press and hold the ashlight switch. The light will cycle from high to low
and back at a rate of approximately one mode per second and will continue
to cycle while the switch is held down. Release the switch when the desired
brightness level is reached.
Rear Light:
The rear green LED light stays on while ashlight is in operation
regardless of mode selected.
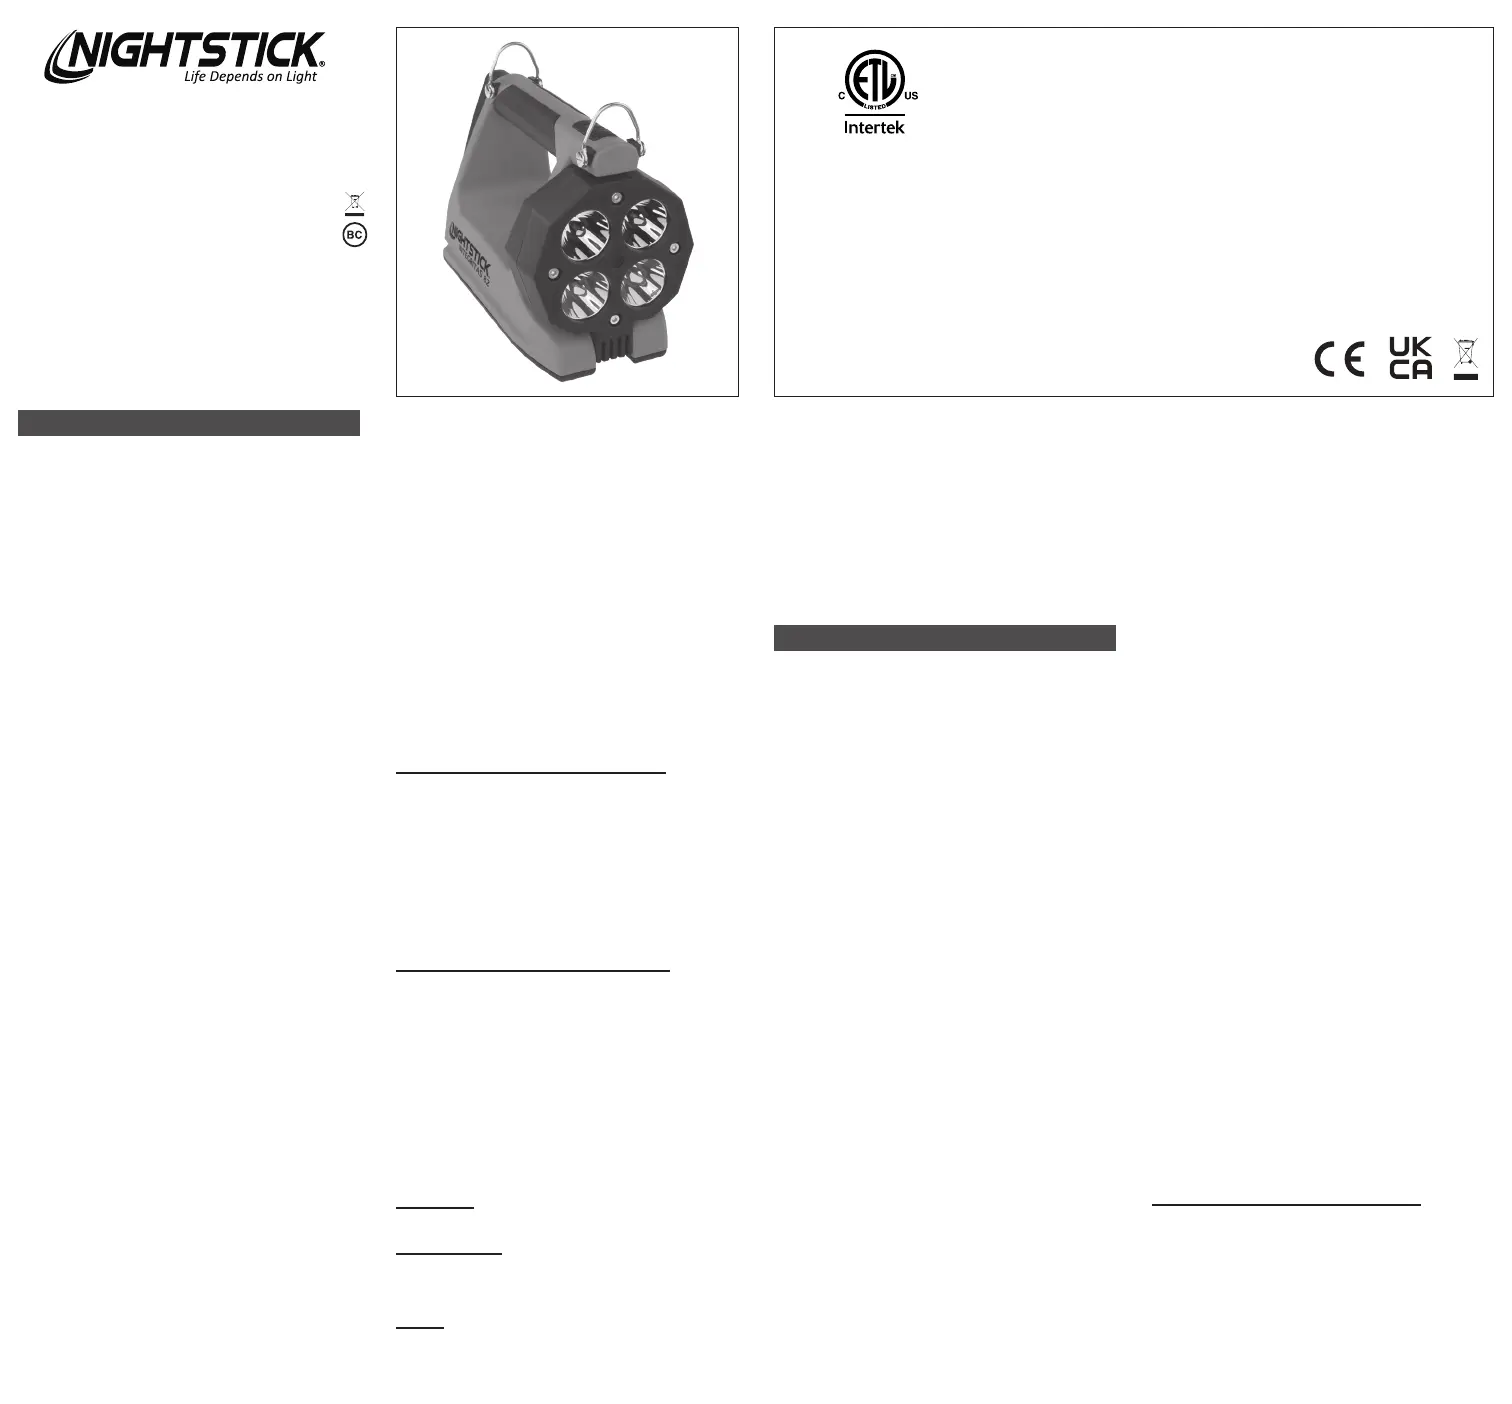
CLASS I DIV 2 GRPS A-D T3
CLASS II & III DIV 2 GRPS F-G T135°C
CLASS I ZONE 2 Group IIC T3
-20ºC ≤ Tamb ≤ +40ºC
3.6V/Cell 5582-BATT
INTRINSICALLY SAFE
SECURITE INTRINSEQUE
Bayco Products, Inc. XPR-5582
ID 4003544
640 S. Sanden Blvd., Wylie, TX 75098
WARNING: Risk of ignition - Do not open in a hazardous area.
AVERTISSEMENT: Ne pas ouvrir dans une zone dangereuse.
WARNING: Risk of ignition - Do not charge batteries in a hazardous area.
AVERTISSEMENT: Danger d’inflammation - Ne pas charger les piles dans une zone dangereuse.
Meets requirements of NFPA-1971-8.6 (2018).
Charger meets requirements of NFPA-1901-14.1.10.2 (2024)
LIMITED LIFETIME WARRANTY
Bayco Products, Inc. warrants this product to be free from defects in
workmanship and materials for the original purchaser’s lifetime. The Limited
Lifetime Warranty includes the LEDs, housing and lenses. Rechargeable
batteries, chargers, switches, electronics and included accessories are
warranted for a period of two years with proof of purchase. Normal wear and
failures which are caused by accidents, misuse, abuse, faulty installation and
lightning damage are excluded.
We will repair or replace this product should we determine it to be defective.
This is the only warranty, expressed or implied, including any warranty of
merchantability or tness for a particular purpose.
For a complete copy of the warranty, go to www.nightstick.com/nightstick-
product-support/warranties. Retain your receipt for proof of purchase.
FR
AVERTISSEMENTS - SÉCURITÉ INTRINSÈQUE
y Avertissement : Pour éviter l’inammation d’atmosphère dangereuse,
ne pas placer le chargeur pour ce produit dans une zone dangereuse. Le
chargeur pour ce produit doit être placé UNIQUEMENT dans une zone non
dangereuse.
y Avertissement : Pour éviter l’inammation d’atmosphère dangereuse,
ne pas essayer de recharger ce produit dans une zone dangereuse. Cette
tâche doit être effectuée UNIQUEMENT dans une zone non dangereuse.
y Avertissement : Les batteries au lithium-ion doivent être utilisées et chargées
correctement. Une mauvaise utilisation peut causer des blessures graves, un
incendie ou la mort.
y Avertissement : Veuillez utiliser uniquement le bloc-piles rechargeable
5582-BATT approuvé et inclut de Bayco Products.
y Avertissement : Ne PAS essayer d’utiliser d’autres piles rechargeables
ou non rechargeables avec cette lampe.
y Avertissement : Pour éviter l’inammation d’atmosphère dangereuse, ne
pas ouvrir la collerette de la lentille dans une zone dangereuse. Cette tâche
doit être effectuée UNIQUEMENT dans une zone non dangereuse.
y Avertissement : Lorsque vous remplacez le bloc-piles rechargeable,
veuillez utiliser uniquement le bloc-piles rechargeable approuvé 5582-BATT
de Bayco Products.
y Avertissement : Pour éviter l’inammation d’atmosphère dangereuse,
le bloc-piles rechargeable doit être remplacer uniquement dans une zone
non dangereuse.
y Avertissement : Ne pas mettre le bloc-piles rechargeable dans l’eau ou
l’eau salée, ou laisser le bloc-piles être mouillé.
y Avertissement : Ne pas entreposer le bloc-piles rechargeable avec des
objets métalliques cela pourrait causer un court-circuit.
y Avertissement : la substitution de composants peut compromettre la sécurité
intrinsèque.
DIRECTIVES PARTICULIÈRES POUR UNE SÉCURITÉ
INTRINSÈQUE
Pour votre propre sécurité, toujours conrmer la charge d’une zone
dangereuse ou potentiellement dangereuse quand la lampe de poche est
utilisée.
UTILISATION INITIALE
Avertissement : Pour éviter l’inammation d’atmosphère dangereuse, ne
pas essayer de charger ce produit dans une zone dangereuse. Cette tâche
doit être effectuée UNIQUEMENT dans une zone non dangereuse.
Charger complètement la lampe XPR-5582 avant la première utilisation ou
si la pile est neuve ou n’a pas été utilisée pendant plusieurs mois. Le temps
maximum de charge requis est d’une durée approximative de 6 heures.
UTILISATION QUOTIDIENNE
AVERTISSEMENT : POUR ÉVITER L’INFLAMMATION D’ATMOSPHÈRE
DANGEREUSE, NE PAS ESSAYER DE CHARGER CE PRODUIT DANS
UNE ZONE DANGEREUSE. CETTE TÂCHE DOIT ÊTRE EFFECTUÉE
UNIQUEMENT DANS UNE ZONE NON DANGEREUSE.
y Utiliser uniquement le chargeur Nightstick, le bloc-piles rechargeable
5582-BATT et l’adaptateur c.a. ou c.c. fournis. Pour de meilleurs résultats,
charger la lampe 5582 lorsque le faisceau de lumière commence à faiblir.
y Brancher l’adaptateur d’alimentation c.a. au chargeur. Le voyant DEL ne
sera pas allumé à ce stade.
y Avec la lampe de poche faisant face vers l’avant, glisser la lampe 5582
dans le chargeur jusqu’à ce qu’elle s’enclenche correctement.
y Le voyant DEL passe au rouge continu indiquant ainsi que la lampe 5582
est correctement insérée dans le chargeur et est en mode chargement.
y Le voyant DEL demeure rouge jusqu’à ce que la pile soit complètement
chargée. Lorsque le chargement est complété, le voyant DEL passe au vert.
y La durée totale d’une charge complète de la lampe 5582 varie selon la
charge restante dans le bloc-piles.
y Pour vous assurer d’une charge complète, garder la lampe 5582 dans
le chargeur et la mettre en marche. Le voyant DEL passera au rouge.
Éteindre la lampe 5582. Si la lampe 5582 est complètement chargée, le
voyant DEL passera au vert.
y Si ce n’est pas le cas, le voyant reste rouge jusqu’à la charge
complète pour, par la suite, passer au vert. La lampe 5582 est maintenant
complètement chargée.
REMPLACEMENT DU BLOC-PILES RECHARGEABLE AU
LITHIUM-ION
AVERTISSEMENT : LORSQUE VOUS REMPLACEZ LE BLOC-
PILES RECHARGEABLE, UTILISER UNIQUEMENT LE BLOC-PILES
RECHARGEABLE APPROUVÉ 5582-BATT DE BAYCO PRODUCTS.
AVERTISSEMENT : POUR ÉVITER L’INFLAMMATION D’ATMOSPHÈRE
DANGEREUSE, LE BLOC-PILES RECHARGEABLE DOIT ÊTRE
REMPLACÉ UNIQUEMENT DANS UNE ZONE NON DANGEREUSE.
y Desserrer les vis situées au bas de la lampe et enlever la plaque pour
exposer le bloc-piles
y La pile est reliée à la lampe avec un l qui comporte un connecteur
à boutons-pression pour pile. Enlever le bloc-piles de la lampe en
débranchant premièrement les ls qui s’encliquètent ensemble.
y En utilisant uniquement le rechange de bloc-piles rechargeable et
approuvé 5582-BATT de Bayco Products, placer le nouveau bloc-piles dans
le boîtier et rebrancher les ls.
y Replacer la plaque de base et visser toutes les vis. MISE EN GARDE :
Ne PAS trop serrer les vis. Si vous le faites, vous risquez d’endommager
les lets et affecter la sécurité intrinsèque de la lampe.
BASE DE CHARGEUR À CÂBLAGE DIRECT DANS LE
VÉHICULE
ATTENTION : ENTRÉE CHARGEUR: 12 VDC MAX. TOUTE MODIFICATION
DU CORDON L’ADAPTATEUR CC ENFICHABLE POUR PRISE ALLUME-
CIGARE INCLUS ANNULERA LA GARANTIE DE VOTRE PRODUIT.
INSTALLATION DANS UNE VOITURE/ CAMIONNETTE 12 V
Pièces nécessaires : trousse de fil direct 12 volts (Référence NS-
DW12 inclus)
IMPORTANT : Avant de tenter de modier le câblage de votre véhicule,
retirez la pince de batterie négative et sécurisez-la.
y Connectez le l rouge positif (étiqueté +) du trousse de l direct 12
volts à une source d’alimentation positive (12 V CC), soit directement à la
batterie pour une charge constante, soit à un panneau de fusibles pour une
alimentation à l’allumage.
y Connectez le l noir de trousse de l direct 12 volts (étiqueté -) à un l de masse
ou à la masse du châssis.
EU AUTHORIZED REPRESENTATIVE:
Clever Rep AB, Box 1898 11674 Stockholm, Sweden
ar-contact@cleverrepresentative.eu