DCAM100FM
Installation
Instructions
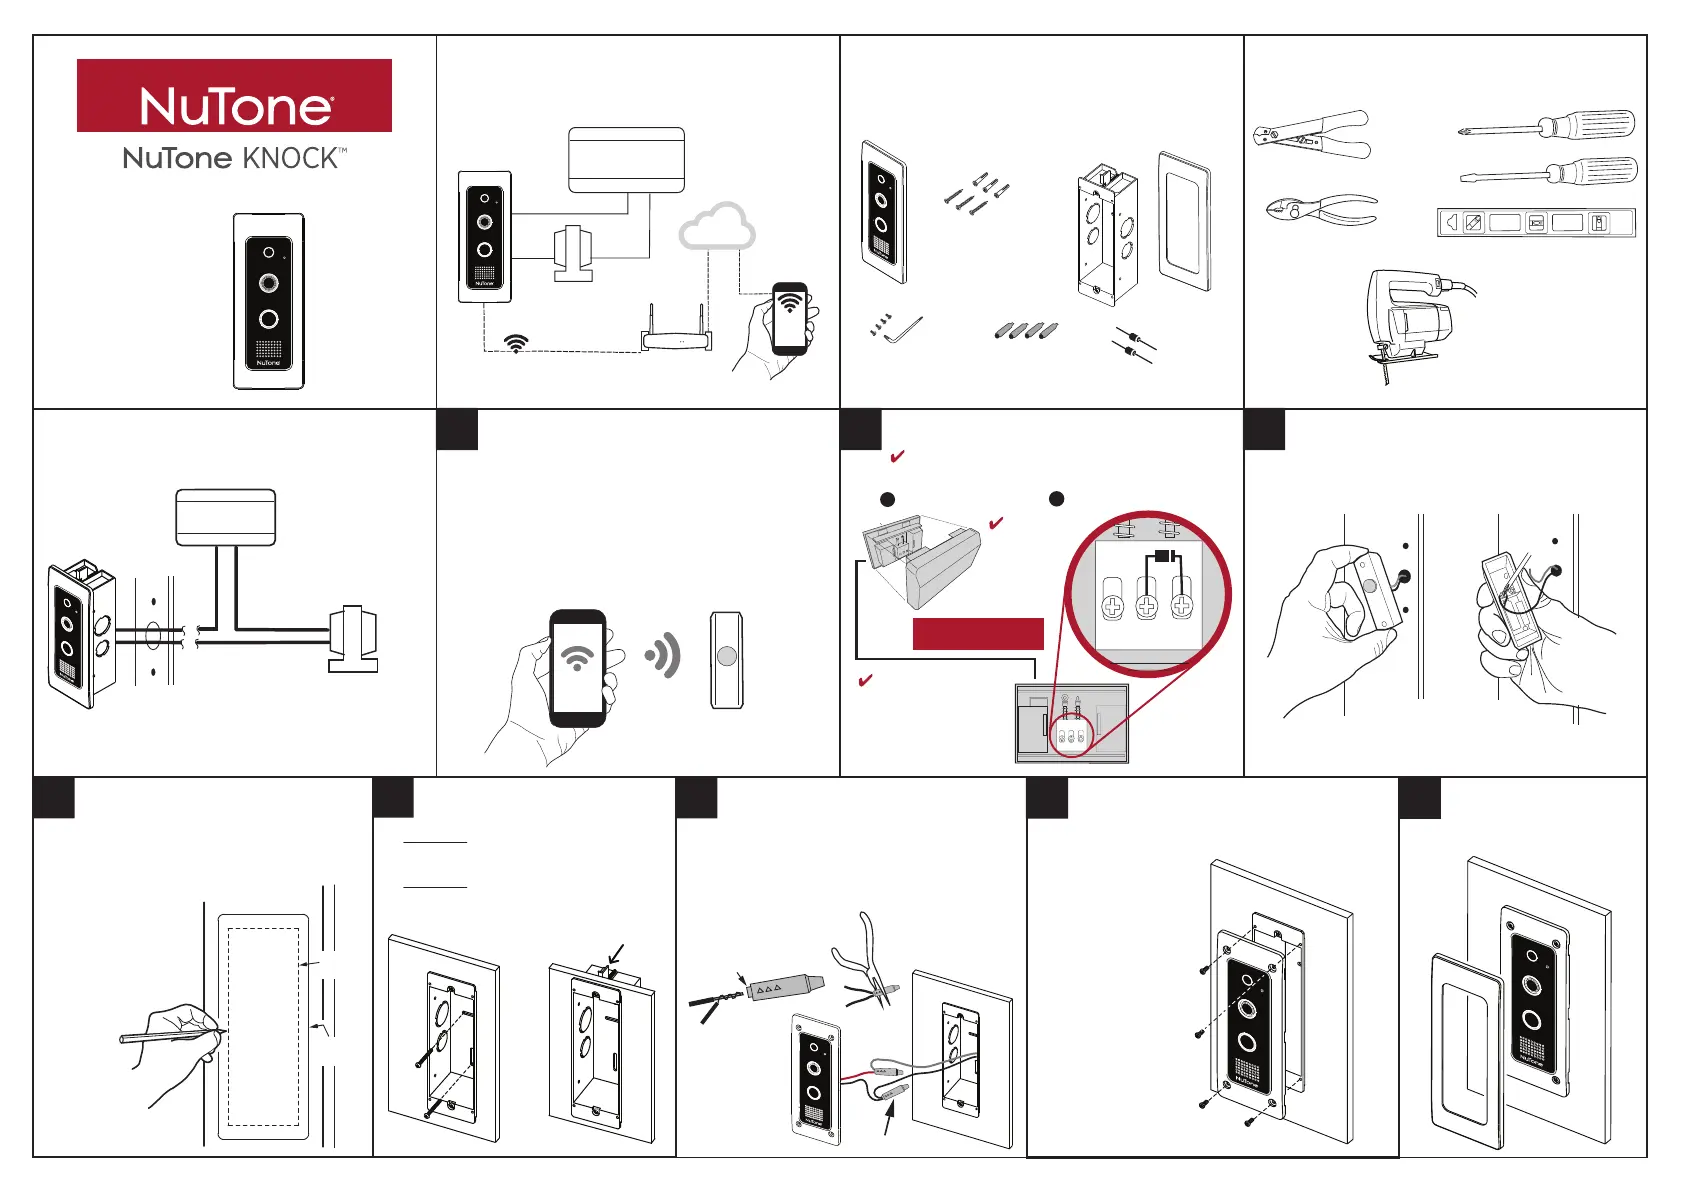
System Description
SMART
DOORBELL
CAMERA
DOORBELL
TRANSFORMER
CHIME BOX
RETUOR iFiW
WiFi COMMUNICATIONS
CLOUD
SMARTPHONE
Doorbell Camera Components
JIGSAW
WIRE STRIPPERS / CUTTER
PHILLIPS SCREWDRIVER
LEVEL
FLAT SCREWDRIVER
PLIERS
Tools For Installation
DIODES FOR
CHIME BOX (2)
WIRE
CONNECTORS (4)
TORX
WRENCH
TORX SCREW (4)
SMART
DOORBELL
CAMERA
ROUGH-IN
MOUNTING
BOX
(Sold separately)
CAMERA
TRIM
RING
PHILLIPS SCREWS
(3)
ANCHORS
(3)
SMARTPHONE
EXISTING
DOORBELL
Prepare for Installation
•
Go to existing doorbell location.
•
Use a Smartphone connected to the installations WiFi
router to confirm adequate signal strength (2 - 3 bars).
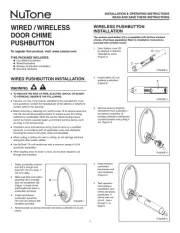
Existing Doorbell Removal
DISCONNECT WIRES
FROM PUSHBUTTON
DOORBELL
•
Remove existing doorbell pushbutton from location.
•
Disconnect wires from back of pushbutton.
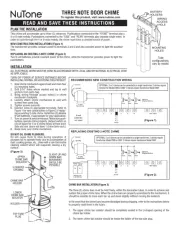
Cut Out for Rough-in Box
• Use template (provided) to trace the
rough-in cutout area in desired location.
• Use a level to align the
template.
• Use a saw to cut
out traced area
accurately.
Install Rough-in Box
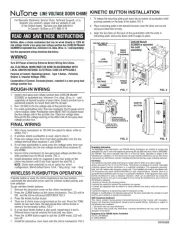
System Overview
CHIME BOX
DOORBELL TRANSFORMER
REAR
TRANS
FRONT
REAR TRANS
FRONT
1 OPEN CHIME BOX
CHIME BOX
FRONT VIEW
WITHOUT COVER
2 INSTALL DIODE AS SHOWN
IMPORTANT STEP
Installing Diode in Chime Box
NOTE: Not
compatible
with
electronic
chimes
1 2
4
5
VERIFY WiFi STRENGTH
NOTE: It is recommended to TURN POWER OFF
before performing any wiring.
NOTE:
When (2)
DCAM100FM’s are used,
connect a second diode
between REAR and
TRANS terminals.
Flush Mount
• Method 1: Ensure that screws will have
proper supporting material in the wall.
• Method 2: Wall board must be 1-inch or
less in thinkness to use tabs. Do not
overtighten, as tabs can break.
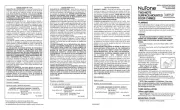
Wiring Doorbell Camera
1. TWIST THEN
FEED WIRES INTO
SHORT END OF
CONNECTOR
2
. CRIMP WIRES WITH
PLIERS ON SHORT END
OF CONNECTOR
• Run wires into rough in box for
electrical connections.
• Connect doorbell wires using weather-resistant
wire connectors (included).
TRACE
AND CUT
TRIM RING
LOCATION
6
Camera Installation / Security Screw
• Use 4 security screws
(provided) with tool
(provided) to secure
camera to rough
in box.
Complete Installation
• Press the trim ring into place.
7 8
CONNECTORS IN PLACE
- OR -
3