Thank you for purchasing this Olight Product. Please
read this manual carefully before use and keep it for
* The red beam level is Class 3R
* All above specifications are test results based on ANSI/NEMA
FL1 Standard. The tests are performed when the built-in battery
* The low battery indicator will turn red when the light is working
and the battery level is less than 10%.
Before first use please fully charge the product.
Connect the USB end of the charging cable to an external USB
power source, then attach the other end of the magnetic
charging cable to the charging port of the light. It takes no
more than 1 hour to fully charge the light ( For reference only.
When the USB power supply is insufficient to provide 5V
0.35A power capacity, the charging time will be longer
NOTE: A backup set of NYLOK adjustable screws is included.
* The NYLOK cone point set screw is used for vertical angle
* The NYLOK oval point set screw is used for horizontal angle
• DO NOT shine the light directly into human eyes. This may
cause temporary blindness, or permanent damage to the eyes.
• DO NOT charge this product with other charging cables except
the one included in the original package.
• DO NOT cover the light head, or place the light head down on
the ground when the light is on. The radiation energy of the light
may cause damage to the light itself, or even result in burning
• DO NOT leave the light in any type of fabric bag or fusible
plastic container under high temperature.
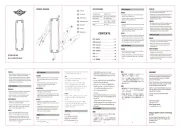
BALDR RL Mini ( With Battery )
Use the included Allen wrench to rotate the adjustment screws on
the side of the light to calibrate the vertical or horizontal angle of
the red beam, and finally sight in the red beam for accurate use.
The BALDR RL Mini can be used on most Glock or Picatinny
(mil-std-1913) type rails. The Glock adapter labeled “GL” is
already installed and a Picatinny (mil-std-1913) adapter is
included in the package. To install the light on Picatinny
(mil-std-1913) rails, the user needs to replace the “GL”
adapter with the included 1913 adapter using the screws and
wrench provided in the package.
The setting switch is magnetically sensitive, when close to
magnet, interference may occur.
• Fully charge the battery before storing the light for a long
Please keep the charging port clean. Wipe any dust off before
Please wipe the lens regularly. If the red beam spot is
abnormal, please wipe and clean the lens
The LED light will work for one minute at the top output mode
and gradually step down to 100 lumens within 2 minutes.
• The two switches can only be activated by pushing
downward. Pushing forward or on the side of the switch
Always attach the light on the rail could better protect the
switch and avoid damage caused by falling.
The BALDR RL Mini can only be charged with the included
MCC special charging cable, not compatible with other MCC
• NYLOK is a registered trademark of NYLOK LLC.
• Keep out of reach of children.
• Red beam light is bright and blinding - DO NOT shine at
aircraft or vehicles at any distance.
• If the light is stored for a long time or transported, please
turn the light setting switch to the Red Beam Only position.
Dongguan Olight E-Commerce Technology
Address: 4th Floor, Building 4, Kegu Industrial
Park, No 6 Zhongnan Road, Changan Town,
Dongguan City, Guangdong, China.
customer-service@olightworld.com
Visit www.olightworld.com to see our complete
product line of portable illumination tools.
Within 30 days of purchase: Contact the original seller for
Within 2 years of purchase: Contact Olight for repair or
This warranty does not cover normal wear and tear,
modifications, misuse, disintegrations, negligence,
accidents, improper maintenance, or repair by anyone other
than an authorized retailer or Olight itself.
A. 03, 25, 20213.0911.6010.9000
战术点亮: 向下按任意一按键并保持, 产品在按键按
常亮: 快速单击任意一按键, 产品持续点亮, 再次单
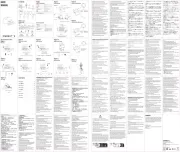
THREE LIGHT SETTINGS AVAILABLE: As the mark shows,
push the setting switch from left, middle, right to select red
beam only, white LED/red beam combined, white LED only
The ambidextrous switch on the BALDR RL Mini can only be
pressed down to activate the light. Pressing the side or front
of the switch will not turn it on.
Momentary ON: Press and hold down either switch for
momentary on. The light will stay on until the switch is
On/Off: Single click either switch for constant on. Single
click again to turn the light off.
Tre lysinnstillinger tilgjengelig: Som merket viser, trykk
innstillingsbryteren fra venstre, midten, høyre for å velge
kun rød stråle, hvit LED/rød stråle kombinert eller kun hvit
Bryteren på BALDR RL Mini kan benyttes på begge sider.
Den kan bare trykkes ned for å aktivere lyset. Hvis du
trykker på siden eller forsiden av bryteren, slås den ikke på.
AV/PÅ: Enkelt klikk for å slå på lykten med konstant lys.
Enkelt klikk igjen for å slå den av.
KOLME VALOASETUSTA KÄYTETTÄVISSÄ: Kuten merkit
näyttävät, työnnä kytkin vasemmalle kytkeäksesi punaisen
pistemäisen valon, keskelle kytkeäksesi valkoisen valon ja
punaisen pistemäisen valon yhdistelmän, oikealle
kytkeäksesi vain valkoisen valon.
BALDR RL Mini molempikätinen kytkin toimii painamalla
kumpaa tahansa kytkintä ylhäältä alaspäin. Kytkimen
painaminen sivusta tai suoraan takaa ei käynnistä
On/Off: Kytke valaisin päälle tai pois painamalla kumpaa
tahansa kytkintä kerran lyhyesti.
Hetkellinen käyttö: Käytä valaisinta hetkellisesti
painamalla kumpaa tahansa kytkintä pitkään. Valo sammuu
Momentær PÅ: Press og hold nede bryteren for momentær
på. Lyset vil være på til bryteren slippes.
Tre tillgängliga ljuslägen: Som markeringen visar,
inställningsknappen från vänster, mitten, höger för att välja
endast rött ljus, vitt och rött ljus samtidigt, samt endast
vitt ljus, i den ordningen.
Den dubbelmanövrerade brytaren på BALDR RL Mini kan
endast tryckas ned för att tända lampan. Trycks brytaren i
sidled eller framifrån, tänds inte lampan.
Av/på: Klicka en gång på brytaren för att tända lampan
konstant. Klicka igen för att släcka lampan.
Tillfällig tändning: Håll brytaren nedtryckt för att tända
tillfälligt. Lampan lyser tills det att brytaren släpps.
DRIE LICHTINSTELLINGEN BESCHIKBAAR: Zoals het
merkteken laat zien, drukt u op de instelschakelaar van
links, midden, rechts om alleen rode straal, witte LED / rode
straal gecombineerd, of alleen de witte LED lamp te
De tweehandige schakelaar op de BALDR RL Mini kan alleen
naar beneden worden gedrukt om de lamp te activeren. De
lamp reageert niet wanneer de schakelaar vanaf de zijkant
of voorkant wordt ingedrukt.
Aan/ Uit: Druk eenmaal op één van de schakelaars voor
“Constant Aan”. Druk nogmaals op de schakelaar om de
Kortstondig Aan: Houdt één van de schakelaars vast voor
“Kortstondig Aan”. De lamp blijft aan totdat de schakelaar
wordt losgelaten door de gebruiker.
dost pne trzy ustawienia wiatła:ę ś Jak wskazująznaki,
przesu cznik ustawie rodek, w prawo ń ą przeł ń ś w lewo, na
aby wybraćodpowiednio włą ą ą ęczenie czerwon wi zk / tryb
kombinowany (wi zka+dioda LED) / tylko dioda LEDą.
Aby wł czyć latark dwustronny włą ę ącznik na BALDR RL Mini
należy wciskać w dół,. Wciskanie go z boku lub od frontu nie
Wł czanie/wył czanie:ą ą Wciś ą ąnij wł cznik aby wł czyć
latark . Wci nij go ponownie, aby ję ś ą ą wył czyć
Wł czanie chwilowe: ąwci nij i przytrzymaj jedn ze stron ś ą
wł wiatło pozostanie włą Ścznika. ączone do momentu jej
zwolnienia przez u ytkownikaż
Drei Lichteinstellungen wählbar: Die Markierung zeigt die
aktuelle Einstellung und kann nach Links, die Mitte oder nach
Mitte: roter Strahl / weißes Licht
Доступно 3 режима работы фонаря
показано на фонаре, установите
переключатель в крайнее левое положение,
по центру или в крайнее правое положение,
чтобы выбрать красный лазер, белый свет
плюс красный лазер или только белый свет
В модели используется двухпозиционная
кнопка, которая включает фонарь при
нажатии вниз. При нажатии в других
направлениях фонарь не включится
фонаря быстро нажмите вниз на кнопку,
при повторном нажатии фонарь
удерживайте кнопку, фонарь будет светить
до тех пор, пока вы ее не отпустите
Der beidseitige Schalter muss zum Schalten nach unten
gedrückt werden. Seitlicher Druck führt nicht zum
AN/AUS: Ein einfacher Klick schaltet die Lampe ein. Ein
erneuter einfacher Klick schaltet die Lampe aus.
Momentary ON: Halten Sie den Schalter gedrückt geht die
Lampe an. Die Lampe geht aus sobald sie den Schalter
HÁROMFÉLE ÜZEMMÓD: A jelzéseknek
megfelelően a háromállású üzemmód
kapcsoló bal szélső, középső majd jobb szélső
állásba tolásával a lámpa vörös színű lézer,
kombinált fehérfényű lámpa / vörös színű lézer
és fehérfényű lámpa módra kapcsolható.
A BALDR RL Mini bekapcsolása csak a
duplagombos kapcsoló lefelé nyomásával
(billentésével) érhető el. A kapcsoló oldalra
vagy előre nyomásával a lámpa nem
Pillanatnyi bekapcsolás: A lámpa pillanatnyi
bekapcsolásához tartsa nyomva a duplagom-
bos kapcsoló bármelyik gombját. A lámpa a
gomb felengedéséig világít.
Be/Ki kapcsolás: A lámpa folyamatos fénnyel
történő bekapcsolásához nyomja le kattanásig
a duplagombos kapcsoló bármelyik gombját.
Újabb kattanásig történő gombnyomással a
Вибір режиму :Як показано на зображенні,
змінюйте положення перемикача у позиції
Зліва, Посередині, Справа, щоб вибрати
відповідно, лише лазер(червоний),
лазер(червоний) та ліхтар, лише ліхтар.
Двухскладовий перемикач BALDR RL Mini
може бути натиснутий лише вниз, щоб
увімкнути світло. Натискання на бічну або
передню частину вимикача не увімкне ліхтар.
Моментальне ввімкнення :натисніть і
утримуйте будь-який перемикач, щоб
увімкнути ліхтар. Ліхтар буде увімкнено, поки
вимикач не буде відпущено.
Увімкнення / вимкнення :натисніть один
раз будь-яким перемикачем, щоб ввімкнути
постійне світло. Ще одне натискання кнопки
Encendido momentáneo: Mantenga presionado cualquier
switch para encendido momentáneo. La linterna se apagará
cuando el usuario libere el switch.
TRES AJUSTES DE LUZ DISPONIBLES: Como se muestra en
el dibujo, presione el interruptor de configuración a izquierda,
centro o derecha para seleccionar solo el láser rojo, combinar
el LED blanco y láser rojo o solo accionar el LED blanco
El switch ambidiestro de la BALDR RL Mini solo puede
utilizarse para encender la linterna, La linterna no se
encenderá presionando el swith lateral o frontal.
On/Off: Presion solo una vez cualquier switch para
encendido. Repita la misma operación para apagado.
오른쪽으로 밀어 레드 레이저 , 화이트 라이트와
레드 레이저 동시, 화이트 라이트 모드로 선택 할
양측 스위치를 다 사용할 수 있어 오른손잡이와
왼손잡이 모두 불편함없이 사용 할 수 있습니다.
일시적 조명 ON/OFF: 후면 스위치를 누른체로
전원 ON/OFF: 후면 스위치 2개 중 1개를 1회
클릭하면 전원이 켜지며 다시 클릭하면 꺼집니다.
BALDR RL Mini にある左右二つのスイッチは、下
TROIS MODES D'ÉCLAIRAGE DISPONIBLES : Conformément
aux marquages sur la lampe, faites coulisser l’interrupteur à
gauche, au milieu ou à droite pour sélectionner le rayon rouge
seul, la LED blanche + le rayon rouge combinés, ou la LED
L'interrupteur ambidextre sur BALDR RL Mini ne peut être
appuyé que pour activer la lumière. Appuyer sur le côté ou
l'avant du commutateur ne l'allume pas.
Activé/Désactivé: un seul clic permet de commuter pour une
activation constante. Cliquez un seul clic pour l'éteindre.
Appuyez sur et maintenez enfoncé
l'interrupteur pour ON momentané. Lâchez l'interrupteur pour
L'interruttore ambidestro sulla BALDR RL Mini può essere
premuto solo per attivare la luce. Premendo lateralmente o
la parte anteriore dell’interruttore la torcia non si accende.
Accensione momentanea: tenere premuto uno dei due
interruttori per l'attivazione momentanea. La luce rimarrà
accesa fino al rilascio dell'interruttore.
On / Off: singolo clic su uno dei due pulsanti per
l’accensione fissa. Fare di nuovo clic per spegnere la luce.
TRE IMPOSTAZIONI DISPONIBILI: Come mostra
l’immagine, premere l'interruttore da sinistra verso il centro,
per selezionare solo il raggio rosso, ripetere per la luce
bianca ed il raggio rosso combinati, ancora una volta per
attivare solo la luce bianca.
DOSTUPNÉ TIETO NASTAVENIA SVETLA: Ako ukazuje
značka, stlačte prepínač nastavenia zľava, stred, doprava,
aby ste vybrali iba červený lúč, kombinovanú bielu LED /
červený lúč, iba bielu LED podľa toho.
Obojsmerný spínač na môže by stlačený len pre aktiváciu ť
svetla. Stlačením bočnej alebo prednej časti spínača sa
Zapnutie / vypnutie: Jedným kliknutím stlačte jeden z
prepínačov. Jedným kliknutím znova ho vypnete.
Momentary ON: Stlačte a podržte niektorý spínač na
chví . Svetlo zostane zapnuté, kým ho ľ ťu, svetlo bude svieti
เป็นไฟฉายและเลเซอร์แดง และตาแหน่งขวาสุดเป็นไฟฉายอย่างเดียว
การเปิดชั่วคราว: กดปุ่มค้างไว้เพื่อเปิดชั่วคราว ปล่อยปุ่มเมื่อต้องการ
เปิด / ปิด: กดปุ่มและปล่อย เพื่อเปิด ทาซ้าอีกครั้งเพื่อปิด
ระดับแสงมีให้เลือก 3 รูปแบบดังนี้: ที่ตัวไฟฉาย จะมีสัญลักษณ์ คือ
เมื่อเลื่อนสวิทซ์ไปตาแหน่งซ้ายสุด จะเป็นแสงเลเซอร์แดง, ตาแหน่งกลาง
EU-Declaration of Conformity can be found here:
https://olightworld.com/ec-declaration
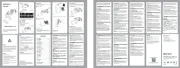
2. Slide the rail mount to your desired position.
1. Pull open the swing arm.
4. Position the Glock rail adapter (already installed) or
Picatinny rail adapter (to be installed first) to the desired
rail notch and then close the swing arm.
3. Use the included Allen wrench to ensure that the two
socket screws are tight. (Two backup socket screws are