WARNING! When using electric tools basic safety precautions should always be followed to reduce the risk of fire, electric
shock and personal injury.
-Read the whole manual carefully and make sure you know how to switch the tool off in an emergency, before operating the
tool. Save these instructions and other documents supplied with this tool for future reference.
-This appliance is not intended for use by persons (including children) with reduced physical, sensory or mental capabilities, or
lack of experience and knowledge, unless they have been given supervision or instruction concerning use of the appliance by a
person responsible for their safety.
Children should be supervised to ensure that they do not play with the appliance.
-Always check that the power supply corresponds to the voltage on the rating plate.
-The power supply for this product should be protected by a residual current device (rated at 30mA or less). A residual current
device reduces the risk of electric shock.
-Inspect tool cords periodically and if damaged have them replaced by a certified electrician.
-Always use an approved extension lead suitable for the power input of this tool. Before use, inspect the extension lead for
signs of damage, wear and ageing. Replace the extension lead if damaged or defective.
-When using an extension lead on a reel, always unwind the lead completely. Do not use a damaged extension lead, or an
extension lead that is not suitable for the power input of the tool. Failure to do so may result in a risk of fire and electric shock
and will void the warranty.
-This appliance incorporates an earth connection for functional purposes.
Rated Power: 500W (S1); 800W (S6: 15%)
Input Voltage: 230-240V ~ 50Hz
Blade: Ø200mm x Ø16 x 2.4mm
Riving Knife Thickness: 2.2mm
3 YEAR REPLACEMENT WARRANTY*
Your product is guaranteed for a period of If 36 months from the original date of purchase.
a product is defective it will be replaced in accordance with the terms of this warranty. Warranty
excludes consumable parts, for example: valve adapters and accessories.
*This product is intended for DIY use only and replacement warranty covers domestic use.
The following actions will result in the warranty being void.
• If the tool has been operated on a supply voltage other than that specified on the tool.
• If the tool shows signs of damage or defects caused by or resulting from abuse, accidents
• Failure to perform maintenance as set out within the instruction manual.
• If the tool is disassembled or tampered with in any way.
• Professional, industrial or high frequency use.
Ozito 25 Fox Drive, Dandenong South, VIC 3175, Australia.
2 x Locking Screws, 2 x Washers,
2x Spanners, Dust Extraction
Wear eye, ear & breathing
Regulatory Compliance Mark
Revolutions or reciprocations
Power tools that are no longer usable should not
be disposed of with household waste but in an
environmentally friendly way. Please recycle where
facilities exist. Check with your local council authority for
Recycling packaging reduces the need for landfill and raw
materials. Reuse of recycled material decreases pollution
in the environment. Please recycle packaging where
facilities exist. Check with your local council authority for
CARING FOR THE ENVIRONMENT
Spare parts can be ordered from the Special Orders Desk at your
local Bunnings Warehouse.
For further information, or any parts not listed here, visit
www.ozito.com.au or contact Ozito Customer Service:
E-mail: enquiries@ozito.com.au
TABLE SAW SAFETY WARNINGS
GENERAL POWER TOOL SAFETY WARNINGS
WARNING! Read all safety warnings, instructions, illustrations and specifications provided with this power tool. Failure
to follow all instructions listed below may result in electric shock, fire and/or serious injury.
Save all warnings and instructions for future reference.
The term “power tool” in the warnings refers to your mains-operated (corded) power tool or battery-operated (cordless) power
a) Keep work area clean and well lit. Cluttered or dark areas invite accidents.
b) Do not operate power tools in explosive atmospheres, such as in the presence of flammable liquids, gases or dust.
Power tools create sparks which may ignite the dust or fumes.
c) Keep children and bystanders away while operating a power tool. Distractions can cause you to lose control.
a) Power tool plugs must match the outlet. Never modify the plug in any way. Do not use any adapter plugs with
earthed (grounded) power tools. Unmodified plugs and matching outlets will reduce risk of electric shock.
b) Avoid body contact with earthed or grounded surfaces, such as pipes, radiators, ranges and refrigerators. There is an
increased risk of electric shock if your body is earthed or grounded.
c) Do not expose power tools to rain or wet conditions. Water entering a power tool will increase the risk of electric shock.
d) Do not abuse the cord. Never use the cord for carrying, pulling or unplugging the power tool. Keep cord away from
heat, oil, sharp edges or moving parts. Damaged or entangled cords increase the risk of electric shock.
e) When operating a power tool outdoors, use an extension cord suitable for outdoor use. Use of a cord suitable for
outdoor use reduces the risk of electric shock.
f) If operating a power tool in a damp location is unavoidable, use a residual current device (RCD) protected supply.
Use of an RCD reduces the risk of electric shock.
a) Stay alert, watch what you are doing and use common sense when operating a power tool. Do not use a power tool
while you are tired or under the influence of drugs, alcohol or medication. A moment of inattention while operating
power tools may result in serious personal injury.
b) Use personal protective equipment. Always wear eye protection. Protective equipment such as a dust mask, non-skid
safety shoes, hard hat or hearing protection used for appropriate conditions will reduce personal injuries.
c) Prevent unintentional starting. Ensure the switch is in the off-position before connecting to power source and/or
battery pack, picking up or carrying the tool. Carrying power tools with your finger on the switch or energising power
tools that have the switch on invites accidents.
d) Remove any adjusting key or wrench before turning the power tool on. A wrench or a key left attached to a rotating part
of the power tool may result in personal injury.
e) Do not overreach. Keep proper footing and balance at all times. This enables better control of the power tool in
f) Dress properly. Do not wear loose clothing or jewellery. Keep your hair and clothing away from moving parts. Loose
clothes, jewellery or long hair can be caught in moving parts.
g) If devices are provided for the connection of dust extraction and collection facilities, ensure these are connected
and properly used. Use of dust collection can reduce dust-related hazards.
h) Do not let familiarity gained from frequent use of tools allow you to become complacent and ignore tool safety
principles. A careless action can cause severe injury within a fraction of a second.
4) Power tool use and care
a) Do not force the power tool. Use the correct power tool for your application. The correct power tool will do the job
better and safer at the rate for which it was designed.
b) Do not use the power tool if the switch does not turn it on and off. Any power tool that cannot be controlled with the
switch is dangerous and must be repaired.
c) Disconnect the plug from the power source and/or remove the battery pack, if detachable, from the power tool
before making any adjustments, changing accessories, or storing power tools. Such preventive safety measures
reduce the risk of starting the power tool accidentally.
d) Store idle power tools out of the reach of children and do not allow persons unfamiliar with the power tool or these
instructions to operate the power tool. Power tools are dangerous in the hands of untrained users.
e) Maintain power tools and accessories. Check for misalignment or binding of moving parts, breakage of parts and
any other condition that may affect the power tool’s operation. If damaged, have the power tool repaired before use.
Many accidents are caused by poorly maintained power tools.
f) Keep cutting tools sharp and clean. Properly maintained cutting tools with sharp cutting edges are less likely to bind and
g) Use the power tool, accessories and tool bits etc. in accordance with these instructions, taking into account the
working conditions and the work to be performed. Use of the power tool for operations different from those intended
could result in a hazardous situation.
h) Keep handles and grasping surfaces dry, clean and free from oil and grease. Slippery handles and grasping surfaces do
not allow for safe handling and control of the tool in unexpected situations.
a) Have your power tool serviced by a qualified repair person using only identical replacement parts. This will ensure that the
safety of the power tool is maintained.
IN ORDER TO MAKE A CLAIM UNDER THIS WARRANTY
YOU MUST RETURN THE PRODUCT TO YOUR NEAREST
BUNNINGS WAREHOUSE WITH YOUR BUNNINGS
REGISTER RECEIPT. PRIOR TO RETURNING YOUR
PRODUCT FOR WARRANTY PLEASE TELEPHONE OUR
CUSTOMER SERVICE HELPLINE:
New Zealand: 0508 069 486
The benefits provided under this warranty are in addition to other rights and remedies which
are available to you at law.
Our goods come with guarantees that cannot be excluded at law. You are entitled to a
replacement or refund for a major failure and for compensation for any other reasonably
foreseeable loss or damage. You are also entitled to have the goods repaired or replaced if the
goods fail to be of acceptable quality and the failure does not amount to a major failure.
Generally you will be responsible for all costs associated with a claim under this warranty,
however, where you have suffered any additional direct loss as a result of a defective product
you may be able to claim such expenses by contacting our customer service helpline above.
TO ENSURE A SPEEDY RESPONSE PLEASE HAVE
THE MODEL NUMBER AND DATE OF PURCHASE
AVAILABLE. A CUSTOMER SERVICE REPRESENTATIVE
WILL TAKE YOUR CALL AND ANSWER ANY QUESTIONS
YOU MAY HAVE RELATING TO THE WARRANTY POLICY
WARNING! The appliance is not to be used by persons (including children) with reduced physical, sensory or mental
capabilities, or lack of experience and knowledge, unless they have been given supervision or instruction. Young
children should be supervised to ensure that they do not play with the appliance. Before connecting a tool to a power
source (mains switch power point receptacle, outlet, etc.) be sure that the voltage supply is the same as that specified on
the nameplate of the tool. A power source with a voltage greater than that specified for the tool can result in serious injury to
the user, as well as damage to the tool. If in doubt, do not plug in the tool. Using a power source with a voltage less than the
nameplate rating is harmful to the motor.
• This tool is designed to cut timber products only. Do not use the tool to cut any other materials. Do not cut firewood with
this tool. The irregular shape of firewood makes it unsafe to cut with this tool.
• Avoid using power tools for long periods of time without breaks. Vibration from tools can be transmitted into your hands
• Blade depth and bevel adjusting locking levers must be tight and secure before making a cut. If blade adjustment shifts
while cutting, it may cause binding and kickback. Ensure all clamps, levers and locking knobs are securely tightened prior
to operation. This will result in projects being produced accurately and safely.
• When the blade binds in material being cut, switch off the tool and wait for blade to come to a complete stop. Investigate
and take corrective action to eliminate cause of binding.
• Do not use the saw to perform rebate or groove cuts unless suitable guarding, such as tunnel guard, is fitted above the
saw table. Do not use the saw for slotting (stopped groove) cuts.
• Use only transportation devices and never use the cuttings guards for handling or transportation when transporting the
machine. Always ensure the blades are covered by the blade guard during transportation.
Guarding related warnings
• Keep guards in place. Guards must be in working order and be properly mounted. A guard that is loose, damaged, or
is not functioning correctly must be repaired or replaced.
• Always use saw blade guard and riving knife for every through-cutting operation. For through-cutting operations
where the saw blade cuts completely through the thickness of the workpiece, the guard and other safety devices help
reduce the risk of injury.
• Make sure the saw blade is not contacting the guard, riving knife or the workpiece before the switch is turned on.
Inadvertent contact of these items with the saw blade could cause a hazardous condition.
• Adjust the riving knife as described in this instruction manual. Incorrect spacing, positioning and alignment can make
the riving knife ineffective in reducing the likelihood of kickback.
• For the riving knife device to work, it must be engaged in the workpiece. The riving knife is ineffective when cutting
workpieces that are too short to be engaged with the riving knife. Under these conditions a kickback cannot be prevented
• Use the appropriate saw blade for the riving knife. For the riving knife to function properly, the saw blade diameter
must match the appropriate riving knife and the body of the saw blade must be thinner than the thickness of the riving
knife and the cutting width of the saw blade must be wider than the thickness of the riving knife.
Cutting procedures warnings
• DANGER: Never place your fingers or hands in the vicinity or in line with the saw blade. A moment of inattention or a
slip could direct your hand towards the saw blade and result in serious personal injury
• Feed the workpiece into the saw blade only against the direction of rotation. Feeding the workpiece in the same
direction that the saw blade is rotating above the table may result in the workpiece, and your hand, being pulled into the
• Never use the mitre gauge to feed the workpiece when ripping and do not use the rip fence as a length stop when
cross cutting with the mitre gauge. Guiding the workpiece with the rip fence and the mitre gauge at the same time
increases the likelihood of saw blade binding and kickback.
• When ripping, always keep the workpiece in full contact with the fence and always apply the workpiece feeding
force between the fence and the saw blade. Use a push stick when the distance between the fence and the saw blade
is less than 150 mm, and use a push block when this distance is less than 50 mm. “Work helping” devices will keep your
hand at a safe distance from the saw blade.
• Use only the push stick provided by the manufacturer or constructed in accordance with the instructions. This
push stick provides sufficient distance of the hand from the saw blade.
• Never use a damaged or cut push stick. A damaged or cut push stick may break causing your hand to slip into the saw
• Do not perform any operation “freehand”. Always use either the rip fence or the mitre gauge to position and guide
the workpiece. “Freehand” means using your hands to support or guide the workpiece, in lieu of a rip fence or mitre
gauge. Freehand sawing leads to misalignment, binding and kickback.
• Never reach around or over a rotating saw blade. Reaching for a workpiece may lead to accidental contact with the
• Provide auxiliary workpiece support to the rear and/or sides of the saw table for long and/or wide workpieces to
keep them level. A long and/or wide workpiece has a tendency to pivot on the table’s edge, causing loss of control, saw
blade binding and kickback.
• Feed the workpiece at an even pace. Do not bend, twist or shift the workpiece from side to side. If jamming occurs, turn
the tool off immediately, unplug the tool, then clear the jam. Jamming the saw blade by the workpiece can cause kickback
• Do not remove pieces of cut-off material while the saw is running. The material may become trapped between the
fence or inside the saw blade guard and the saw blade pulling your fingers into the saw blade. Turn the saw off and wait
until the saw blade stops before removing material.
• Use an auxiliary fence in contact with the table top when ripping workpieces less than 2mm thick. A thin workpiece
may wedge under the rip fence and create a kickback.
Kickback causes and related warnings
• Kickback is a sudden reaction of the workpiece due to a pinched, jammed saw blade or misaligned line of cut in the workpiece
with respect to the saw blade or when a part of the workpiece binds between the saw blade and the rip fence or other
fixed object. Most frequently during kickback, the workpiece is lifted from the table by the rear portion of the saw blade
and is propelled towards the operator. Kickback is the result of saw misuse and/or incorrect operating procedures or
conditions and can be avoided by taking proper precautions as given below.
• Never stand directly in line with the saw blade. Always position your body on the same side of the saw blade as
the fence. Kickback may propel the workpiece at high velocity towards anyone standing in front and in line with the saw
• Never reach over or in back of the saw blade to pull or to support the workpiece. Accidental contact with the saw
blade may occur or kickback may drag your fingers into the saw blade.
• Never hold and press the workpiece that is being cut off against the rotating saw blade. Pressing the workpiece
being cut off against the saw blade will create a binding condition and kickback.
• Align the fence to be parallel with the saw blade. A misaligned fence will pinch the workpiece against the saw blade
• Support large panels to minimise the risk of saw blade pinching and kickback. Large panels tend to sag under their
own weight. Support(s) must be placed under all portions of the panel overhanging the table top.
• Use extra caution when cutting a workpiece that is twisted, knotted, warped or does not have a straight edge
to guide it with a mitre gauge or along the fence. A warped, knotted, or twisted workpiece is unstable and causes
misalignment of the kerf with the saw blade, binding and kickback.
• Never cut more than one workpiece, stacked vertically or horizontally. The saw blade could pick up one or more
pieces and cause kickback.
• When restarting the saw with the saw blade in the workpiece, centre the saw blade in the kerf so that the saw
teeth are not engaged in the material. If the saw blade binds, it may lift up the workpiece and cause kickback when the
• Keep saw blades clean, sharp, and with sufficient set. Never use warped saw blades or saw blades with cracked
or broken teeth. Sharp and properly set saw blades minimise binding, stalling and kickback.
Table saw operating procedure warnings
• Turn off the table saw and disconnect the power cord when removing the table insert, changing the saw
blade or making adjustments to the riving knife or saw blade guard, and when the machine is left unattended.
Precautionary measures will avoid accidents.
• Never leave the table saw running unattended. Turn it off and don’t leave the product until it comes to a complete
stop. An unattended running saw is an uncontrolled hazard.
• Locate the table saw in a well-lit and level area where you can maintain good footing and balance. It should be
installed in an area that provides enough room to easily handle the size of your workpiece. Cramped, dark areas,
and uneven slippery floors invite accidents.
• Frequently clean and remove sawdust from under the saw table and/or the dust collection device. Accumulated
sawdust is combustible and may self-ignite.
• The table saw must be secured. A table saw that is not properly secured may move or tip over.
• Remove tools, wood scraps, etc. from the table before the table saw is turned on. Distraction or a potential jam can
• Always use saw blades with correct size and shape (diamond versus round) of arbour holes. Saw blades that do not
match the mounting hardware of the saw will run off-centre, causing loss of control.
• Never use damaged or incorrect saw blade mounting means such as flanges, saw blade washers, bolts or nuts.
These mounting means were specially designed for your saw, for safe operation and optimum performance.
• Never stand on the table saw, do not use it as a stepping stool. Serious injury could occur if the product is tipped or if
the cutting tool is accidentally contacted.
• Make sure that the saw blade is installed to rotate in the proper direction. Do not use grinding wheels, wire
brushes, or abrasive wheels on a table saw. Improper saw blade installation or use of accessories not recommended
may cause serious injury.
WARNING! BEFORE CLEANING THE APPLIANCE OR
CARRYING OUT ANY MAINTENANCE PROCEDURE,
MAKE SURE THAT IT IS DISCONNECTED FROM THE
POWER SUPPLY TO PREVENT ACCIDENTAL STARTING.
1. We recommend that you clean the appliance immediately after
2. Keep the safety devices free of dirt and dust as much as
possible. Wipe the equipment with a clean cloth.
3. Clean the appliance regularly with a damp cloth and some soft
soap. Do not use cleaning agents or solvents; these may be
aggressive to the plastic parts in the appliance. Ensure that no
water can get into the interior of the appliance.
Storage : Pull the mains plug out of the socket, switch off the tool
and make sure that it is secured in such a way that it cannot be
started up again by any unauthorised person.
Store the tool in a dry location which is not accessible to
Supply Cords : If replacement of the supply cord is necessary,
this has to be done by a certified electrician in order to avoid a
Note: Ozito Industries will not be responsible for any damage or
injuries caused by the repair of the tool by an unauthorised person
or by mishandling of the tool.
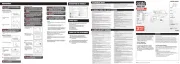
1. Remove the saw blade cover
2. Remove the blade nut by
rotating anti-clockwise using
3. Remove the outer flange and
Note: Ensure the mounting
of grease prior to fitting
4. Replace the blade onto
the spindle, ensuring the
blade direction matches the
directional arrows on the
5. Refit the outer flange and blade nut. Tighten using the supplied
spanners to secure the blade.
WARNING!: ENSURE THE TOOL IS DISCONNECTED
FROM THE POWER SUPPLY BEFORE PERFORMING ANY
WARNING!: NEVER TRY TO USE A BLADE THAT IS
LARGER THAN THE STATED CAPACITY OF THE TABLE
SAW. IT MIGHT COME INTO CONTACT WITH THE BLADE
GUARDS AND RISK PERSONAL INJURY OR DAMAGE TO
THE TABLE SAW. THIS WILL NOT BE COVERED UNDER
WARNING!: NEVER USE A BLADE THAT IS TOO THICK
TO ALLOW THE OUTER BLADE WASHER TO ENGAGE
WITH THE FLATS ON THE SPINDLE. IT WILL PREVENT
THE BLADE NUT FROM PROPERLY SECURING THE
WARNING!: USE ONLY SAW BLADES WHERE THE
RIVING KNIFE IS NOT THICKER THAN THE WIDTH
OF THE GROOVE CUT BY THE SAW BLADE AND NOT
THINNER THAN THE BODY OF THE SAW BLADE.
WARNING!: ENSURE THAT THE SAW BLADE IS
SUITABLE FOR THE MATERIAL TO BE CUT AND THAT
THE MAXIMUM POSSIBLE SPEED IS NOT LESS THAN
WARNING! ENSURE THAT ANY SPACERS AND SPINDLE
RINGS THAT MAY BE REQUIRED SUIT THE SPINDLE
AND BLADE THAT ARE FITTED.
Replacing The Table Insert
1. Unscrew the rotary knob and
take off the saw blade guard.
3. Take out the worn table
4. Fit the replacement table insert by following the above in
Replacing The Riving Knife
1. Unscrew the rotary knob and
take off the saw blade guard.
2. Remove the fastening screws.
3. Remove the fastening riving
4. Fit the riving knife by
Note: The distance between
Note: Make sure that the riving knife has been fitted straight and
not wobbly. It must be positioned in the center along an
imaginary line extending behind the saw blade, so that it is
not possible for the material to get jammed
WARNING! NEVER USE THE TABLE SAW WITHOUT THE
WARNING! TO PREVENT INCREASED LIKELIHOOD OF
INJURY, THE TABLE INSERT SHOULD BE CHANGED
WHENEVER IT IS WORN OR DAMAGED
WARNING! EVERY TIME THAT YOU CHANGE THE
SAW BLADE, CHECK THAT THE SAW BLADE GUARD
OPENS AND CLOSES AGAIN IN ACCORDANCE WITH
REQUIREMENTS. ALSO CHECK THAT THE SAW BLADE
SPINS FREELY IN THE SAW BLADE GUARD.
WARNING! EVERY TIME THAT YOU CHANGE THE SAW
BLADE, CHECK TO SEE THAT IT SPINS FREELY IN THE
TABLE INSERT IN BOTH PERPENDICULAR AND 45°