* Be careful not to pinch your ngers when setting up or folding up the stand.
* Do not adjust the height of the stand while a keyboard is mounted on it.
* Avoid inserting ngers into any of the holes in the stand. Otherwise, you risk injury.
* Before using the stand, make sure that the inner legs are locked. If the inner legs are not
locked, you risk injury as the result of the keyboard falling from the stand.
* Use the cable holder to manage the cables that are connected to the keyboard.
* Do not move the stand with the keyboard resting on it. Doing so may cause the keyboard
Do not open or perform any internal modi cations on the stand. (The only
exception would be where this manual provides speci c instructions which
should be followed in order to put in place user–installable options.)
Do not attempt to repair the stand, or replace parts within it (except when this
manual provides speci c instructions directing you to do so). Refer all servicing
to your retailer, the nearest Roland Service Center, or an authorized Roland
distributor, as listed on the “Information” page.
Never install the stand in any of the following locations.
• Subject to temperature extremes (e.g., direct sunlight in an enclosed vehicle,
near a heating duct, on top of heat-generating equipment); or are
• Damp (e.g., baths, washrooms, on wet oors); or are
• Exposed to steam or smoke; or are
• Subject to salt exposure; or are
• Exposed to rain; or are
• Subject to high levels of vibration and shakiness.
Make sure you always have the stand placed so it is level and sure to remain
stable. Never place it on stands that could wobble, or on inclined surfaces.
In households with small children, an adult should provide supervision until the
child is capable of following all the rules essential for the safe operation of the
Protect the stand from strong impact.
This stand for use only with speci c Roland musical instruments. Use with
other models is capable of resulting in instability causing possible injury. See
Even if you observe the cautions given in the owner’s manual, certain types of
handling may allow the keyboard to fall from the stand, or cause the stand to
overturn. Please be mindful of any safety issues before using the keyboard.
Never climb on top of the stand.
• Depending on the material and temperature of the surface on which you place the
stand, its rubber feet may discolor or mar the surface. You can place a piece of felt
or cloth under the rubber feet to prevent this from happening. If you do so, please
make sure that the stand will not slip or move accidentally.
• For everyday cleaning wipe the stand with a soft, dry cloth or one that has been
slightly dampened with water. To remove stubborn dirt, use a cloth impregnated
with a mild, non-abrasive detergent. Afterwards, be sure to wipe the stand
thoroughly with a soft, dry cloth.
• Never use benzine, thinners, alcohol or solvents of any kind, to avoid the possibility
of discoloration and/or deformation.
• In the interest of product improvement, the speci cations and/or appearance of
this stand are subject to change without prior notice.
Before using this stand, carefully read the sections entitled: “USING THE UNIT SAFELY” and “IMPORTANT NOTES.”
Additionally, the manual should be saved and kept on hand as a convenient reference.
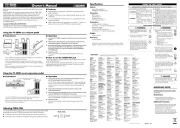
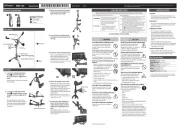
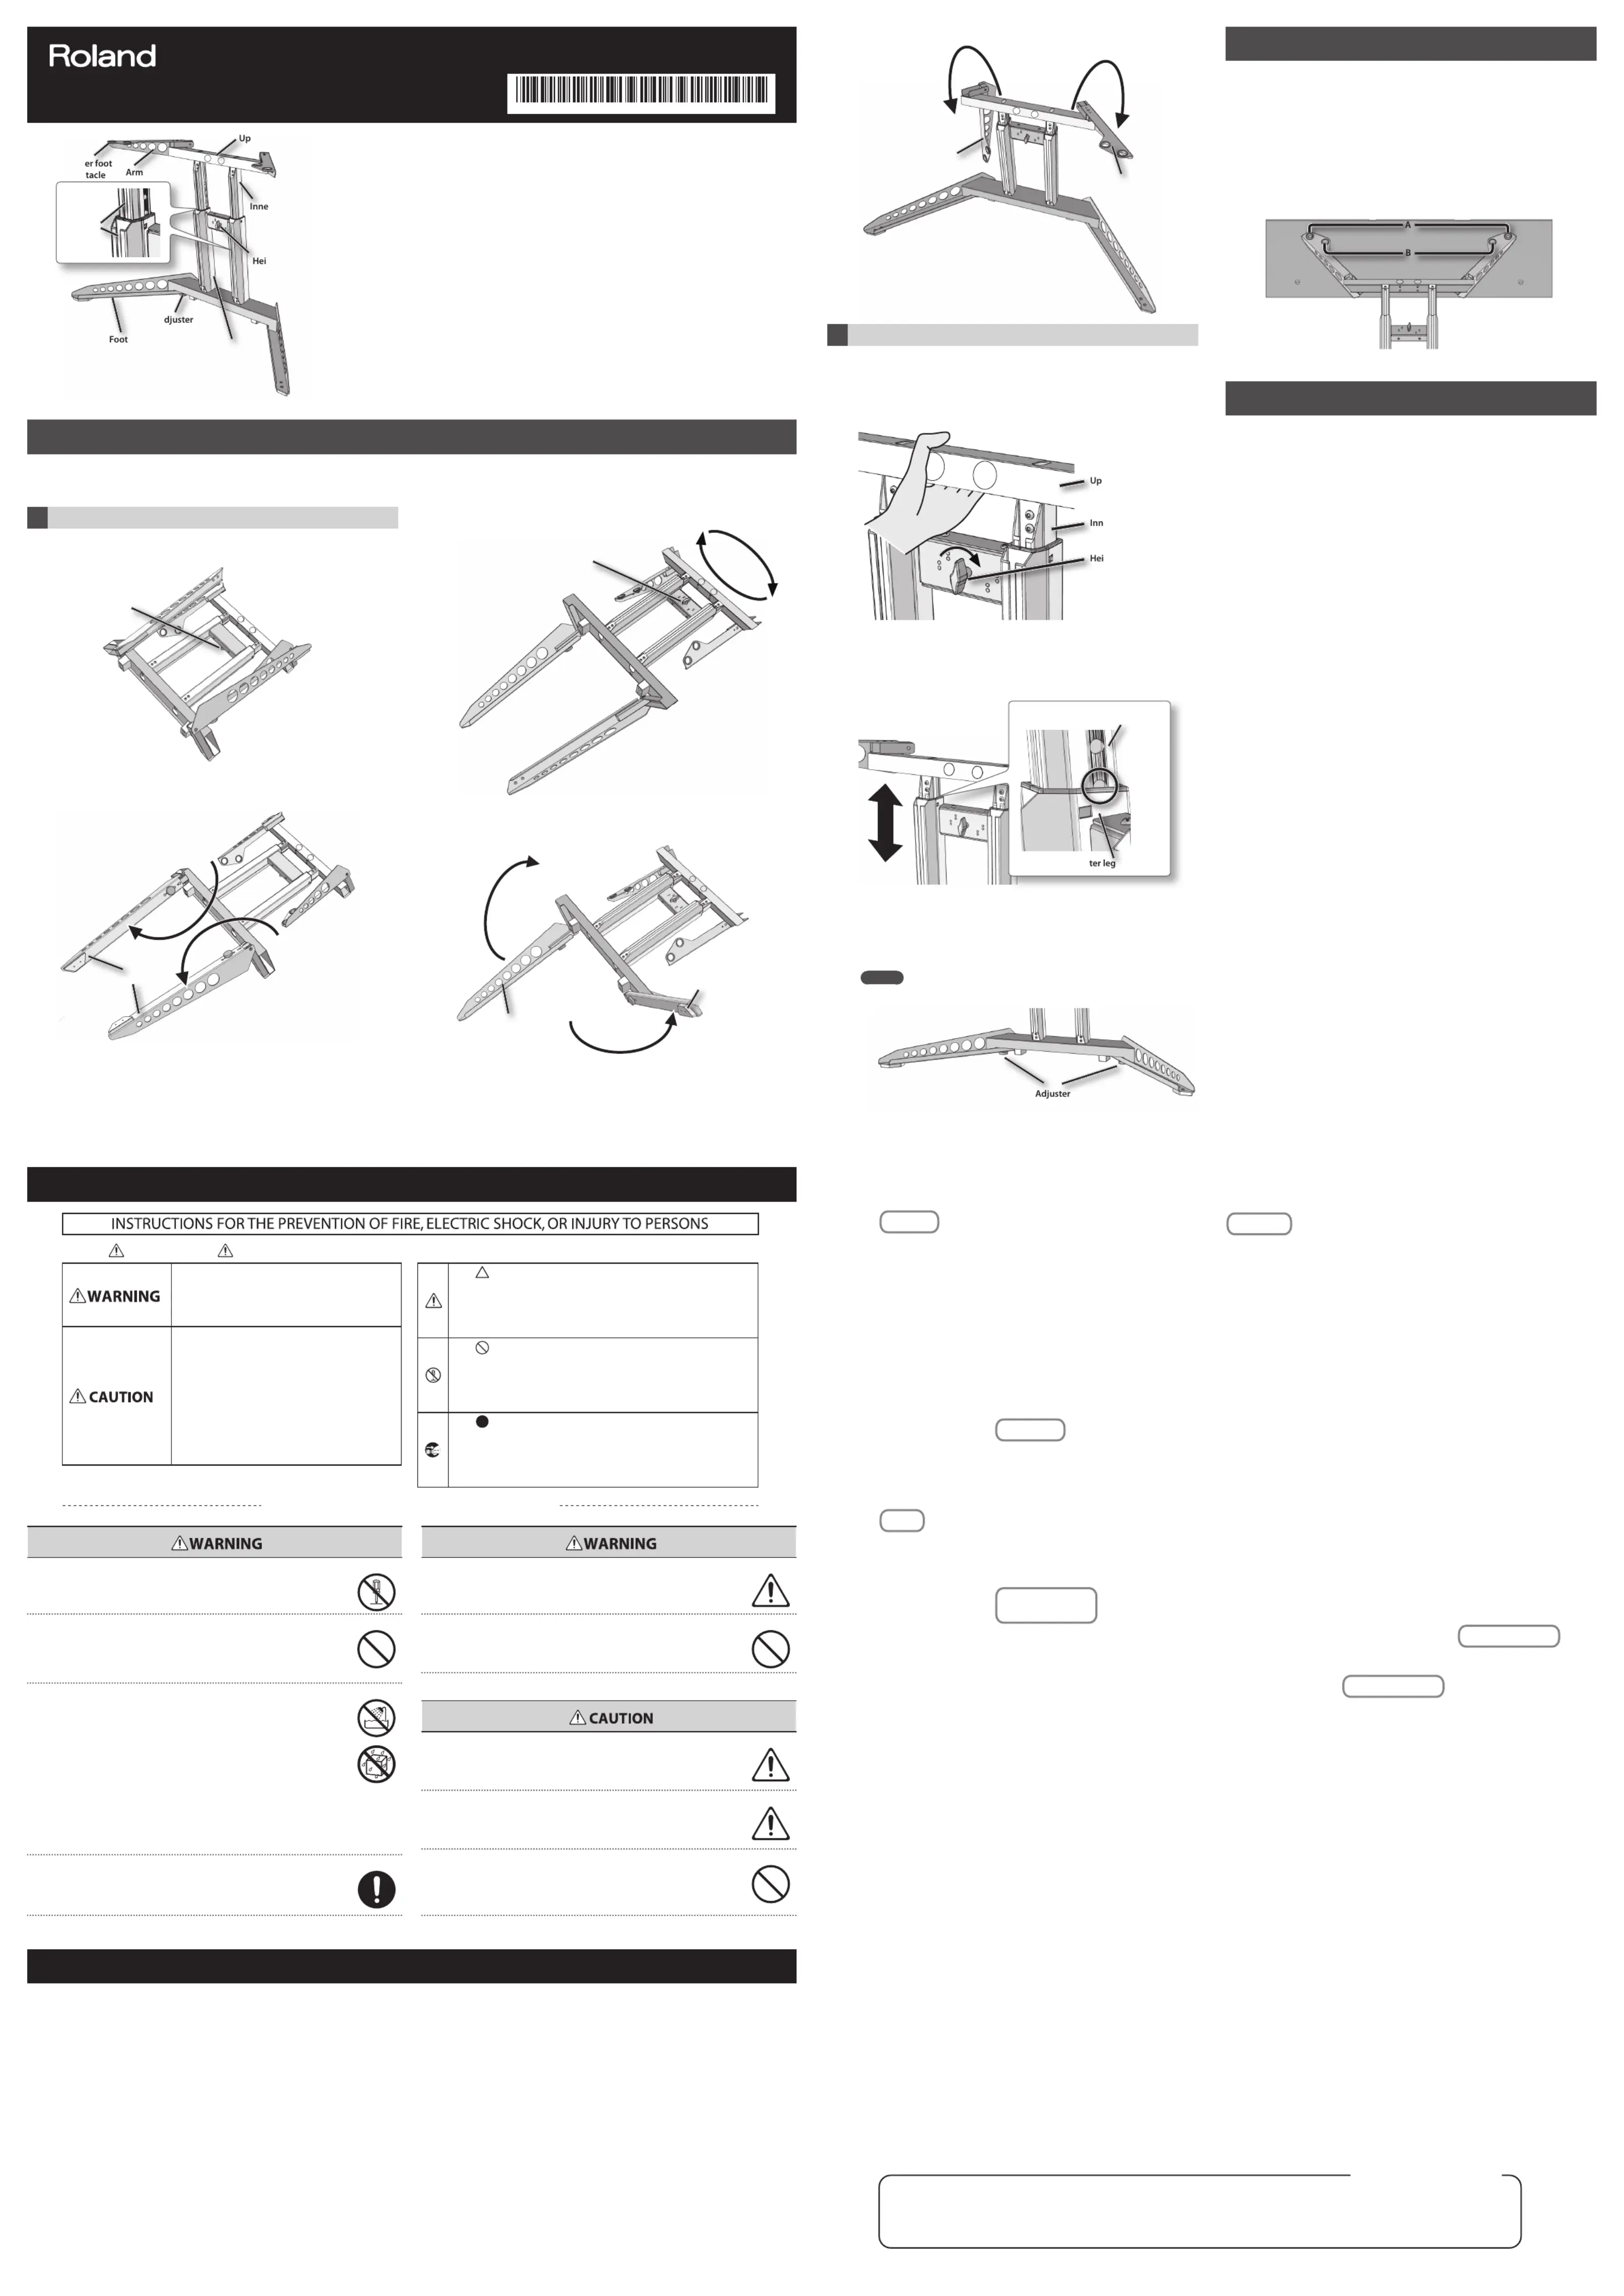
1 Setting up the feet and arms
1. Place the stand as illustrated below.
The Height adjustment knob
2. One at a time, pull out the feet.
The Height adjustment knob
4. Spread the feet all the way.
5. Place the stand upright.
Copyright ©2011 ROLAND CORPORATION
All rights reserved. No part of this publication may be reproduced in any form without the written permission of ROLAND CORPORATION.
Roland is a registered trademark of Roland Corporation in the United States and/or other countries.
6. One at a time, spread the arms all the way.
2 Adjusting the height of the stand
1. While rmly holding the upper beam with one hand, turn the
height adjustment knob clockwise.
The locking mechanism for the inner leg will be released, and the upper
2. While continuing to turn the height adjustment knob, lift the
upper beam until it’s at the desired height.
Adjust it so that the centers of the holes on the inner legs are aligned with
the edges of the outer legs.
3. Take your hand away from the height adjustment knob.
You should hear a clicking sound when the inner legs are properly locked.
* Try moving the upper beam up or down slightly, and con rm that the
If the stand seems loose, turn the adjuster to adjust the height.
1. Firmly insert the rubber feet on the bottom of the keyboard (at
its front, beneath the keys) into the rubber feet receptacles on
the arms (either A or B).
The keyboard has been set up properly once its rubber feet have been
inserted into the rubber feet receptacles of the arms.
* Check to make certain that both of the rubber feet are properly
inserted into the rubber feet receptacles. If the rubber feet are not
properly inserted into the rubber feet receptacles, the keyboard could
1. Disconnect all cables that are connected to the keyboard.
2. Remove the keyboard from the stand.
3. Remove the cables from the cable holder.
4. Using the procedure described in “Adjusting the height of the
stand,” adjust the stand so it’s at its lowest position.
* Try moving the upper beam up or down slightly, to check if the inner
5. Fold up the stand by performing the reverse of the steps
described in “Setting up the feet and arms.”
* When assembling the KS-J8, cover your work surface with a soft blanket or the cushioning materials in which the parts were packed. You risk scratching
the parts or the oor if you place the parts directly on the oor.
This product contains chemicals known to cause cancer, birth defects and other reproductive harm, including lead.
Used for instructions intended to alert the
user to the risk of injury or material
damage should the unit be used
* Material damage refers to damage or
other adverse effects caused with
respect to the home and all its
furnishings, as well to domestic animals
Used for instructions intended to alert the
user to the risk of death or severe injury
should the unit be used improperly.
The symbol alerts the user to things that must be
carried out. The specific thing that must be done is
indicated by the design contained within the circle. In the
case of the symbol at left, it means that the power-cord
plug must be unplugged from the outlet.
The symbol alerts the user to important instructions or
warnings.The specific meaning of the symbol is
determined by the design contained within the triangle. In
the case of the symbol at left, it is used for general
cautions, warnings, or alerts to danger.
The symbol alerts the user to items that must never be
carried out (are forbidden). The specific thing that must
not be done is indicated by the design contained within
the circle. In the case of the symbol at left, it means that
the unit must never be disassembled.
About WARNING and CAUTION Notices
ALWAYS OBSERVE THE FOLLOWING
When you need repair service, call your nearest Roland Service Center or authorized Roland
distributor in your country as shown below.
9, EBN Hagar Al Askalany Street,
T.O.M.S. Sound & Music (Pty)Ltd.
Londonderry Road, Ottery 7800
Roland Shanghai Electronics
5F. No.1500 Pingliang Road
Roland Shanghai Electronics
Co.,Ltd. (BEIJING OFFICE)
3F, Soluxe Fortune Building
63 West Dawang Road, Chaoyang
8th Floor, Railway Plaza, 39
Chatham Road South, T.S.T,
Rivera Digitec (India) Pvt. Ltd.
411, Nirman Kendra Mahalaxmi
Flats Compound O . Dr. Edwin
Moses Road, Mumbai-400011,
Ruko Garden Shopping Arcade
Jl.Letjend. S.Parman Kav.28
Jakarta Barat 11470, INDONESIA
TEL: (021) 5698-5519/5520
Roland Asia Paci c Sdn. Bhd.
45-1, Block C2, Jalan PJU 1/39,
Dataran Prima, 47301 Petaling
Makati, Metro Manila 1200,
North Road Sec. 2 Taipei 104,
100-108 Soi Verng Nakornkasem,
386 CACH MANG THANG TAM ST.
DIST.3, HO CHI MINH CITY,
Instrumentos Musicales S.A.
(1123) Buenos Aires, ARGENTINA
12 Webster Industrial Park
Wildey, St.Michael, BARBADOS
Parque Industrial San Jose
Cotia - Sao Paulo - SP, BRAZIL
Nataniel Cox #739, 4th Floor
Cra 43 B No 25 A 41 Bododega 9
JUAN Bansbach Instrumentos
Ave.1. Calle 11, Apartado 10237,
Zeelandia Music Center Inc.
Curacao, Netherland Antilles
Instrumentos Fernando Giraldez
Calle Proyecto Central No.3
75 Avenida Norte y Final Alameda
Edi cio No.4010 San Salvador,
Calzada Roosevelt 34-01,zona 11
Almacen Pajaro Azul S.A. de C.V.
Casa Veerkamp, s.a. de c.v.
Av. Toluca No. 323, Col. Olivar
de los Padres 01780 Mexico D.F.,
Altamira D'Este Calle Principal
de la Farmacia 5ta.Avenida
Boulevard Andrews, Albrook,
Panama City, REP. DE PANAMA
Distribuidora De Instrumentos
J.E. Olear y ESQ. Manduvira
Distribuciones Musicales SAC
Francisco Acuna de Figueroa
Av.las industrias edf.Guitar import
#7 zona Industrial de Turumo
Roland Central Europe N.V.
Houtstraat 3, B-2260, Oevel
HR - 10000 Zagreb, CROATIA
CZECH REPUBLIC DISTRIBUTOR
180 00 Praha 8, CZECH REP.
Skagerrakvej 7 Postbox 880
Roland Scandinavia As, Filial
Oststrasse 96, 22844 Norderstedt,
2045. Törökbálint, FSD Park 3. ép.,
E2 Calmount Park, Calmount
20020 Arese, Milano, ITALY
Lilleakerveien 2 Postboks 95
Roland Systems Group EMEA, S.L.
Rotunda Eng. Edgar Cardoso
4400-676 Vila Nova de Gaia,
535500 Gheorgheni, ROMANIA
Sutjeska br. 5 XS - 24413 Palic,
Roland Systems Group EMEA, S.L.
Paseo García Faria, 33-35
CH-4452 Itingen, SWITZERLAND
UA - 89600 Mukachevo, UKRAINE
Atlantic Close, SWANSEA SA7 9FJ,
Jadeh Makhsous Karaj (K-9),
Jalal Street, Reza Alley No 4 .
Halilit P. Greenspoon & Sons
8 Retzif Ha'alia Hashnia St.
P.O.Box 126 (Safat) 13002,
George Zeidan St., Chahine Bldg.,
Achra eh, P.O.Box: 16-5857
aDawliah Universal Electronics
Technical Light & Sound Center
Beyoglu, Istanbul, TURKEY
Zak Electronics & Musical
Zabeel Road, Al Sherooq Bldg.,
No. 14, Ground Floor, Dubai,
5480 Parkwood Way Richmond B.
Los Angeles, CA 90040-2938,
As of Feb. 1, 2011 (ROLAND)
* 5 1 0 0 0 2 0 6 2 4 - 0 1 *