Before using this unit, carefully read the sections entitled “USING THE UNIT SAFELY” and “IMPORTANT NOTES”
on back side. These sections provide important information concerning the proper operation of the unit.
Additionally, in order to feel assured that you have gained a good grasp of every feature of your new unit,
read Owner's Manual in its entirety. This manual should be saved and kept on hand as a convenient reference.
Main Specications
Channels 40 channels input x 2
40 channels output x 2
* The number of available channels will be changed by the device
that attach the XI-REAC.
Signal Processing Sampling Frequency 96 kHz, 48 kHz, 44.1 kHz
Connectors REAC ports (1, 2): RJ-45 EtherCon type
USB COMPUTER port: USB type B (inside of the panel, updates only)
Indicator REAC x 2
Power Consumption 1.7 W
Dimensions 120 (W) x 185 (D) x 40 (H) mm
4-3/4 (W) x 7-5/16 (D) x 1-5/8 (H) inches
* Protruding parts not included.
Weight 160 g
6 oz
Operation
Temperature
+5 to +40 degrees Celsius
+41 to +104 degrees Fahrenheit
Accessories Setup Guide, REAC cap x 2, REAC connector cover x 2, Ferrite core x 2
* In the interest of product improvement, the specications and/or appearance of this unit
are subject to change without prior notice.
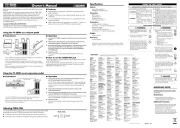
About REAC CablesDetaching the REAC Caps
By default, the REAC ports are tted with REAC caps. Remove these REAC caps when you use
the REAC ports.
Be careful to keep removed REAC caps from becoming lost.
Attaching the Ferrite Cores
Attach ferrite cores to the cables you connect to the REAC ports.
The ferrite cores are needed to prevent electromagnetic noise. Be sure to attach ferrite
cores to cables you connect to the REAC ports.
1. Open an included ferrite core by spreading apart the tabs at two places.
2. Attach the ferrite core at a location near the plug base.
Close the ferrite core by pressing down on each tab until it clicks into place.
MEMO
Connect the plug at the end where the ferrite core is attached to a REAC port on the
interface module.
Attaching the REAC Connector Covers
When using commercially available Category 5e Ethernet cables, attach the included REAC
connector covers.
MEMO
Remove the REAC connector covers when using EtherCon type REAC cables (SC-W20F, SC-
W100S, or W100S-R).
Be careful to keep removed REAC connector covers from becoming lost.
* 5 1 0 0 0 4 3 2 6 1 - 0 1 *
Setup Guide
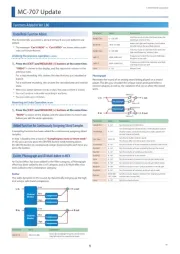
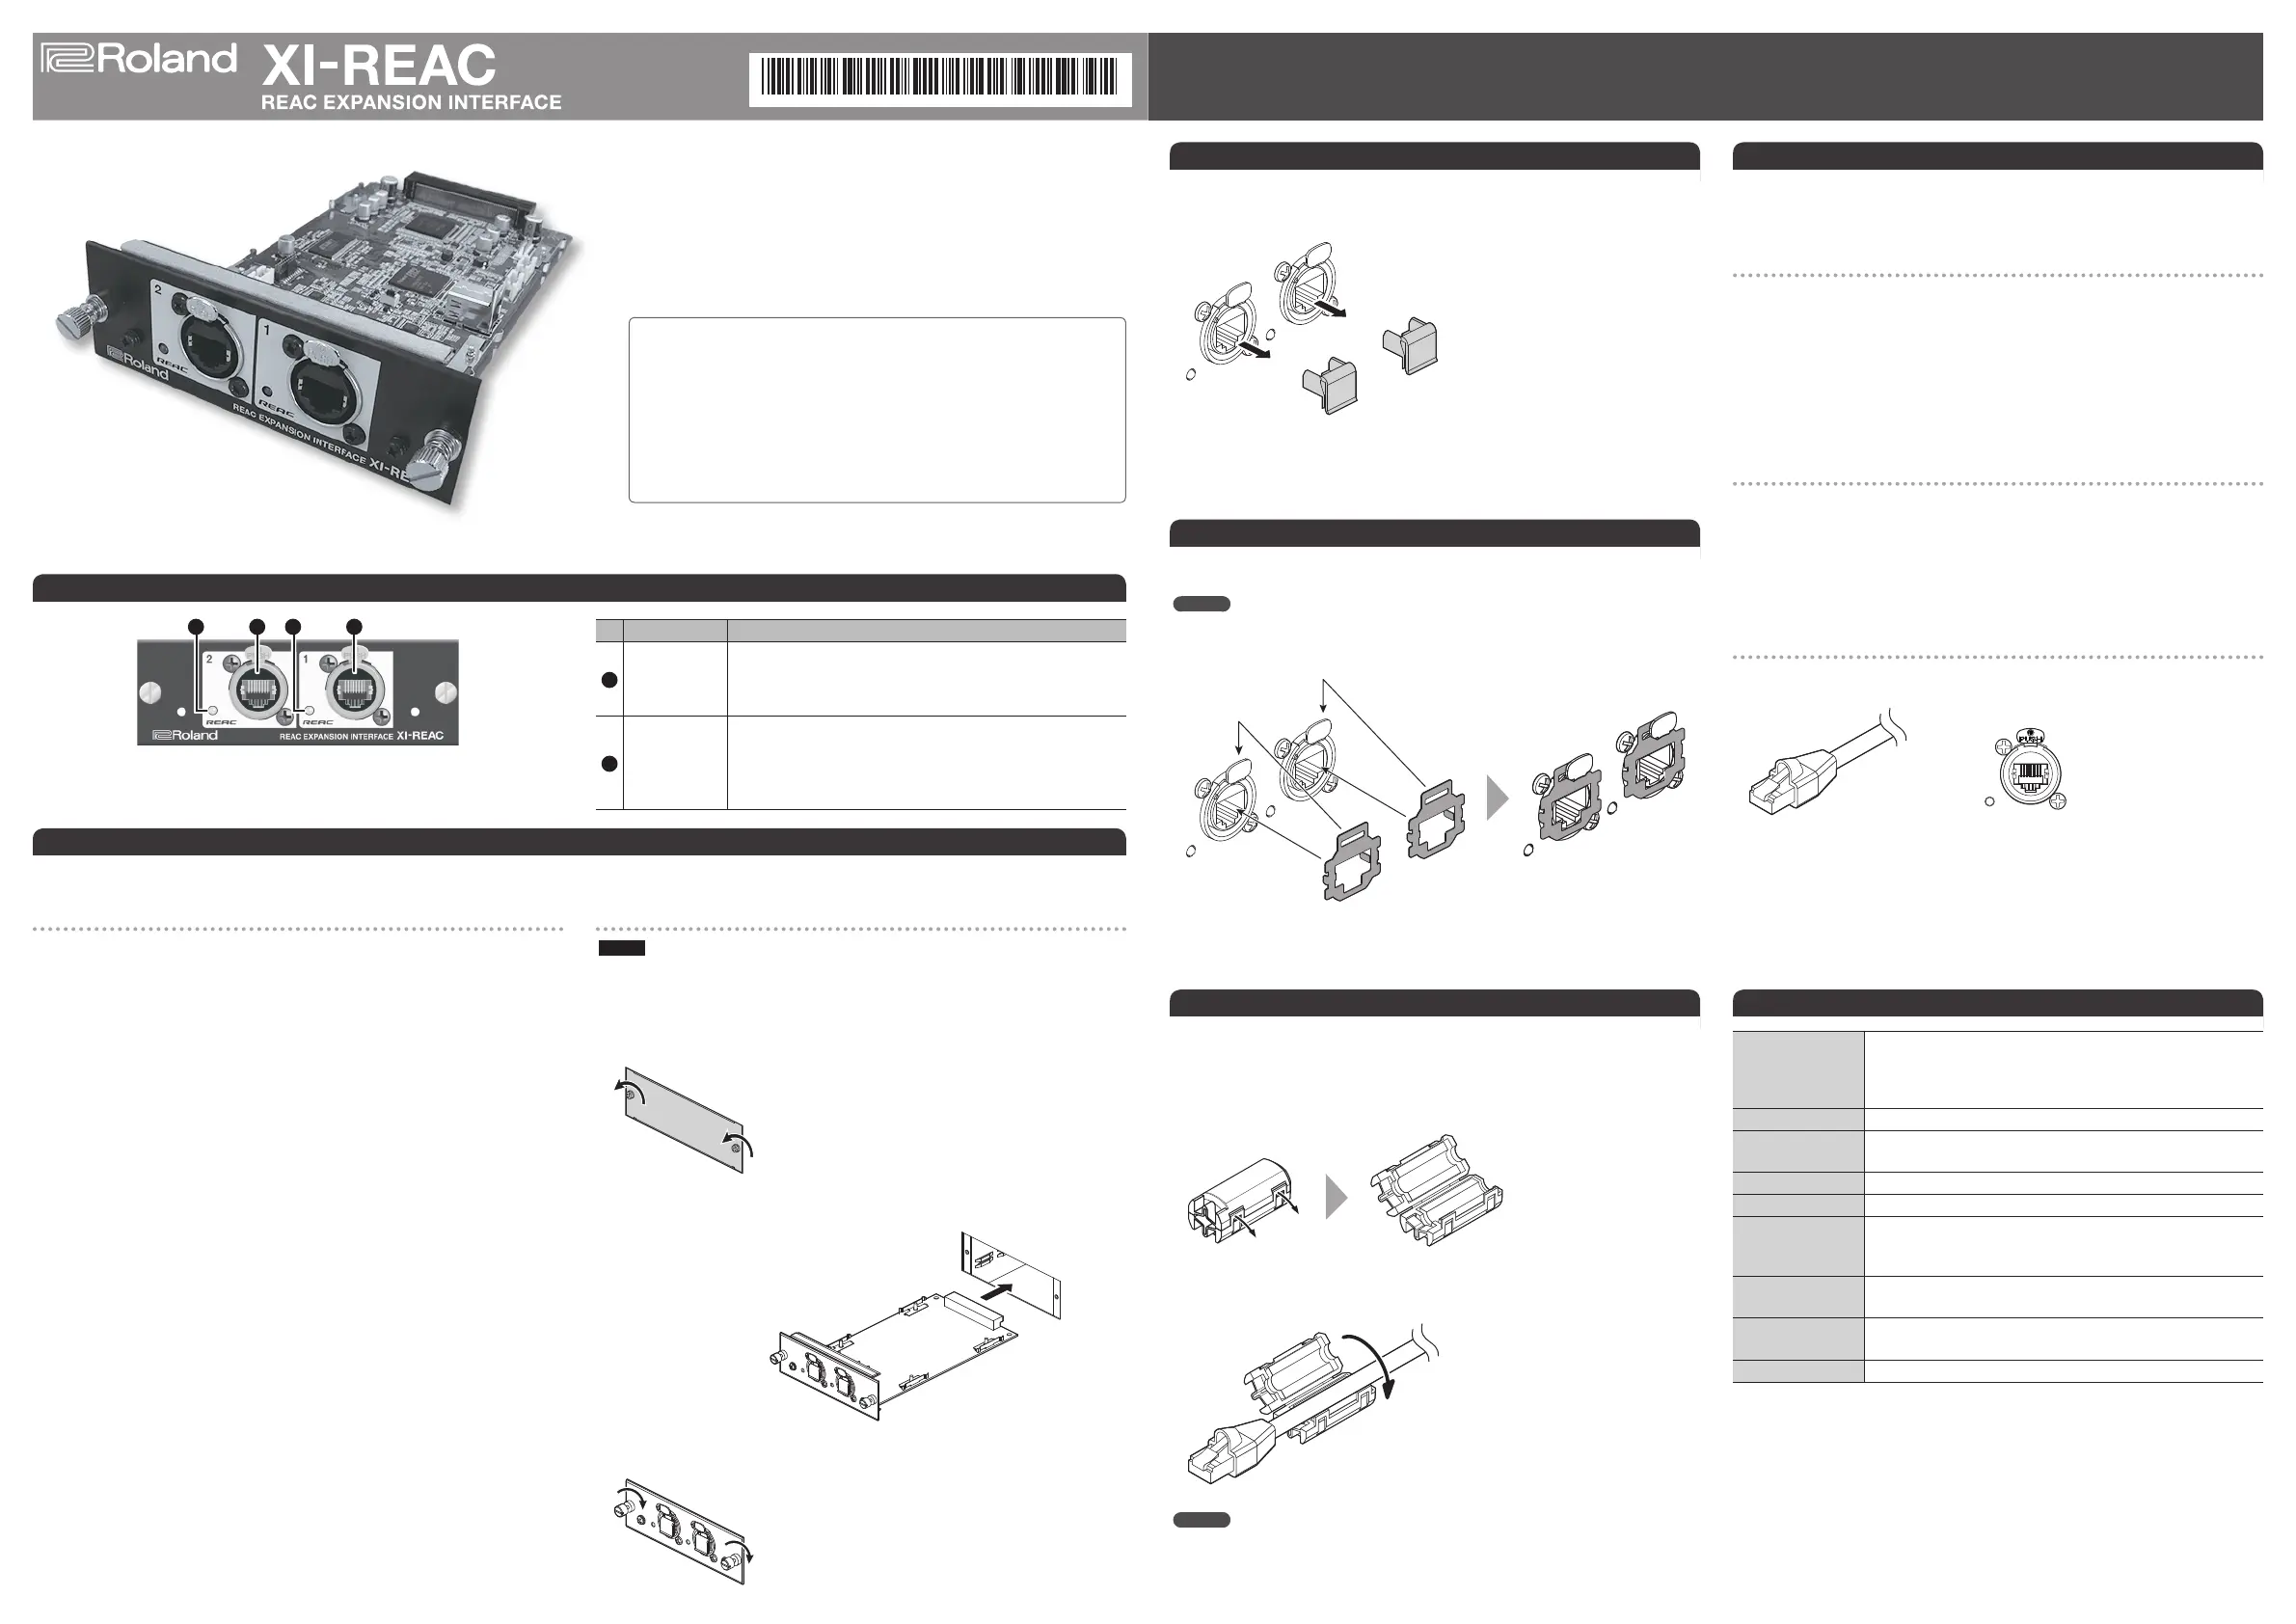
Panel Descriptions
1 12 2
No. Name Explanation
1
REAC ports (1, 2)
These are RJ45 connectors for connecting input/output units such as
the S-1608, S-0816, or S-4000S via Cat5e Ethernet cables.
* For more information about Ethernet cables that you can use to
make REAC connections, please read “About REAC Cables.”
2
REAC indicator
These indicate the status of REAC communication.
Unlit: No connection with a REAC device has been established.
Lit: Data is being received from the REAC device.
Blinking: The unit is in standby for receiving data from the REAC device.
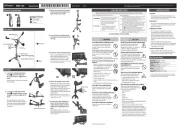
Installing the Interface Module
Install the interface module on a compatible device.
Important Notes on Handling
To avoid the risk of damage to internal components that can be caused by static electricity,
please carefully observe the following whenever you handle the interface module.
• Before you touch the interface module, always rst grasp a metal object (such as a water
pipe), so you are sure that any static electricity you might have been carrying has been
discharged.
• When handling the interface module, grasp it only by the panel or the interface module’s
edges. Avoid touching any of the electronic components or connectors.
• Before you connect any cables, make sure they do not carry a static electricity charge. Such
charges can be transmitted, for example, if the other end of the cable has been in contact
with a carpet (or other object) where there is a static electricity buildup.
• Save the bag in which the interface module was originally shipped, and put the interface
module back into it whenever you need to store or transport it.
Installing
NOTE
Before installing the interface module, you must rst always turn o the unit where
installing and unplug its power cord from the power outlet.
1. Loosen the EXPANSION SLOT mounting screws (2) on the device where you're
installing, and detach the panel cover.
2. Insert the interface module into the EXPANSION SLOT.
* Do not touch any of the interface module pathways or
connection terminals.
* Never use excessive force when installing a interface
module. If it doesn’t t properly on the rst
attempt, remove the interface module and
try again.
3. Secure the interface module in place using the mounting screws (2).
Copyright © 2015 ROLAND CORPORATION
Because Category 5e Ethernet cables are used, connecting REAC devices to one another
is simple and easy. These Cat 5e Ethernet cables are ordinarily used to make computer
network connections.
Ethernet Cable Types
• Crossover cable
The cable’s internal wiring crosses over at each RJ45 plug. This means that the connections
of the RJ45 plugs at either end of the signal cable are dierent
• Straight cable
The cable’s internal wiring is arranged identically at each end.
* With this interface module, you can use either crossover cables or straight cables.
For making connections to the REAC ports, we recommend using optionally available REAC
cables (SC-W20F, SC-W100S, W100S-R, etc.).
Important Notes on Handling Ethernet Cables
• Never apply strong force to Ethernet cables.
• Never wind (bend) an Ethernet cable using a coil radius of 25 millimeters or less, or
bend the cable sharply enough to kink it.
• Never bind bundled Ethernet cables too tightly.
• Never run lengths of multiple Ethernet cables in parallel over long distances.
• Keep Ethernet cables away from sources of noise (such as power cords, motors, and
uorescent lights).
Ethernet Connectors
Ethernet cables use RJ45 plugs. REAC devices are provided with an RJ45 connector at REAC
port.
RJ45 plug REAC RJ45 connector
For critically important communication, protecting RJ45 plugs and connectors is vital. In
such cases, rugged Neutrik EtherCon plugs are used for the REAC RJ45 plugs.
Using EtherCon RJ45 plugs makes possible the same kind of latchlocked connections as
when using XLR plugs.
Neutrik provides EtherCon RJ45 plugs, as well as EtherCon plugs that you can add to or use
to modify RJ45 plugs on third-party Ethernet cables.
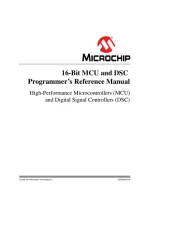
Thank you, and congratulations on your choice of the XI-REAC interface
module.
Installing this interface module on a Roland professional audio device
enables expanded audio input and output using REAC (Roland Ethernet
Audio Communication).
For information on devices on which the XI-REAC interface module can
be installed, check the Roland website.
http://proav.roland.com