Precision 9 Installation Guide™
The Precision™ 9 compass outputs magnetic heading for sail and powerboats. It connects to the vessel’s NMEA 2000
network, allowing you to set up and control it from display units on the network. The compass outputs magnetic heading
data suitable for autopilot steering as well as rate of turn, pitch, roll and heave.
¼Note: Pitch and roll are called trim and heel for B&G
The Precision™ 9 compass can be mounted on a at, horizontal or vertical surface, athwart ship or along ship. Select a
location that provides a solid mounting place free from vibration (as much as possible), and as close as possible to the vessel’s
center of pitch and roll, i.e. close to the water line.
It should be as far away as possible from:
• disturbing magnetic interferences, for example, engines (minimum of 2 m)
• large metal objects, particularly the autopilot drive unit.
On steel hull vessels, the compass can be mounted 0.75 - 1 m (2.5 - 3.3 ft) above the wheel house on a non-magnetic stand, if
no other options are available.
¼Warning: Never mount the compass upside down. Level the compass as close to horizontal as possible.
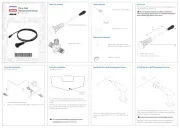
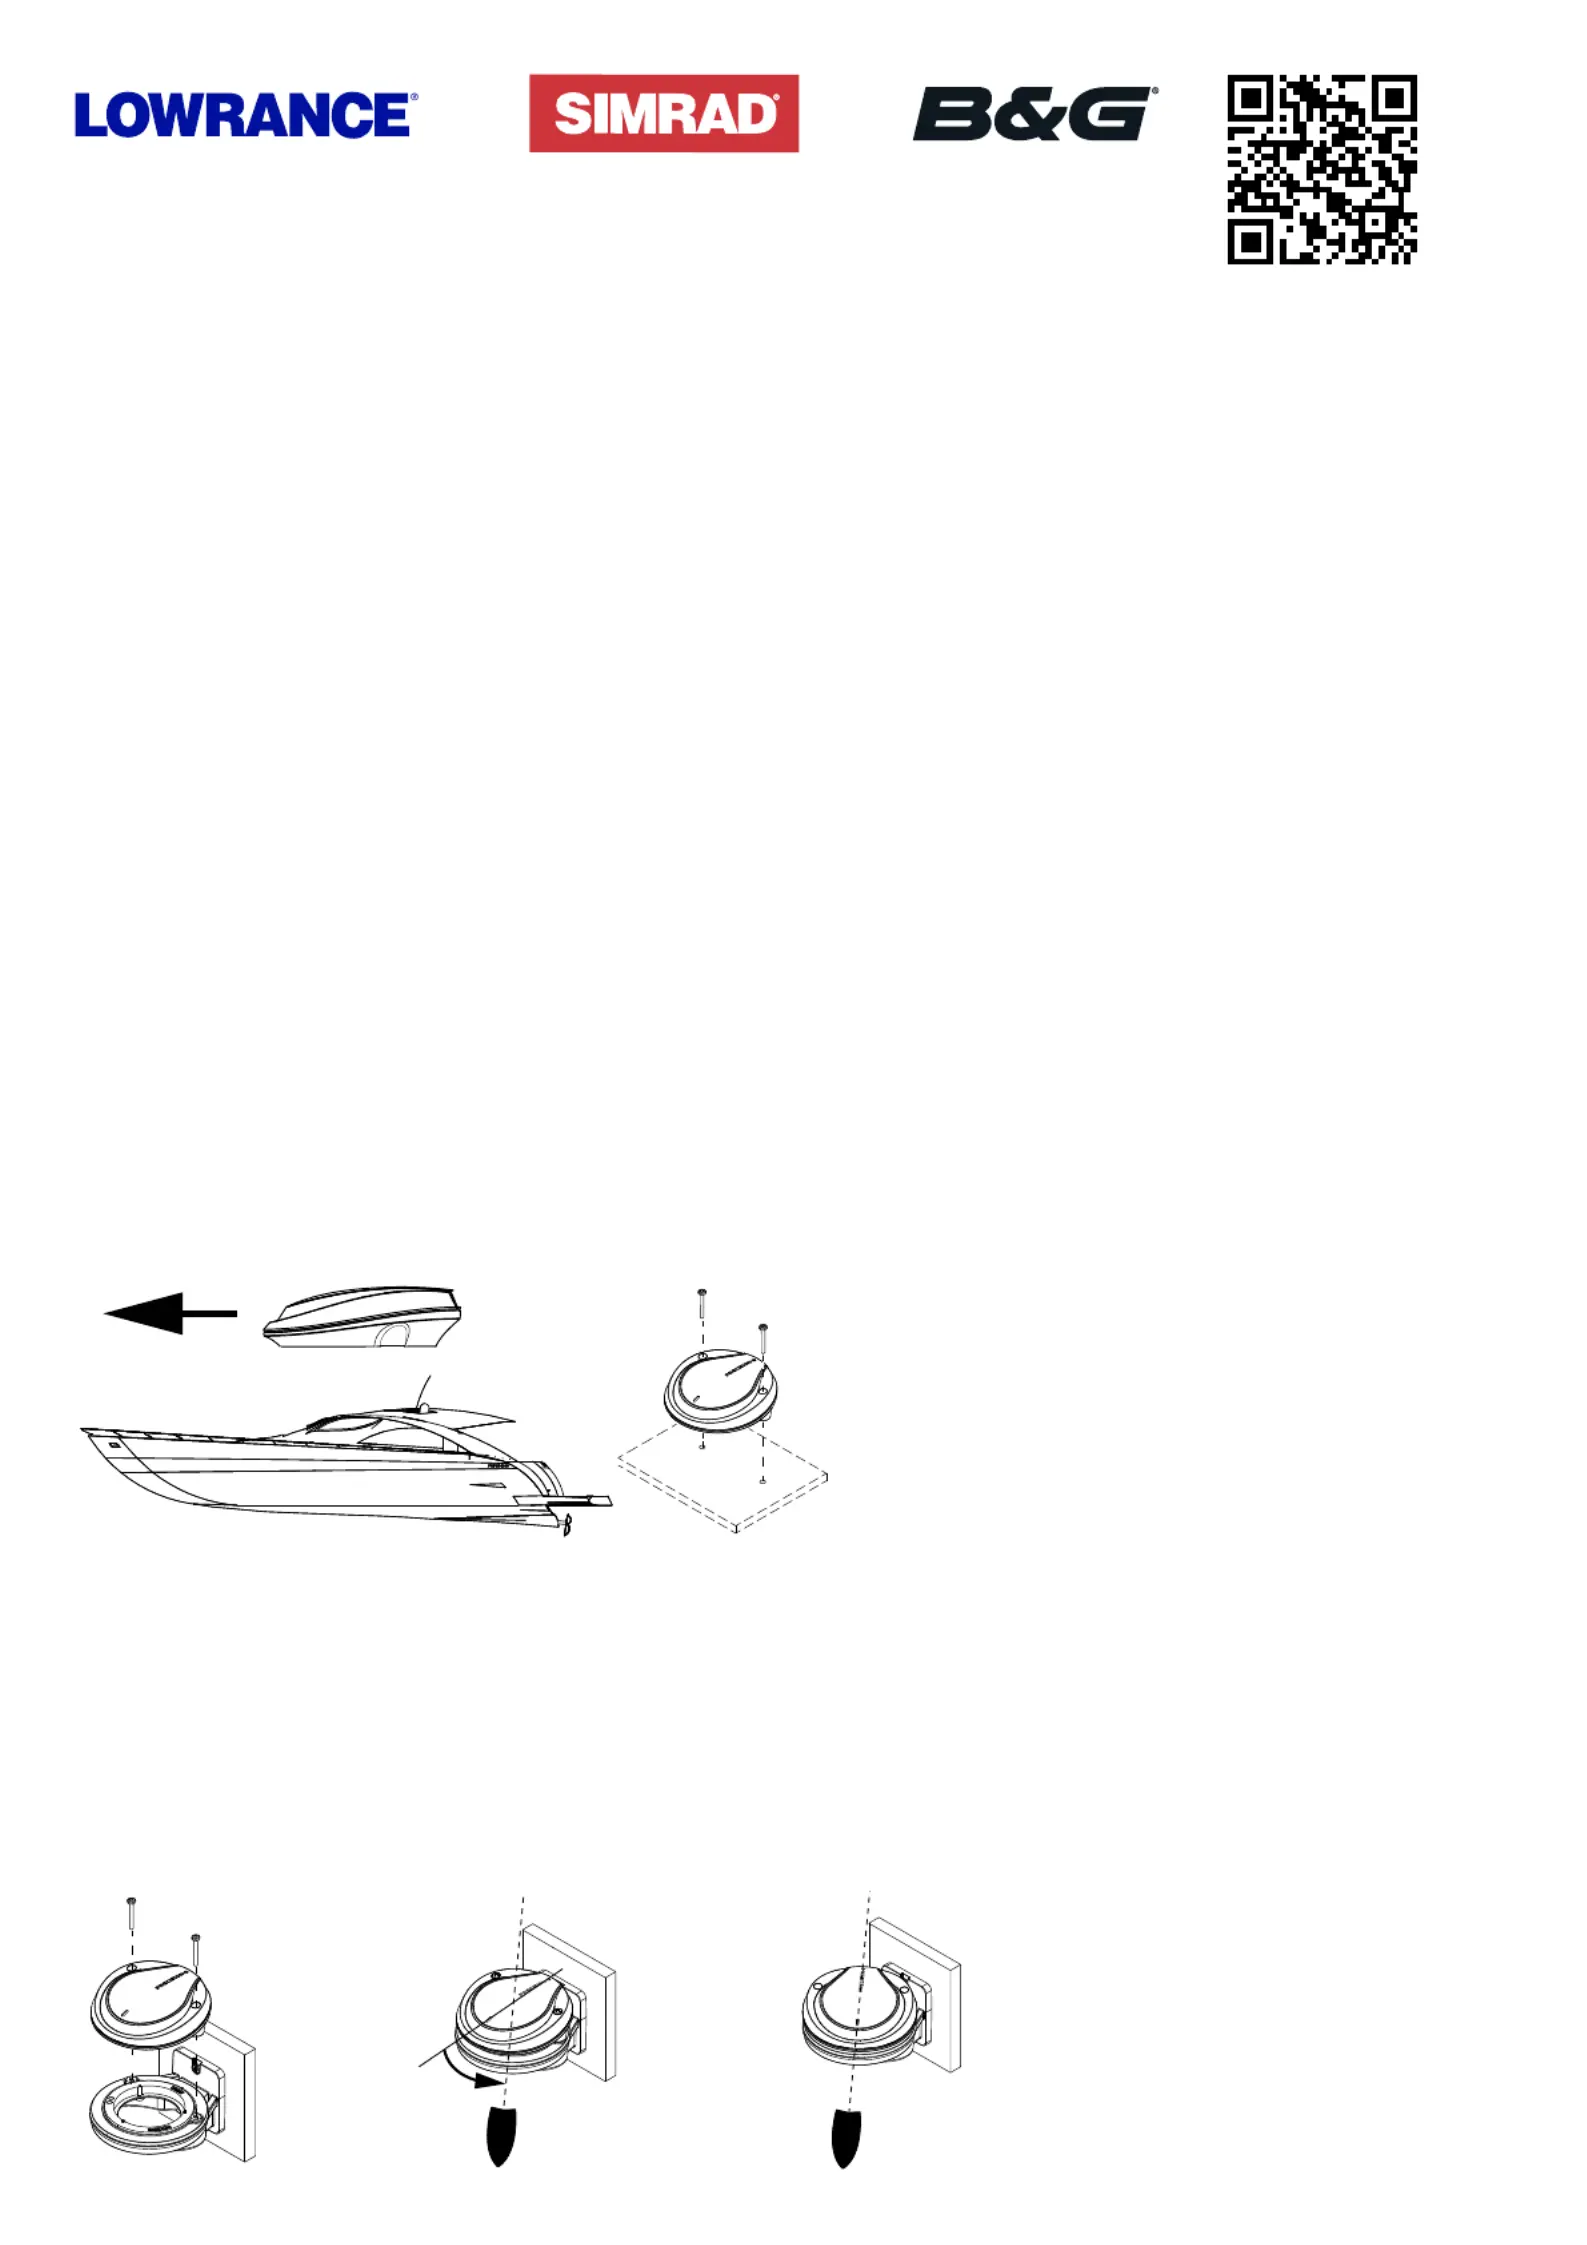
To mount the compass directly to a at, horizontal surface:
1. Use the supplied direct mount template to mark 2 screw holes and a hole for the network cable.
¼Note: Position the compass so it is parallel to the vessel’s center line.
2. Drill holes at the marks and position the compass so the holes line up.
3. Use 2 pan head or roundhead machine screws to secure the compass to the surface.
¼Note: You must supply your own screws for direct mounting. Screw recommendations: Ø 10G - 4.8 mm - 3/16". Max 7.5 mm
(0.29”). Length is determined by the surface thickness. Screws must be non magnetic.
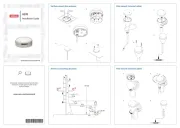
To mount the compass to a at, vertical surface, such as a bulkhead:
1. Use the supplied bracket template to mark 2 holes to a vertical surface, then drill holes at the marks.
2. Use the supplied self-tapping screws to attach the supplied bracket to the wall.
3. Position the compass on the bracket so the mounting holes line up.
4. Insert the supplied machine screws and tighten them loosely (only half way).
5. Manually swivel the compass so it’s orientation is parallel to the vessel’s center line.
6. Fully tighten the mounting screws to secure the compass.