Sloan ESD-500 Manual


Læs gratis den danske manual til Sloan ESD-500 (4 sider) i kategorien Sæbedispenser. Denne vejledning er vurderet som hjælpsom af 4 personer og har en gennemsnitlig bedømmelse på 4.9 stjerner ud af 2.5 anmeldelser. Har du et spørgsmål om Sloan ESD-500, eller vil du spørge andre brugere om produktet?

Side 1/4
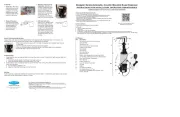
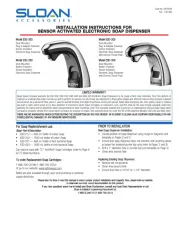
SLOAN DECK MOUNTED SOAP DISPENSER (ESD-SERIES) INSTALLATION INSTRUCTIONS
Touchfree Counter Mounted System Installation Guide
If there is a dispenser currently installed
• Remove the existing unit, both the above and below counter assemblies
• Clean the counter area where the previous dispenser was located
• Verify the size of the existing counter hole is 15/16” to 1-1/4” in diameter
If there is no hole in the counter
• Prior to drilling, examine below the counter to ensure adequate clearance for the new unit
• Drill a 1” diameter hole in the counter top
• Clean the counter area where the new hole is located
Code no. 0816203
Rev1 (01/17)
Prior To Installation
New Soap Dispenser Installation:
• Ensure that dispenser does not interfere with anything
above or below the lavatory/counter top area
• Drill a 1” diameter hole in counter top
• Clean area around hole
To Order Replacement Soap Cartridges
800.321.9647
GOJO Industries
Rells are also available through your local plumbing or janitorial supply
distributor.
When the soap bottle is empty, a new bottle must be used. The bottle
furnished with the unit is not designed to be relled. Altering the bottle and
relling it with soap will void the warranty of the product.
LIMITED WARRANTY
Unless otherwise noted, Sloan Valve Company warrants its Products to be made of rst class materials, free from defects of material or workmanship under
normal use and to perform the service for which they are intended in a thoroughly reliable and efcient manner when properly installed and serviced, for
a period of three years (1 year for SF Faucets, special nishes and PWT electronics and 30 days on PWT software) from date of purchase. During this
period, Sloan Valve Company will, at its option, repair or replace any part or parts which prove to be thus defective if returned to Sloan Valve Company, at
customer’s cost, and this shall be the sole remedy available under this warranty. No claims will be allowed for labor, transportation or other incidental costs.
This warranty extends only to persons or organizations who purchase Sloan Valve Company’s products directly from Sloan Valve Company for purpose of
resale. This warranty does not cover the life of the batteries.
THERE ARE NO WARRANTIES WHICH EXTEND BEYOND THE DESCRIPTION ON THE FACE HEREOF. IN NO EVENT IS SLOAN VALVE COMPANY
RESPONSIBLE FOR ANY CONSEQUENTIAL DAMAGES OF ANY MEASURE WHATSOEVER.
SLOAN 10500 SEYMOUR AVENUE FRANKLIN PARK, IL 60131
Phone: 1-800-9-VALVE-9 or 1-847-671-4300 Fax: 1-800-447-8329 or 1-847-671-4380 www.sloan.com
Improper installation of the
Counter Mounted Dispenser
could result in
breakage.
Dispenser must hang freely
underneath the sink.
Proper installation allows
the unit to vertically hang
beneath the sink.
ESD-1500
ESD-2000
ESD-500
ESD-600 ESD-700 ESD-800
ESD-2100
2
Soap Dispenser Installation
NOTE: ESD-2100 Shown, instructions applicable for all Sloan soap dispensers
Installing the Touchfree Counter Mounted System
Prior to beginning installation, study the exploded view of the Touchfree Counter-Mounted System and locate all the
pieces. Also, look beneath the countertop to and a suitable place for mounting of the Battery Box (9) so that it will not
interfere with system components or plumbing.
Feed the Data Cable 5a and the
shank of the Dispenser Assembly
1 through the hole in the
countertop. Point the spout of the
Dispenser into the sink bowl.
From underneath the counter,
feed the Lock Washer 3 and then
the Mounting Nut 3a over the
Data Cable 5a and onto the
threaded shank of the Dispenser
Assembly 1. Tighten the nut
securely.
Align the indent inside the top of
the Motor Assembly/Bottle
Support 7 with the indent on the
shank of the Dispenser Assembly
1 and rmly push the Motor
Assembly/Bottle Support up, onto
the shank.
NOTE: Hold the Data Cable rmly
out of the way as you push up on
the Motor Assembly/Bottle
Support. Continue pushing
upward until the vertical slots in
the Dispenser shank and the
Motor Assembly/Bottle Support
line up.
Secure the Motor Assembly/Bottle
Support 7 to the Dispenser
Assembly 1 shank by pushing the
Retaining Clip 4 into place
through the vertical slots, until it
goes all the way through the Motor
Assembly.
NOTE: Motor Assembly Bottle
Support will rotate 360° to avoid
any obstruction.
Remove the cover from the
Battery Box 8 by loosening the
two captive screws on the Battery
Box cover. Position the Box on a
convenient (vertical or horizontal)
surface under the counter top that
will allow access for battery
changing. Attach the Box to the
surface using the two screws 10
and anchors (if attaching to a
plaster or masonry surface).
Use the Wall Clip 11 to secure the
Power Cable to a wall or other
under-counter surface if desired.
Place four alkaline “D” Cell
batteries into the Battery Box 9
cover. The batteries must be
positioned according to the
diagrams shown on the inside of
the cover.
NOTE: If the batteries are not
properly installed or the cover is
not properly positioned on the
Box, the System will not work.
Position the cover (with batteries
installed) on the Battery Box and
tighten the two captive screws.
IMPORTANT: Connect the two
halves of the Data Cable 5a
and 5b
by visually lining up the white
stripes on each half and gently
pushing the cable connectors
together until the stripes touch.
Improperly assembled
connectors can cause unit to
not function as intended.
After the batteries are installed in
the battery box, connect the two
halves of the power cable 6a and
6b . Allow 20 seconds before the
system is ready to dispense soap.


Produkt Specifikationer

Mærke: Sloan
Kategori: Sæbedispenser
Model: ESD-500

Har du brug for hjælp?

Hvis du har brug for hjælp til Sloan ESD-500 stil et spørgsmål nedenfor, og andre brugere vil svare dig


Sæbedispenser Sloan Manualer
Sloan

Sloan ESD-250 Manual

16 Juni 2025
Sloan

Sloan ESD-500 Manual

15 Juni 2025
Sloan

Sloan ESD-2000 Manual

15 Juni 2025

Sæbedispenser Manualer

Nyeste Sæbedispenser Manualer