Sony BC-VM10 Manual
Sony
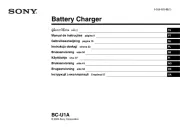
Batterioplader
BC-VM10

| Mærke: | Sony |
| Kategori: | Batterioplader |
| Model: | BC-VM10 |
Har du brug for hjælp?
Hvis du har brug for hjælp til Sony BC-VM10 stil et spørgsmål nedenfor, og andre brugere vil svare dig
Batterioplader Sony Manualer
29 August 2025
8 Juli 2025
22 December 2024

10 August 2024

5 August 2024

27 Juli 2024

25 Juli 2024

20 Juli 2024

18 Juli 2024

6 Juli 2024
Batterioplader Manualer
- Siemens
- Hamron
- Jupio
- Roav
- Intenso
- QVS
- Proosten
- FERM
- Maktec
- IOttie
- Kemo
- Spektrum
- PowerWalker
- Meec Tools
- Activ Energy - Aldi
Nyeste Batterioplader Manualer

10 December 2025

9 December 2025

8 December 2025

8 December 2025

8 December 2025

8 December 2025

8 December 2025

7 December 2025

7 December 2025

7 December 2025