Hex Nut (I)
ASSEMBLY AND INSTALLATION
INSTRUCTIONS
NOTES: 1. Before installing, consult local electrical codes for wiring and grounding requirements.
2. READ AND SAVE THESE INSTRUCTIONS.
C0112 / C0258
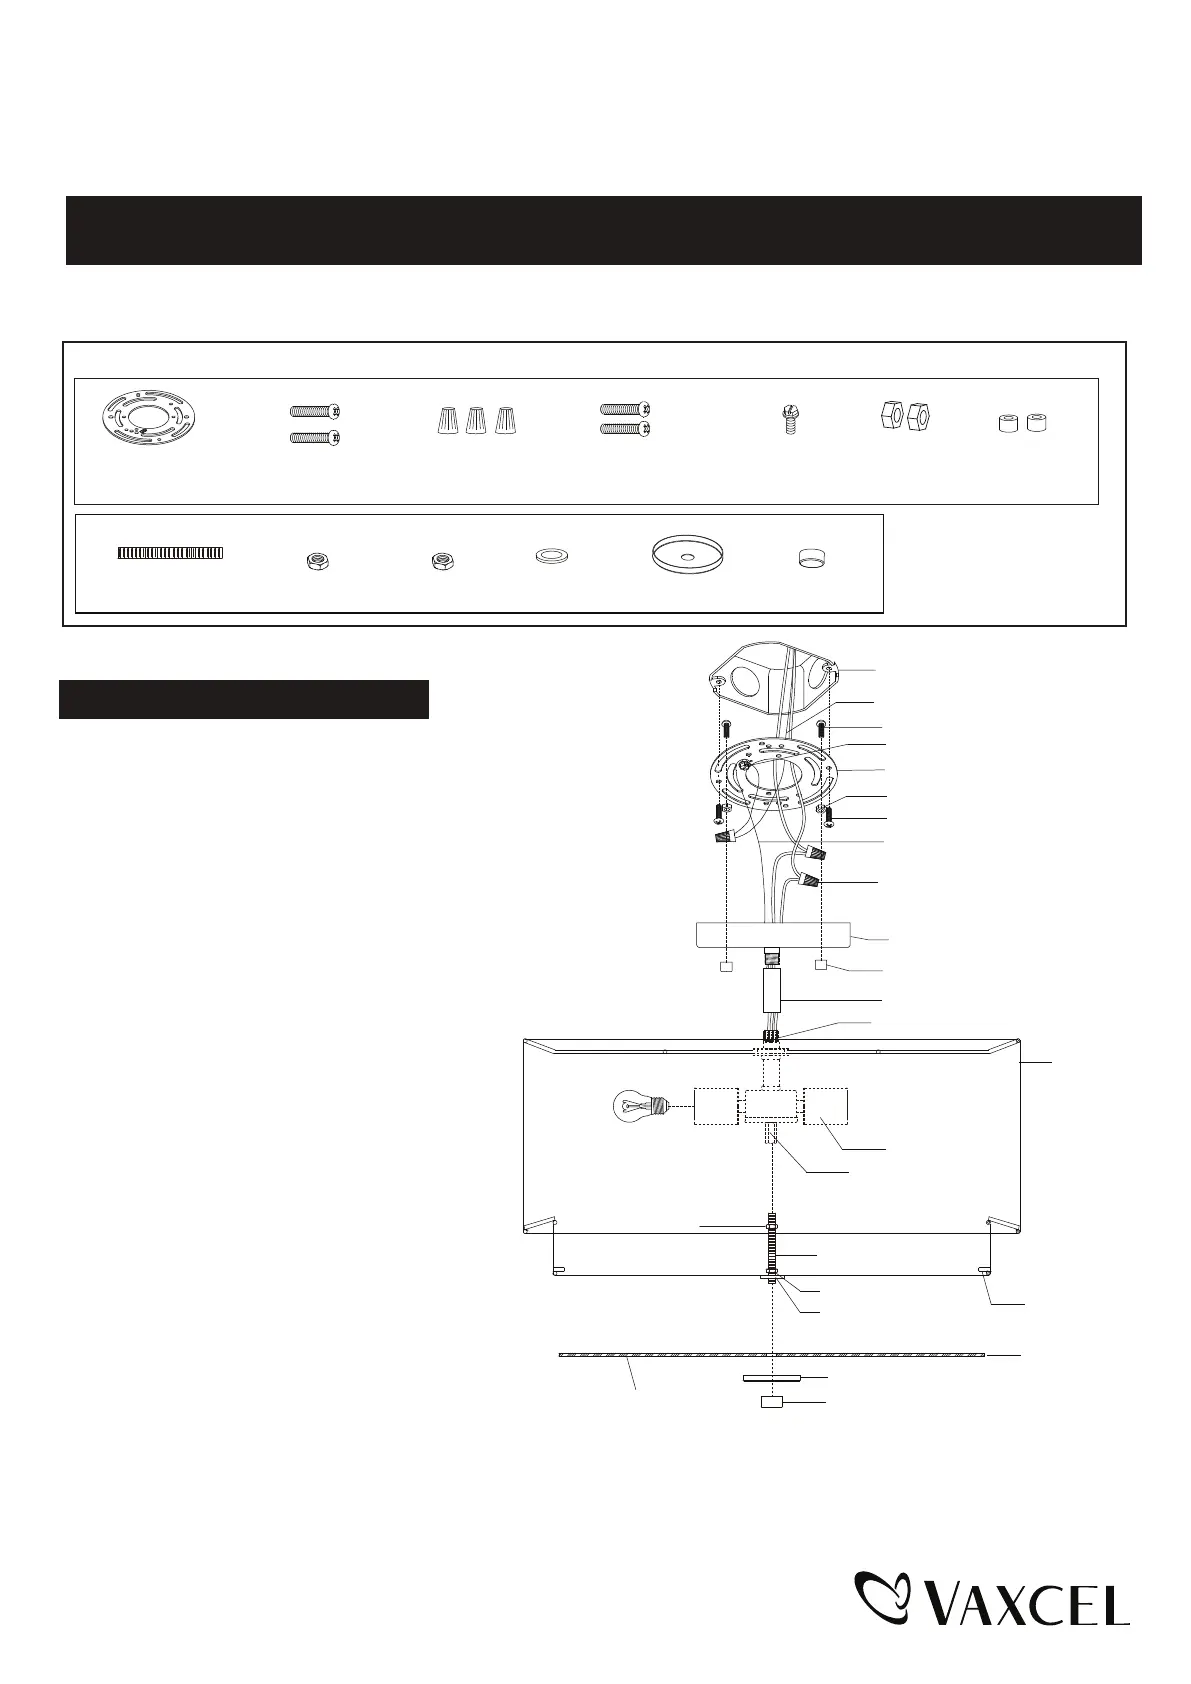
Hardware Package (included):
WARNING:
TO AVOID RISK OF ELECTRICAL SHOCK, BE SURE TO SHUT OFF
POWER BEFORE INSTALLING OR SERVICING THIS FIXTURE.
Turn off the power at fuse or circuit box
Green Ground
Screw (E)
Fixture Mounting
Screw(D)
Mounting Screw (B)
Wire Connector (C)
Installation Steps
Lock Nut (F)
Bolt Nut (G)
Canopy
Bolt Nut (G)
Threaded Pipe
Mounting Plate (A)
House Grounding Wire
Fixture Grounding Wire
Wire Connector (C)
Fixture Mounting Screw (D)
Mounting Plate (A)
Green Ground Screw (E)
Mounting Screw (B)
Lock nut (F)
Outlet Box
211019
Max.60W Type A Bulb
(not included)
Socket
Coupling
Tube
Hex Nut -a (J)
Metal Pad (K)
Long Threaded Pipe (H)
Decorative Cup (L)
Finial (M)
Acrylic Diffuser
Frosted Side
Bracket
Linen Shade
Hex Nut (I)
Hex Nut-a (J)
Metal Pad (K)
Long Threaded Pipe (H)
Decorative Cup (L)
Finial (M)
1. Thread the fixture mounting screws (D) through mounting plate (A),
and then secure them with two lock nuts (F). Adjust the length
of fixture mounting screws (D) if necessary.
2. Attach mounting plate
(A)
to the outlet box using two mounting
screws
(B)
.
3.
Thread the fixture wire through the tube and the canopy.
4. Attach one end of the tube to the canopy, and the other end to the
threaded pipe of the fixture.
5. Attach the long threaded pipe
(H)
to coupling, and
then secure the preinstalled hex nut
(I)
.
6. Attach the hex nut-a
(J)
and the metal pad
(K)
to
the long threaded pipe
(H)
, slip the plastic plate
and decorative cup
(L)
up through the long threaded
pipe
(H)
, and then secure them with the finial
(M)
.
NOTE: The depth of the lower hex nut-a (J) and
the metal pad in long threaded pipe may need to
be adjusted to properly fit the plastic plate. The
plastic plate should be flatly laid on three
brackets, and the frosting side of the plastic plate
should be faced down.
7. Install bulbs (not included). Check relamping
label at socket area or packaging for maximum
wattage allowed.


